25 April 2015

Road to Hünfeld - Game 2

GAME 2

Game 2 was meant to be a slightly bigger - more platoon sized - action.  This was to represent a Conbat Reconnaissance patrol from the leading Soviet Motor Rifle Battalion clashing with a West German Covering Force, which is attempting to slow down and perhaps confuse the Soviet advance elements, buying some more time for the main defensive line to dig in.

I had thought about giving the West Germans some defences, but after reading a bit on their doctrine, and looking at what they were going to field, I decided the West German defene would be more of a mobile - counter attack at any opportunity defence - rather than a static defence.  I'm not sure how historically accurate this is - but it seemed right to me!

The Soviet Force – 1 x T-80BV platoon (of 3 tanks), 1 x Motor Rifle Platoon ( of 3 BMP-2 with dismounts), 1 x BRDM-2 AT-5, 1 x NBC BRDM-2 and 1 x BTR-70 with a mounted Combat Engineer squad.  In addition the Soviets had basically had the whole force from the recon game, minus the BMP dismounts – who were all killed.  I had given them 2 x Timed 122mm strikes when I prepared the list and the I gave them 1 more added as they had won game 1 so convincingly.

The West German force consisted of 1 x Panzer Grenadier Squad (3 Marder with dismounts), 2 x Leopard 2 MBTs, 1 x Jaguar 1, 1 x SP 120mm Panzermorser, plus 1 x Fuchs (with dismounts) and 1 x Luchs which had survived Game 1.  The Germans also had 2 x 3 tube battery On Call 120mm Mortar Barrages.

The scenario was as per Attack/Counter Attack from BGK with the recce units that start on the table being those units that survived on both sides from Game 1.

The table looked like this once the recce units had been placed on it.  The Soviet table edge is to the left and the West German edge is to the right:


You can see two large wooded sections on the Soviet side, with small tracks leading through them.

Looking at it from the other side it looked like this:


The combi vans centred on each intersection and the beetle in the barnyard are the objectives.

The player's plans were bound to cause an interesting game.  The Soviet player had decided to nuke the centre of the table with his timed artillery strikes and drive down both flanks, while the West German player had decided to hold the centre and win the game from there.  It would prove a costly, but ultimately sucessful choice.

The recce BMP-2 and motorcycle with sidecar drive straight down the main road towards town (as bait) before heading off into a copse of trees.
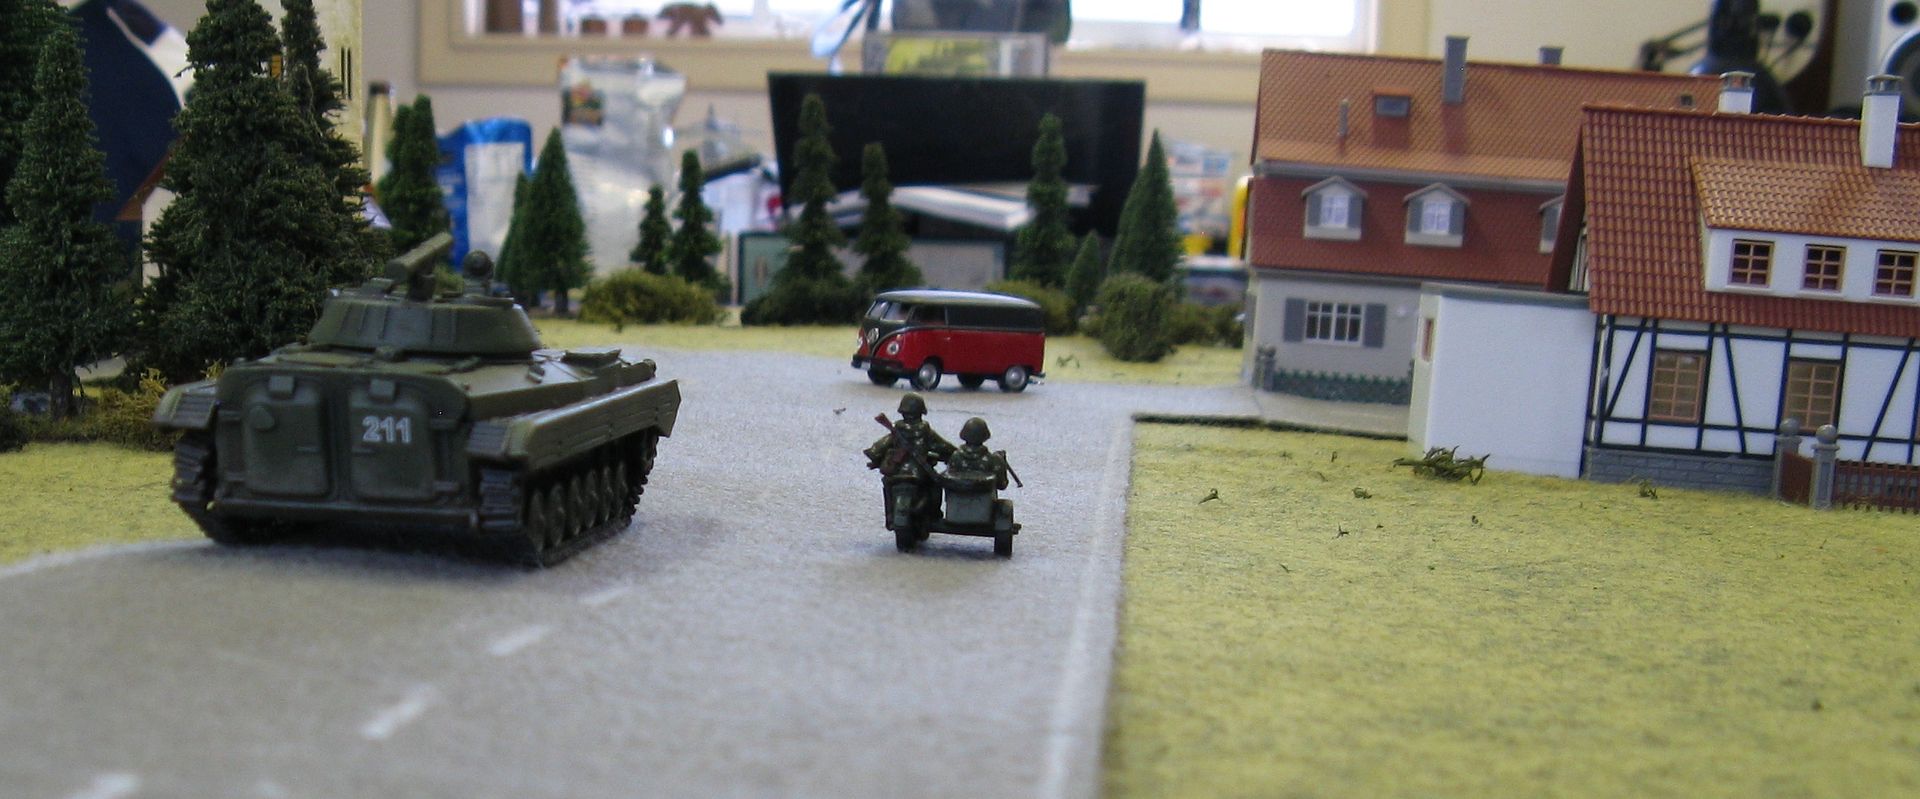

The centre of the village before it erupted in artillery fire:


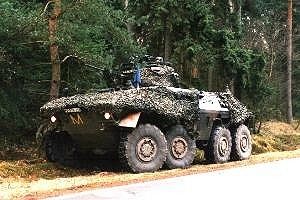
A Luchs in its starting position

The results of a couple of turns of activity (and a crap photo to boot).  The BMP-2 drove to to the small woods to overwatch the village.  The Luchs in turn drove around the opposite side of the woods and slotted the BMP-2.  The Luch was in turn taken out by the T-80BV - which is now in a stand-off with the Leo 2.


The Germans - in keeping with their plans, drove up behind the village and dismounted troops into the houses.  The Soviets, in keeping with their plans, shelled the living daylights out of the village.  Results:

2 dead Marders, a dead Fuchs and a Pinned panzermorser.  Some infantry were killed as well.

The Leopard 2 pulled back towards the centre of the board - ready to go onto Covering Fire

The West German luck turned and they picked up an Aircraft chit and scored an Alpha Jet - which had been left at home so a standin RAAF F-18 stood in!)


Sadly for the west Germans - despite dropping 2 cluster bombs - no Soviet units were taken out, although several were pinned.

Here some overview of the table shots from later in the game - I get caught up and forget to take photos!


You can see the Leo 2 and the Jaguar are on Covering Fire.  Infantry from one of the destroyed Marders and made it across the main road into one of the house and nailed the BTR-70 with a PzF 44.


From the Soviet side you can see a T-80BV has been destroyed shortly after it attempted to take out the Jaguar with a long range shot - and was knocked out the next turn by the Jaguar with a HOT missile.

Down the other end of the table a stand off was occuring between a lowly BRDM-2 and a Leopard 2, along with some infantry


This would be resolved when the Leo 2 raced up to the corner of the block, was missed by 2 T-80 shots, a AT-5 shot and was not pinned by the BRDM-2 hosing it down with 14.5mm HMG fire so it blew the BRDM-2 into little pieces and went back and hid behind the building again.


Final shot I managed to take, before the now lone Panzerfaust 44 operator (they rest of his squad had been gunned down but he soldiered on for 1 more turn) took out the NBC BRDM-2.  But his bravery award would be post-humous as he in turn was killed by Soviet infantry.

Suddenly - when it looked all over for the West Germans, the Soviet player announced he had just exceeded his battle rating and it was all over.  The West German player could scarely believe it - nor could I.  But the West Germans had won Game 2, which meant they would have more time to prepare for the Soviet assault in Game 3.

Which is coming soon...

Richard

Oh - and I should say - a BRDM-2 and the even more herioc recce motorcycle combination survived Game 2 and will be leading the Soviet forces in Game 3!

23 April 2015

The Road to Hünfeld - Game 1

GAME 1

Game 1 was meant to be a small reconnaissance mission.  This was to represent part of a Soviet Regimental Reconnaissance Company, well ahead of the regiment, clashing with elements of a West German Reconnaissance Company.  The aim of the game was for the Soviets to get as much of their force off the table as they could and for the West Germans to stop them, whilst not suffering too heavily.  Any forces on either side left alive at the end of the game would be available as an addition to their Game 2 force.

The Soviet force was 2 x BRDM-2, 1 x BMP-2 with a Recon Motor Infantry Squad, 1 x Recce Motorcycle Combination, 1 x Timed Strike

The West German force consisted of 2 x Luchs, 1 x Fuchs with an Infantry Squad, 1 x On Call 120mm Mortar Barrage and 4 Hidden Unit Markers/Blinds.

The table looked like this from the West German end:

It's meant to be Southern Germany (north of Fulda - near Hünfeld) close to the border.  It's heavily forested, but there are trails through the forest.  The roads allow, well... road movement, the trails allow off road movement, and attempted to travel through the woods forces a D6 penalty on each move.  No one attempted to travel down the rail line.

From the Soviet end:

The lichen represents the edge of the woods.

I decided to make some cammed up hidden markers/blings just to do something a bit different, and add a hint of mystery to the game.  The West Germans had 4 to represent their force – 1 of which was a dummy.  They did not have a significant impact on the game or slow it down – but both players enjoyed not knowing what they were facing.

The blind was removed if the West German player wanted to reveal it, shot or moved within LOS of a Soviet Unit.  Otherwise the Soviet player had to Observe the blind as part of a shooting action.  I wouldn’t bother using them in a larger game, but in such a small game it worked well.


The Soviets drove 2 units straight down the main road at speed:


Sorry for the crappy photo...

One Luchs revealed it self and opened fire...


... and missed.  This setting the tone for the West Germans for this game.

But the Soviets kept coming


A lucky harassment barrage caught both the revealed Luchs and one of the blinds


And the Motorcycle combination cruised on by with not a care in the world!  One more turn and it was off the table


Another crappy photo

The BRDM-2 pulled up and decided to have a crack at the pinned Luchs - not knowing if its 14.5mm heavy machine-gun could even penetrate the Luchs.  It didn't... but it caused a Morale check and the Luchs crew took that opportunity to abandon their vehicle


The BRDM then drove off the table, after the other Luchs tooks some more shots at it and missed (see what I mean about the German shooting).

After unpinning all the blinds were removed leaving the centre of the table looking like this - after the Luchs in the foreground takes a long range shot at the rear of the BMP-2 - and of course misses.


You can see that the West German infantry has dismounted and moved up to the main road.


The sole BMP-2 moves past the abandoned Luchs.  German infantry across the road eye it off.


The West Germans moved up - so the Soviets decided to dismount their own infantry and inflict some more damage on the Capitalists.  This does not go to plan and in the one turn of events that goes the West Germans way the whole game, the Soviets fail to spot the enemy in the undergrowth.  They are then unceremonially gunned down in the next turn by the West Germans.  The BMP-2 drives off the table...


Meanwhile, up the other side of the table the other BRDM-2 carefully makes his way through the woods.  He is being chased by a Luchs, which never quite gets within 4", so able to attempt to spot and shoot at the Soviet AFV.  The BRDM-2 slips of the table edge - leaving the ineffective West Germans to wonder what the hell happened.

So in Game 2, the Soviets will have added to their force - 2 x BRDM-2, 1 BMP-2 (with no dismounts) and 1 slightly heroic Motorcycle Combination.

The West Germans will have an additional Lucha and Fuchs with all the Fuchs's dismounts.  Hopefully the Luchs crew will get some shooting practice in before the next engagement.

Thanks

Richard

13 April 2015

More Campaign Prep

Well the campaign games are going to happen this weekend - so over the last week or so I've been building and painting things for the games.

I've also been mildly chastised for not posting up more content - so here goes with a few more things to keep you going (Andy!)

These are a some Faller buildings I've been collecting and recently built for the game (and all other games set in Germany in the 1980s - although some will also do fine for WWII).  They are pre-coloured and so far, apart from the church, I have done nothing to them.  Once I have more time I'll put some thought into weathering them a bit.

When the AARs come up (next week) hopefully you'll see all these in a better setting...

Anyway - First up is a large Farm complex:


Now the church:


I repainted the tower roof and the stone pavement stones (which you can't see in the photos...) and also added grass.  One of the things I love about this kit was it comes with 2 optional tower toppers (technical term).


Needs to be painted... and...


Kind of cool eh.

Next up a couple of duplex homes:


Now a home with a garage:


And finally a couple of standard suburban homes:


Slightly dodgy construction there - didn't take enough care leaning the peice against the house for the photo...

One more farm to build - but it won't make it to the game on the weekend sadly - ran out of time...

So - on with the show

Have fun

Richard


19 March 2015

Cold War Campaign Weekend

OK - so it's been a while, longer than I had planned, but I've been trying to bring my Late WW2 British forces up to speed, so they have been dominating my model building and painting desk.

No excuses though, I have started the planning for a 2 day campaign with some mates and I thought I might share some of that with you.


The Plan

So the basic outline of the plan is to try and represent a escalating series of engagements as NATO covering forces try to delay a Soviet thrust towards their not quite prepared main line of resistance.  This will be done through 3 gaming sessions over the course of a weekend.


Forces

At the moment apart from Soviets, we have options for NATO.  Whilst having the whole set of games between one NATO nationality and the Soviets makes the most sense, it will mean that some players don't get to use their kit - so I'm thinking of having a maximum of two national NATO forces would be OK.  Our options are:
·         West German & British; or
·         West German & American.

If we go with the 2 nationalities approach, a way of explaining it could be the Soviets trying to advance near a lesss protected Corps boundary line.


Games

So the plan is for 3 gaming sessions - depending on the player count this could mean some concurrent battles.

Session 1 – Saturday – The Recce Battle – Each of these would be a very small 1 v 1 game (probably max 3 AFVs per side) which will represent elements of a Soviet Motor Rifle Regiment’s Recce Company clashing with a NATO recce troop.  The game should last less than 1 hour – with the Soviets needing to identify the locations of the NATO recce troops and report them, and get off the opposite end of the table, while the NATO units need to stay hidden, and destroy the Soviets quickly.  Results of these games will have an impact on the next session. 

Session 2 – Saturday – The Covering Force – Each of these will be a small sized game – think mechanised infantry platoon, supported by a tank troop plus odds and sods.  It will represent the Combat Reconnaissance Patrol of a Soviet Motor Rifle Regiment in action against part of a larger NATO delaying force.  The game should take 2 hrs or so – with the Soviets needing to fix the NATO force in place and destroy them, while NATO needs to keep intact and in the game for as long as possible, delaying the Soviets from winning, before either losing or exiting the table in a planned withdrawal.  Again if we have the players this can be two concurrent battles.  The result from this game will have a large bearing on the next day’s battle - basically the longer the game goes, the more time the NATO defences will have had to get ready for the next battle.


Session 3 – Sunday – The Main Battle – This will be the main game played on a massive 27' long table, hopefully with some purpose built terrain added.  The game will be large enough for all players to be involved, yet my aim is to make it not so large as to lose some dynamism or to create tank car parks.  The nature of the forces will be determined by the results of the previous day’s games.
 
Here I'm thinking if the NATO games on the Saturday have gone badly, the Soviets will release a Forward Detachment that will try and catch the unprepared NATO defenders, well... unprepared.  I'm thinking of having a NATO only time at the beginning of the game - they'll have a number of turns to try and get "ready" - without know which turn the Soviets will arrive on.  They will have a number of assets, including some engineers, and will have to make decisions about what they are going to do, like to we set the bridge with explosives, or demolish that house, or dig trenches.  I'll also have some civilian vehicles trying to escape the combate area, a broken down tank needing repair etc. Where do we try and delay the Soviets?  Where do we make our final stand etc.  Whilst NATO will get reinforcements - they won't arrive until later in the game and in dribbles as forces rush to the scene.


If NATO has done well in the previous day's games, their defensive line will be better set with tank scraps, minefields etc.  The Soviet Attack with be a Forward Security Element of the Regiment - still seeking the main line of resistance.  Basically they'll have more kit in place, and more engineering tasks completed.  More chance of this:


Anyway - that's the initial plans - happy to have any thoughts and comments.
 
Have fun
 
Richard


23 February 2015

Esci M981 FIST-V

Ever since I read Team Yankee many many years ago I wanted to have a model of a FIST-V.  So, when I found I had 3 M901 ITV models, rather than the 2 I thought I had (a long story), I decided to convert 1 into a FIST-V.  If you want to find out more about the M981 you can look here.

Basically this meant slightly remodeling the front face of the Hammerhead - to include the sights etc, but delete the TOW tubes.  I probably could have done more - but with my basic modelling skills I thought what I did was enough.

A warning - I also tried to write something in chalk on the Hammerhead - I'm not real happy with it and will at some point try and get rid of it and have another attempt - using a different brand white pencil though...

So onto the pics:


That's all for now

Thanks

Richard


15 February 2015

M113 1st Platoon - Group Shots

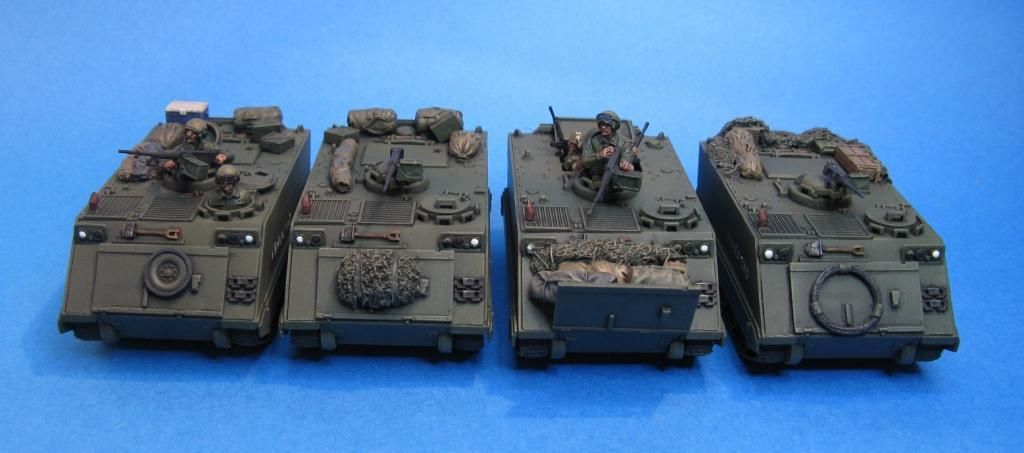
Thought I'd post up some group shots as well now - but before I do, some details on the platoon.  All 4 of these M113 are S-Model kits. Stowage is a mix of Value Gear, Black Dog, Milicast, Airfix (1 item) and the spare wheel and track links come from an old Esci M113 kit. Cams nets are mostly hand made, with 1 from a mate - so no idea where it came from - Germany I think?

Crew are all Wee Friends, sold by Friendship Games (or Models) on ebay and they have their own website. Dismounts poking their heads out of a hatch on one of the M113's are Preiser figures.

On to the photos:


Next up - my newly completed M981 FIST-V.

Thanks

Richard