20 March 2023

Sticking to the Dutch 3D Print theme...

 Just as the title says, today I'm sticking to the Dutch 3D printing theme. 

As part of an ongoing, soon (I hope) to be revealed project, I needed a couple of Dutch Leopard 2A4s.  Fortunately I had a couple of very old Matchbox Leo 2 kits, which I was able to "quickly" make.  As if I do anything quickly!

One of these kits came with West German smoke dischargers, which would look like these:


Originally I thought I could convert these to look like the Dutch smoke discharger layout, which I knew to be different, but couldn't quite remember how.  So I looked it up:

or a bit closer:

So not much chance of converting what I had to look like that!

Fortunately I stumbled across a designer in Cults3D who had already designed a set for 3D printing.  It can be found here.

Now what follows are not the 2 greatest photos I've ever taken, but you should get the idea of my new Dutch Leo 2NL turrets, with proper smoke dischargers, an FN MAG (just blu-tacked in place for now), cam nets and a wire reel like in the photo above.


I will take better photos once the model is complete, but the 3D printed smoke dischargers are exquisite and came out beautifully.  Once again I'm very chuffed with the result.

Thanks

Richard


15 March 2023

The Shape of (Dutch) Things to Come

 I've always wanted to do a Cold War Dutch force in 20mm but with no plastic kits available for their primary IFV, the YPR-765, I'd always put if off.  I'd found some resin kits out there, but these were way to expensive, and I didn't like the quality of the 3D prints I'd seen available for sale.  None of the STL files I've found looked particularly great either.  I'd even talked to a couple of 3D print designers about doing a YPR-765.  But that never went anywhere so I was happy to simply hold off.

However, after some email chatting with Mr M. Bergman of Thingiverse and Wargaming3D fame, all this is about to change.

Here's my first print of his soon to be released line of YPR variants:


This is an early version of the YPR-765 PRI 25mm.  A later variant will also be available, along with the PRAT, the PRGWT and you can easily make the PRI with the .50 cal cupola instead of the turret, the various command vehicles etc.

The print is not 100% perfect, but that's down to me (and my total lack of expertise) and the issues I'm having with my printer.  I'm going to reprint the turret to hopefully fix the rear of it, and I'll be cleaning up the lines on the side as best I can - but beyond that I'm totally chuffed with this model.

Just for comparison purposes here's the Bergman YPR beside a Bergman M113:


So if you've been holding back from running Dutch, or Belgians or any of the other nations that fielded (or min the case of Ukraine, are now fielding) these terrific little vehicles - think again and keep a look out for the STL files.

Happy hunting!

Richard


03 March 2023

The Berlin Project - Infantry and Urban Bases - Part 3

 OK... This is a little embarrassing.  Part 1 and Part 2 of "The Berlin Project - Infantry and Urban Bases" happened back in October 2017.  Those of you paying attention to things like, time, will quickly realise that its been almost six years between parts 2 and 3!

To start off with back then I painted 3 figures (loosely forming a Machine-gun Group) and here's the photo to prove it:


Today those figures look like this:
Not much has changed.  However, I've finally managed to finish the other members of their section - the Rifle Group, lead by their NCO.

Put them together and you have a whole section:

Here's a couple of contextual shots:


I also completed the Machine-gun Group of the next section.  It's kind of a little vignette.


That's it for now.  I have a big WW2 painting project coming up, but will still add some more Cold War models shortly.

Thanks

Richard

27 January 2023

4DModels KrAZ-260B Tractor and MAZ/ChMZAP-5247G semi-trailer Review

 Once again it's been a while.  Preparations for Christmas, visitors and then my wife managing to severely break her ankle just before New Year has meant a pretty busy couple of months for me, and not much time for anything too gamey.

I did have a couple of moments of purchase based stress relief which brings me to today's topic.  For a while now I've wanted to get some kind of Soviet tank transporter/trailer.  I've been looking at the TAKOM offering, which seems quite nice:

and also I say Trumpeter were coming out with this:
which also looked pretty nice.  The thing is, I wanted it for a very specific purpose.  To create this:
I wasn't sure that the S-300 missile tubes would fit on the back of either of the Takom or Trumpeter trailers and I wasn't really willing to pay top dollar for something that may or might not work.

To cut a long story short, one day when randomly having a look around, I stumbled across this kit by 4D Models:
I was a little wary as some of the kits made but this company are basically crap, but when I saw I could get this for less than $22NZD, I thought why not give it a go.  The pics of the completed model looked OK and reviews were generally positive, so I thought the risk of the S-300 tubes not fitting was a risk worth taking.

The box arrived remarkedly quickly from China, a little battered but nothing inside was any worse off.  Here's a look at the back of the box:
Inside were 3 sealed plastic bags of parts and the instructions
Everything was there and nothing was damaged or warped.  In the first bag you got loads of tires.
As you can see they are glossy black with green hubs.  They fit together nicely and are easy to clean up.

The other parts are as below:
and
Interestingly you can see in the second photo that it comes with a transparent piece for the cab's windows and 7 metal rods for the tires.

The tractor goes together very simply and gives a nice simple wargaming standard model.
I couldn't be bothered painting inside the cab - I was in a bit of a therapeutic rush - so I'll be spraying the whole model, only after removing the wheels.  You can see the holder for the spare wheel on the back of the cab.  You end up with 3 spare wheels I think.  You have to make up 17 in all.

The trailer was actually even easier and together, I think they look pretty damn good.
Now of course I checked to see if the S-300 missiles fit on the trailer as they should - and yes indeed they do!  Just for the hell of it I also took out a T-72 to see how it looked on the trailer.
Sorry about the generally crappy photos!

So review time.  First the positives:
  • Super cheap
  • Ridiculously easy to put together
  • Solid wargamers kit
  • Scales well
  • Basically does what it says on the tin
  • If you were really really lazy you could almost get away with out painting it!  Oh the horror!!
Negatives
  • It's pretty chunky and there is of course a lack of fine detail, but personally I think the positive of being a solid (rather than fragile) kit outweigh that
  • Sink marks.  There are quite a few sink marks on this kit.  Some I'm happy to ignore, but some are in quite prominent positions.  I guess all up I can live with them and hopefully hide most of them!
  • The metal rods - while perfectly useful and much better than plastic, unless I'm doing it wrong, they are to long for the wheels on the trailer.  A relatively easy fix, but until that is done it makes the trailer look a bit toy like.
So all in all, for what I want it for I am very happy with my purchase.  Really its a bit of unnecessary frippery but I do have a very minor role in a game planned for it and I just think it's cool to have it.  I'm not sure it would have any real use as a tank transporter in a standard wargame - but will be useful scenery if some "behind Soviet lines" type games.

Now I just need to sort out my many painting issues and get on and paint it.

Thanks and belated Happy New Year

Richard

17 November 2022

Blue Stuff??

Hi all.  I've not been that well lately, so have not been as active as I would have liked, especially with regard to doing stuff worthy of being posted here.

I have however, recently come across "Blue Stuff".


Now I'm aware that Blue Stuff has been around for a while, and many of you are like "Come on Richard - get with the times!".  I'd never really put 2 and 2 together before regarding it, nor thought of much of a use for it, until I realised I did need it and so I decided to jump in, get a small amount (the 4 pack shown above) and give it a go.

For those of you who have not seen it before, Blue Stuff is a thermo plastic moulding material.  Basically this means that when its heated (by being put into a mug of boiling water) it can be bent and moulded. Primarily the way to do this is by pressing it onto something you want a copy of, leaving it until it has cooled down.  Once cool, it retains the shape of the thing you have pressed it into.  Then you simply peel off the Blue Stuff and you are left with a mould.  Here's some examples I made in my first attempt:


It doesn't look like much, but it can work really, really well.  You then fill the mould with the material you want to create your copy with.  I used Green Stuff, but I'm sure other options are available.  I'm about to start stowing some USMC vehicles and you need loads of back packs etc, to give them the right look.  I've bought quite a lot of this kind of stowage, but it can get very expensive if you want it to look authentic.  I decided this was a better option for my stuff.  Here's some of what I've made with Blue Stuff:


Some of it came out great - like the 5 backpacks in the top row - and some not so great, like the big roll on the bottom far right.  Still it's useable I think.

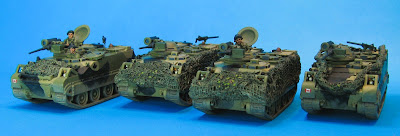
Another trial was to help create some open hatches on some of my 3D prints.  Here's my Canadian Lynx's and some Dutch M113 C&V recon vehicles.  The drivers hatches on both the command vehicles has been fairly carefully drilled open by me, and then a Blue Stuff moulded hatch has been added.


I've also mounted .30 Cal MMGs to these Lynxes.


The hatches on these M113 C&V's is quite oddly shaped.  I'm really not sure how well it would have looked if I had tried to carve these out of plasticard.  I'm pretty happy with both of those particular vehicles.

I've no pics of this, but a while back I bought a Yak-38 Forger to support my Soviet Naval Infantry.  After having mostly built it I found I was missing a fairly critical bit of the model.  The whole project came to a grinding halt while I was trying to work out how to resolve this.  Just recently I found someone selling the exact same model, quite cheaply as it had no canopy.  I bought the model and have fitted the missing piece to existing kit.  Not before I cast that part in Blue Stuff and made a copy.  I also took my existing canopy a cast a copy of that as well.  Now I can make 2 Forgers!

I hope this shows some of the versatility of Blue Stuff and how you might be able to use it to assist you in your Cold War modelling.

Thanks

Richard 

23 October 2022

A couple of things I've been working on...

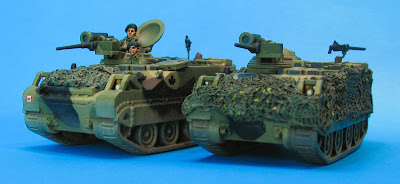
So things are starting to settle down and weather is slowly warming up.  This has meant I've finally been able to set up my 3D Printer for the first time in almost 2 years.  Turns out the hardest thing was deciding what to make to test out the printer.  I was wondering whether it was still working after all that time, inaction, storage and a sea voyage.  I choose to reprint a couple of Canadian Lynx's, as I need 4 for my new recon project.  Here they are:

Very happy with how these turned out.  I just need to replace the barrel of the .50 Cal to something a little more in scale and they will be ready for stowage.  I might also drill out the rear hatch on the one with the open cupola, so I can show it crewed there as well.  I also have to find some .30 Cals I bought for this purpose ages ago, so they are properly armed.

Next up is this Faller farm/house set I built back in Australia.  I'm pretty sure it has appeared in some of my AARs as well:


I really love this set, but I always felt like it was incomplete.  So I decided to build a walled garden for the back of the house:


It's not painted yet, and I had originally planned on using pantiles to match the walls at the front.  Unfortunately, my Wills pantiles were massive compared to those used in the model, so I decided the farm owners had chosen a cheaper option for the walls at the rear of the house.  Primarily made of foam board, some thin plastic sheeting of bricks, spakfilla and breakfast cereal box cardboard of the tiles on the top of the wall.  Even unpainted, I'm pretty happy with how this has all worked out.

That's it for now

Richard


26 September 2022

Armies on Parade

 Sorry it's been a while, but you wouldn't know it - I've actually played a couple of games for the first time in over 2 years!  Both were "introductory" Battlegroup WWII games so I won't be posting up any pics, but it was great to do a bit of painting, put the new table to the test, roll some dice and meet some new guys here in NZ.  New to me that is.

Before the games, and as I was sorting out stuff to put away into the display cabinet a lined up a few things to take some group photos. First up was my Soviets:

Still a few things to do here, and this doesn't include any unmade kits in the "stash".

Next up were the Brits:


Then the Americans:


Getting smaller and smaller.  Lastly the West Germans:

This really didn't seem like much in the West German department and I was scratching my head for a while as I put these in the cabinet - and went searching until I found all the missing vehicles.  No photo of them I'm afraid.

So that's the majority of my larger Cold War armies.  All in 20mm of course.  Still loads of work to do to finish them off.  Any questions, just let me know

Thanks

Richard