Sad title I know...
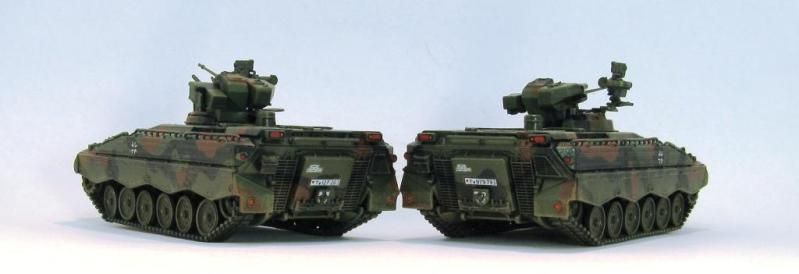
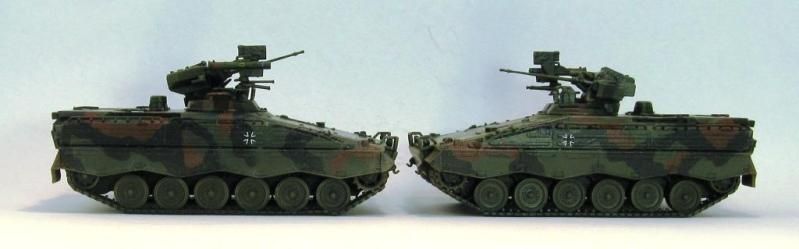
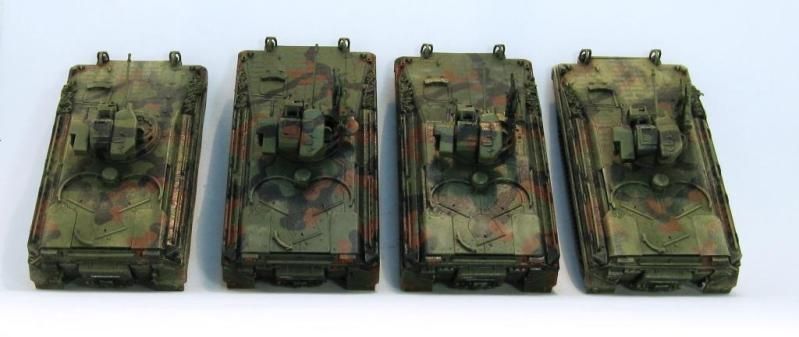
Anyway - this is my Task 4 Entry to the 2012 Group Build on The Guild. Unfortunately I was away for a fair amount of the Task 4 period - and I had a bunch of competing priorities - some of which involved painting miniatures which unfortunately did not fit intot he theme of my 2012 build.
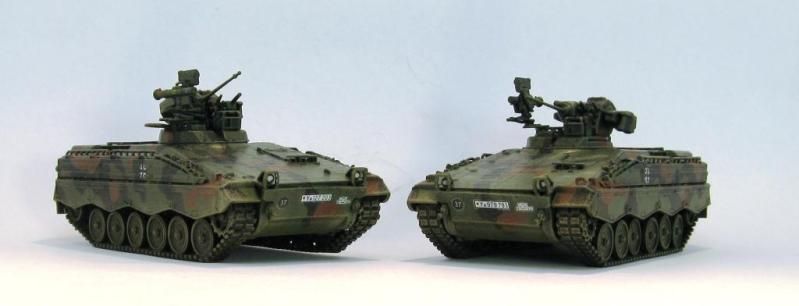
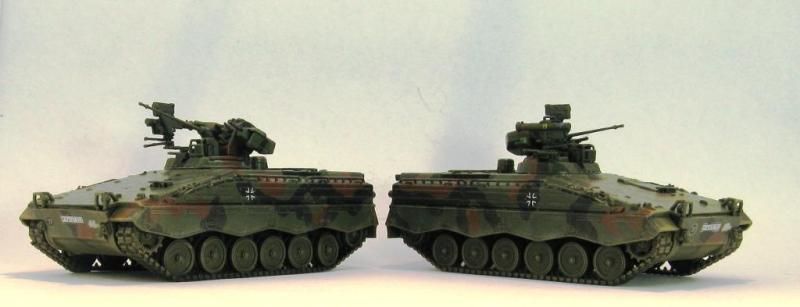
So - what does all this mean - basically that I only finished a couple of Revell Marder 1A3's for my build, and as they are a commission for a mate of mine, they won't be being added to the collection. But.. doing this means adding other new models tot he collection so overall - definitely worth it.
Previously on this blog I posted a couple of my own Marders and more on them can be found here
So - just before I jump into the photos - one more excuse... - I ran out of dullcote so they are still a little shiney in my opinion.
Here we go:
And finally a pic of Simon's new Marders with my older, dirtier Marders:
So I have another 8 or so Marders of my own to build, plus a couple more of Simon's so I may be boring you with tons of Marders over the next few months...
Have fun
Richard
02 September 2012
20 August 2012
B.W. Models FV620 Avis Stalwart
OK - so I decided to post this one up straight away rather than wait... What can I say?
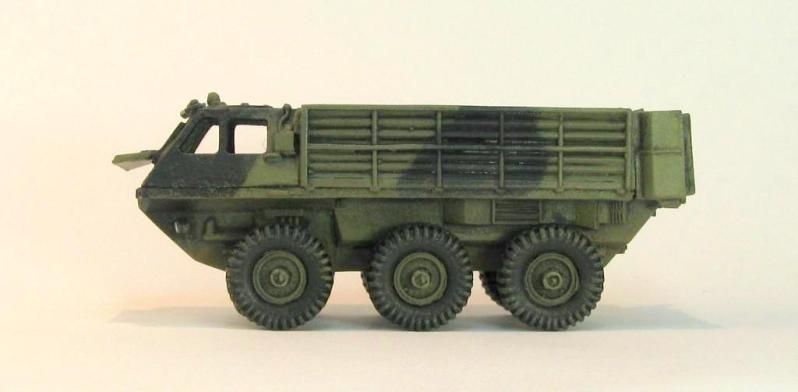
Anyway - my final entry to the Task 3 build was what I now beleive to be a B.W. Models Stalwart. Previously I had stated it was a MMS model - but I now beleive that to be wrong. That's what you get for buying second-hand models I guess - but hey, I'm definitely not complaining.
Here's a link to some info on the FV 620 Avis Stalwart on wikipedia
The only thing I really had to do to fix up this model was to pin each of the wheels. From there it was simply straight onto painting.
Here's the final pics of my Stalwart:
Finally - heres some videos of Stalwarts in action
That's all for now - have fun...
Richard
Anyway - my final entry to the Task 3 build was what I now beleive to be a B.W. Models Stalwart. Previously I had stated it was a MMS model - but I now beleive that to be wrong. That's what you get for buying second-hand models I guess - but hey, I'm definitely not complaining.
Here's a link to some info on the FV 620 Avis Stalwart on wikipedia
The only thing I really had to do to fix up this model was to pin each of the wheels. From there it was simply straight onto painting.
Here's the final pics of my Stalwart:
Finally - heres some videos of Stalwarts in action
That's all for now - have fun...
Richard
Trumpeter T-55 with KMT-5
In the past couple of years I've made more plastic kits than I previously did in the last 20 years. Some have been agony (ACE Models - I'm looking at you) some have been tricky (Revell Marders and Leopard 1A5s - I'm talking about you) and just one kit really stands out in my mind as both an excellent model and incredibly easy to build. And of course that model is the Trumpeter T-55 with the KMT-5 mine roller.
Typically I take a few days to build a model - yes I am very slow - and therefore I also normally try and build 2 models at once, which kind of mitigates some of my slowness.
However, I popped open the Trumpeter box and built this little beauty in a couple of hours. Which - you can see - is lightning fast for me. I had previously been thinking I would just build the mine roller (which looked a little intimidating) and attach it to a T-72, but decided in the end to just build the kit straight from the box and see what happened.
So obviously I am very chuffed with this kit - I just now have to go back and fix up the main driving light onthe hull which I painted ina quick and fairly dodgy fashion - mainly just to finish off the build.
So here are some pics of my Trumpeter T-55 w/KMT-5
That's all for now - next up my Stalwart and then onto the next build which is plodding along slowly.
Thanks and have fun
Richard
Typically I take a few days to build a model - yes I am very slow - and therefore I also normally try and build 2 models at once, which kind of mitigates some of my slowness.
However, I popped open the Trumpeter box and built this little beauty in a couple of hours. Which - you can see - is lightning fast for me. I had previously been thinking I would just build the mine roller (which looked a little intimidating) and attach it to a T-72, but decided in the end to just build the kit straight from the box and see what happened.
So obviously I am very chuffed with this kit - I just now have to go back and fix up the main driving light onthe hull which I painted ina quick and fairly dodgy fashion - mainly just to finish off the build.
So here are some pics of my Trumpeter T-55 w/KMT-5
Thanks and have fun
Richard
09 August 2012
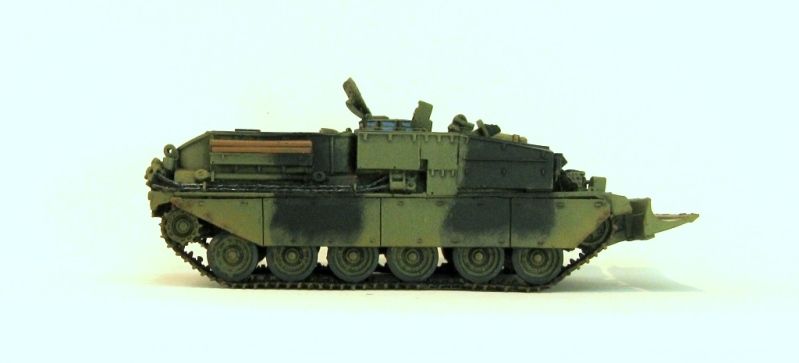
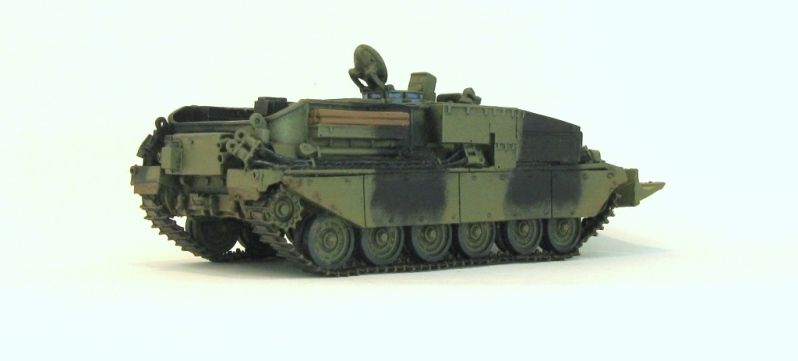
Cromwell Models Chieftain Mk 5 ARV
Well, that week (my first back at work) has just spun by, and this is my first chance to update the blog. This week I've got some more pics of my Cromwell Models Chieftain Mk 5 Armoured Recovery Vehicle.
According to the web, the Chieftain ARV was manufactured by Vickers at Elswick and was based on the chassis of the Mk 5 Chieftain MBT. The main double-capstan winch with electrohydraulic controls is provided with 122 m of 28 mm diameter cable. The similar auxiliary winch is hydraulically operated and provided with 260 m of 11 mm diameter cable. Power for both winches is taken from a PTO on the main engine. Mounted at the front of the ARV is a hydraulically operated earth anchor which, when lowered, allows the vehicle to exert a pull of up to 90,000 kg.
The Chieftain ARV has a crew of four and a loaded weight of 56,000 kg. Armament consists of a cupola-mounted 7.62 mm machine gun and smoke grenade dischargers. In total, 257 ARVs were built at Newcastle-upon-Tyne, of this figure Iran ordered 73 (of which 41 were delivered) with Jordan taking a further 30 vehicles.
Review
This was a pretty nice resin model by Cromwell, for which the main problem I had was the fact that there were no instructions. I was also missing at least 1 part - but that can be the nature of picking up models second hand. Also like many resin kits the tracks were slightly bent, nothing a lot of very hot water couldn't deal with.
Like all cromwell models, I had to remove excess resin and this caused some problems with the tracks and I lost some track teeth. The earth anchor also has excess resin, some of which I beleive would be next to impossible to remove, that that is for the most part unseen.
I had to create a new drivers hatch from scratch so don't look to closely at that!
Once I'd found a bunch of photos of someones very nice 1/35th equivalent kit online, it was relatively straight forward to work out what went where - and so for there the build and paint job was very easy.
So here is my version of the Chieftain Mk5 ARV:
and here is a comparison shot with a Altaya Chieftain Mk 5
OK - that's it for now
Have fun
Richard
According to the web, the Chieftain ARV was manufactured by Vickers at Elswick and was based on the chassis of the Mk 5 Chieftain MBT. The main double-capstan winch with electrohydraulic controls is provided with 122 m of 28 mm diameter cable. The similar auxiliary winch is hydraulically operated and provided with 260 m of 11 mm diameter cable. Power for both winches is taken from a PTO on the main engine. Mounted at the front of the ARV is a hydraulically operated earth anchor which, when lowered, allows the vehicle to exert a pull of up to 90,000 kg.
The Chieftain ARV has a crew of four and a loaded weight of 56,000 kg. Armament consists of a cupola-mounted 7.62 mm machine gun and smoke grenade dischargers. In total, 257 ARVs were built at Newcastle-upon-Tyne, of this figure Iran ordered 73 (of which 41 were delivered) with Jordan taking a further 30 vehicles.
Review
This was a pretty nice resin model by Cromwell, for which the main problem I had was the fact that there were no instructions. I was also missing at least 1 part - but that can be the nature of picking up models second hand. Also like many resin kits the tracks were slightly bent, nothing a lot of very hot water couldn't deal with.
Like all cromwell models, I had to remove excess resin and this caused some problems with the tracks and I lost some track teeth. The earth anchor also has excess resin, some of which I beleive would be next to impossible to remove, that that is for the most part unseen.
I had to create a new drivers hatch from scratch so don't look to closely at that!
Once I'd found a bunch of photos of someones very nice 1/35th equivalent kit online, it was relatively straight forward to work out what went where - and so for there the build and paint job was very easy.
So here is my version of the Chieftain Mk5 ARV:
and here is a comparison shot with a Altaya Chieftain Mk 5
OK - that's it for now
Have fun
Richard
02 August 2012
Well I'm Back!
Finally made it back from holidays and whilst I absolutely loved every minute of it, it is nice to be home.
We had a great time in Europe, and my wife was very sporting in allowing me to drag her through a number of battlefields and Commonwealth War Cemetry's searching for relatives. It did mean we got to see a few spots that really were off the beaten track.
Took more photos in 3 weeks than I think I have taken in my entire life - but just one that fits the Cold War theme of this blog. Crappy picture as I was in the front passenger seat when around the corner this old beast came - somewhere in Southern Germany:
Picked up a few good terrain ideas for my Cold War gaming tables as well... more on that later.
Anyway - bad to more normal scheduling next week.
Hope you're all having fun...
Richard
We had a great time in Europe, and my wife was very sporting in allowing me to drag her through a number of battlefields and Commonwealth War Cemetry's searching for relatives. It did mean we got to see a few spots that really were off the beaten track.
Took more photos in 3 weeks than I think I have taken in my entire life - but just one that fits the Cold War theme of this blog. Crappy picture as I was in the front passenger seat when around the corner this old beast came - somewhere in Southern Germany:
Picked up a few good terrain ideas for my Cold War gaming tables as well... more on that later.
Anyway - bad to more normal scheduling next week.
Hope you're all having fun...
Richard
05 July 2012
S and S T-55 AVLB
Well this will be my last post for a few weeks as I'm going on holidays and doubt I'll have the chance or ability to post anything - may be - you never know.
Review and Build
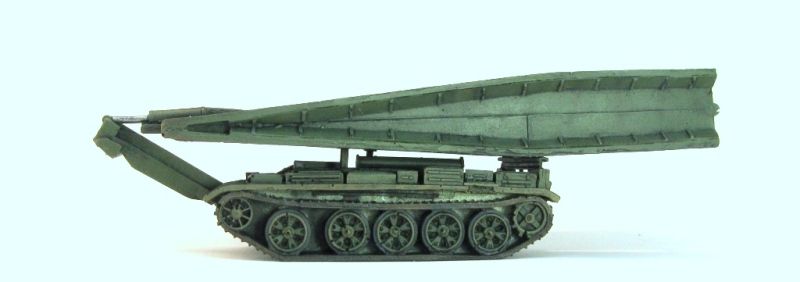
The S&S T-55 AVLB is one of their newer models and it shows. The resin is clean and near 100% few of bubbles or deformities. As always the metal is very crisp and clean. Not much claning was required on this model at all.
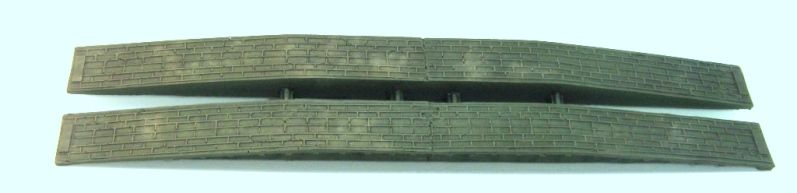
Everything I have to say about this kit is essentially positive. Not only do you get a great little T-55 AVLB with a folded bridge, but you also get a deployed bridge included. The bridge laying mechanism can be put together so you can have it on your tabletop driving to the river (withthe bridge on top of it) but once you reach the river and deploy the bridge, you can simply take off the folded bridge, lower the bridge laying mechanism and park the AVLB next to the bridge. Pretty cool in my opinion.
If anything left a little to be desired, its the instructions - which are fairly basic - but very, very useful no the less. After a bit of fiddling and working out how the photos in the instructions related to the model I had no real problems. Everything fit together very well and nothing had to be trimmed or anything like that.
I totally rate this kit and am very impressed with it.
Here's some photos of the S&S T-55 AVLB:
And the bridge:
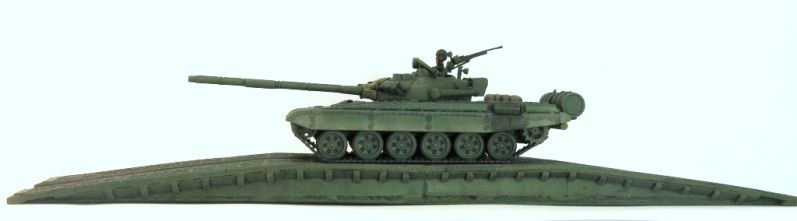
and finally the bridge with a T-72 crossing it:
That's it. See you ina few weeks and have fun...
Richard
Review and Build
The S&S T-55 AVLB is one of their newer models and it shows. The resin is clean and near 100% few of bubbles or deformities. As always the metal is very crisp and clean. Not much claning was required on this model at all.
Everything I have to say about this kit is essentially positive. Not only do you get a great little T-55 AVLB with a folded bridge, but you also get a deployed bridge included. The bridge laying mechanism can be put together so you can have it on your tabletop driving to the river (withthe bridge on top of it) but once you reach the river and deploy the bridge, you can simply take off the folded bridge, lower the bridge laying mechanism and park the AVLB next to the bridge. Pretty cool in my opinion.
If anything left a little to be desired, its the instructions - which are fairly basic - but very, very useful no the less. After a bit of fiddling and working out how the photos in the instructions related to the model I had no real problems. Everything fit together very well and nothing had to be trimmed or anything like that.
I totally rate this kit and am very impressed with it.
Here's some photos of the S&S T-55 AVLB:
And the bridge:
and finally the bridge with a T-72 crossing it:
That's it. See you ina few weeks and have fun...
Richard
03 July 2012
Cromwell Models FV434
Sticking to the British theme - the next up is a Cromwell Models FV434 Armoured Recovery Vehicle.
You find find out a little about the real deal here on wikipedia witha selection of good photos here
Again this is a second hand model which I just had to fix a little and then paint. It's slightly smaller than my Britannia FV432's but I can easily live with that. I'll be using this as a HQ attachment to my FV432 mounted Mechanised Infantry Company.
Not much more to say so on with the photos:
You can see on this one I added a little bit of green stuff to look like a oily towel or something like that. One I'd painted it I kicked myself, because if I had thought of it previously I would had tried to sculpt it into a DPM jacket, which I think would have looked a lot cooler.
There a variety of video clips on youtube - including a whole series of some guys re-fitting an FV434. Here a couple of others:
:
Spot the FV434 in this lot
Thanks and have fun...
Richard
You find find out a little about the real deal here on wikipedia witha selection of good photos here
Again this is a second hand model which I just had to fix a little and then paint. It's slightly smaller than my Britannia FV432's but I can easily live with that. I'll be using this as a HQ attachment to my FV432 mounted Mechanised Infantry Company.
Not much more to say so on with the photos:
You can see on this one I added a little bit of green stuff to look like a oily towel or something like that. One I'd painted it I kicked myself, because if I had thought of it previously I would had tried to sculpt it into a DPM jacket, which I think would have looked a lot cooler.
There a variety of video clips on youtube - including a whole series of some guys re-fitting an FV434. Here a couple of others:
:
Spot the FV434 in this lot
Thanks and have fun...
Richard
Subscribe to:
Posts (Atom)