A mate has been keen to play with his West German force so
it seemed right to give them a burl. He
has a platoon in M113s along with some M48A2GA2s – so that’s suitable for a
Territorial or Heimatschützbrigaden
force.
As their mission includes rear-area protection, it seemed
appropriate that their OPFOR was a unit that would be attacking behind the FEBA
– something like VDV or Soviet Naval Infantry.
So it looked like the SNI would be up for their first game.
I came up with a basic raison d’etre for the game. Imagine the war was been going on for about a
week now (let’s say it’s Day 7). The
Soviets have been pushing back NATO along the whole IGB, especially in
NORTHAG’s area of operations, but WARPAC forces have not been able to keep up
with the planned timetable, nor have they achieved a large breakthrough.
A Polish/East German amphibious assault of Denmark was meant
to have been undertaken on Day 4, but critical milestones for the success of
the invasion were not met on that date, and it has been postponed until Day
8. To support that operation, and to
bypass West German defences on the Hamburg – Lübeck line, the 36th Guards Naval Infantry Brigade
(Twice Red Banner Baltic Fleet) has been tasked with assaulting the
Schleswig-Holstein in Northern Germany.
The basic Soviet plan looks like this:
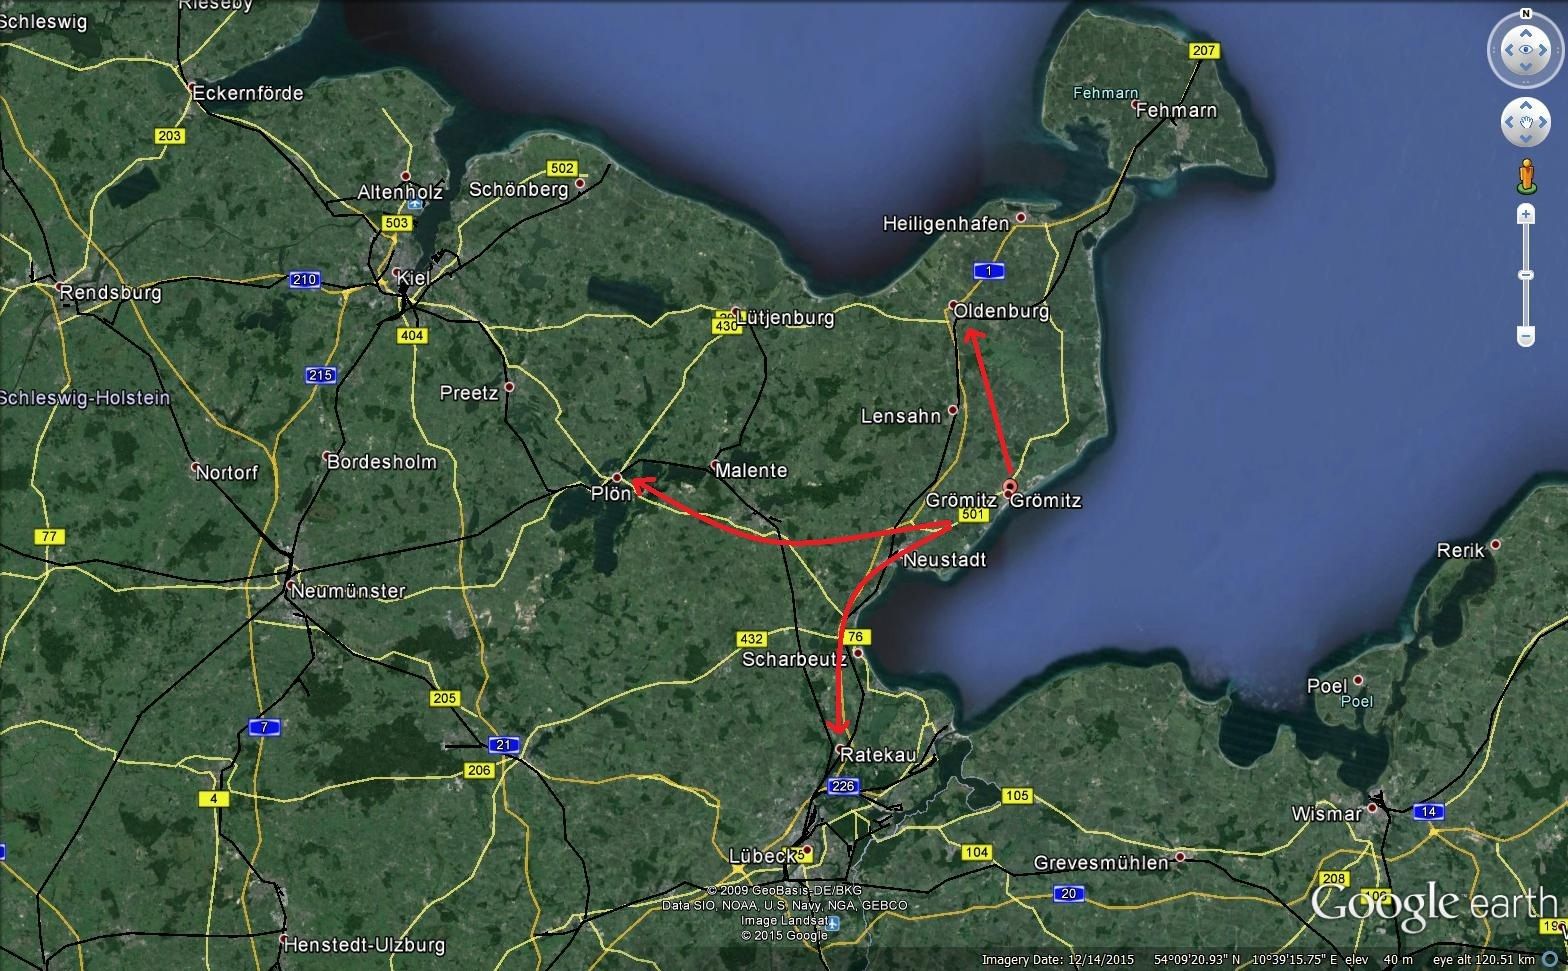
Naval Infantry will land over the beach at Grömitz and start to push out in 3 different directions. Northeast towards the Bundeswehr training ground and logistics point near Oldenburg – North west towards Kiel – Southwest towards the frontline at Lübeck. Their aim was to cause as much havoc as possible, draw off as many of the NATO reserves in the area as they could and if possible, lead NATO planners to believe that this was the main thrust (rather than the diversion it was for the main event on Day 8).
So in the actual game, the West German force would be a
Heavy Jaeger platoon from 512 Jaeger Battalion reinforced by 2 M48A2GA2 which
had been at the shooting range near Oldenburg.
They actual force was:
Jaeger Forward HQ transported by a VW Iltis
Home Turf Special Rule Heavy Jaeger Platoon mounted in 3 M113A1G
Light Jaeger Squad (Police Unit)
Milan ATGM Team
Heavy Mortar Team mounted in a M113 Panzermörser
Redeye SAM Team
Jagdpanzer Kanone
2 x M48A2GA2
Forward Observer Team tansported by a VW Iltis
Light Recon Patrol mounted in an up-gunned VW Iltis
1 x Timed Strike
3 Off table artillery requests
The Soviet force was as follows:
2 x Soviet Naval Infantry platoons mounted in BTRs. (1 in BTR-60PB and 1 in BTR-80)
AT-7 Metis Team
SA-7 Team120mm Mortar Team mounted in aBTR-80
Anti-tank Section – another AT-7 team plus a SPG-9 Team
2 x T-55A
1 x T-55AMV with 2 AT-10 Bastion missiles
1 x PT-76B Light Recce Tank
2 x YaK-38 Airstrikes
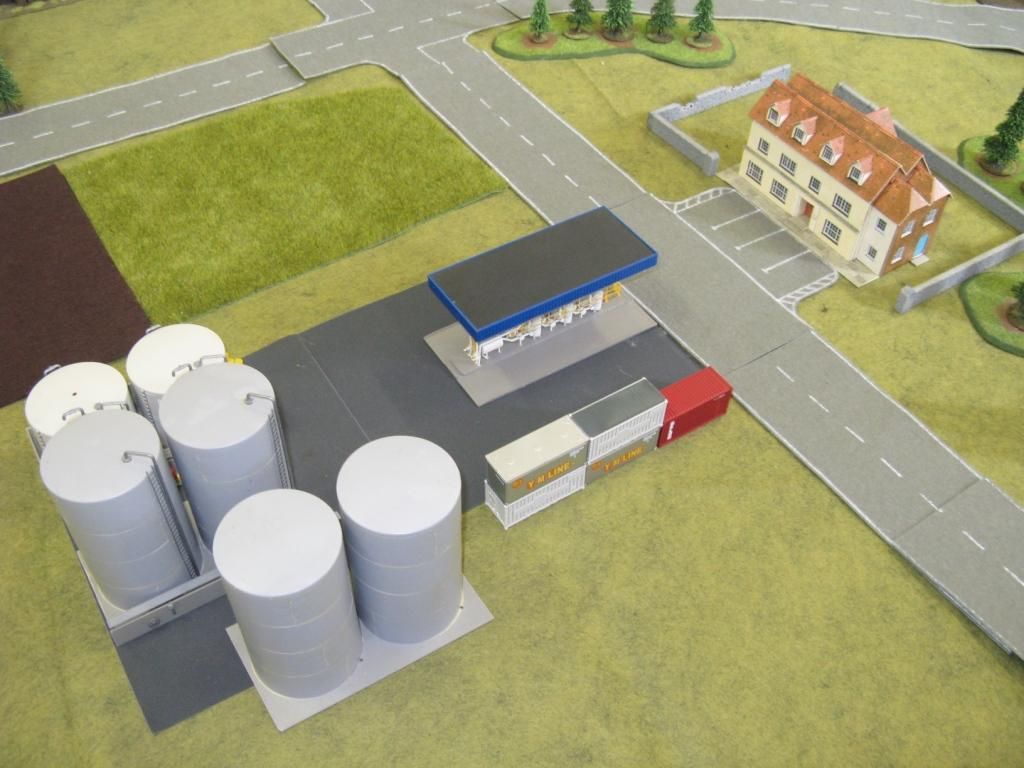
The table was set up as follows. This is the Soviet end

You can see my two objectives - the VW utility at the cross roads and the skip beside the brickworks.
And this is the West German end
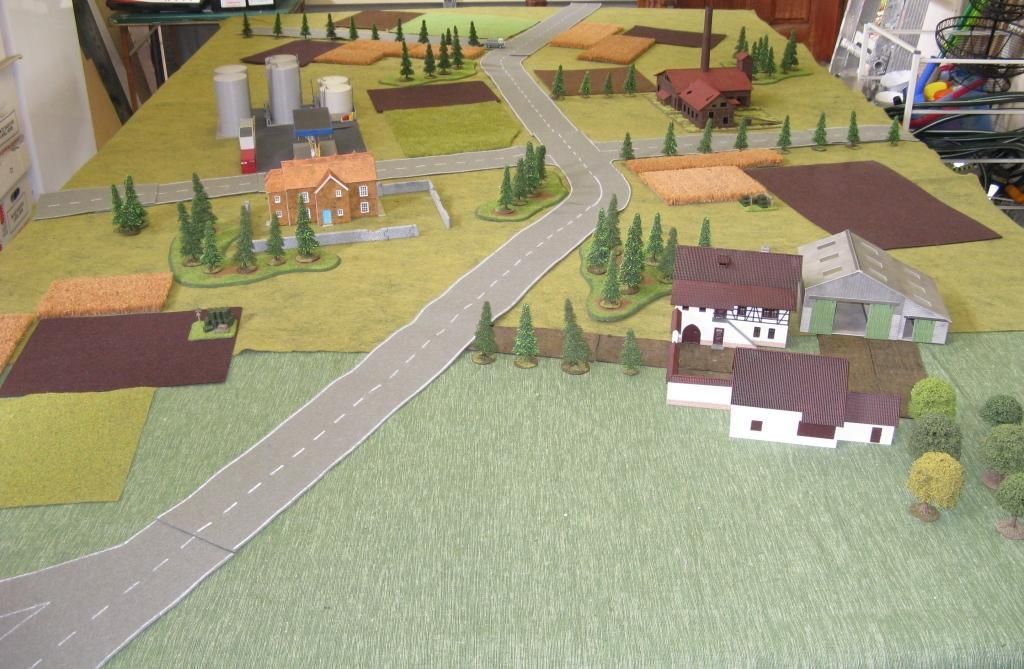

I was going for a farmland with minor industry theme...
The West Germans started with their Light Recon Iltis and police unit on the table, while the Soviets started with just the PT-76B. The mission is a simple meeting engagement as the opposing forces clash on the road to Oldenburg.
I had the first turn and took my first objective near the brickworks. I also took the first of many unsuccessful shots of the game - scaring the willy's out of the Light Recon team who darted behind some woods.

My reinforcments started to arrive and as I had a bit of time up my sleeve I deployed the BTR-80 carrying the 120mm mortar first into a nice safe area behind some woods - but just to be sure I backed it up with a T-55.

The first West Germans similarly started to move onto the board and took an immediate liking to the farm complex on their right flank - deploying their police teams into the woods infront of it, backed up by a Heavy Jaeger section (with the Milan), while the FO hid in the barn and the Panzermörser parked behind it.
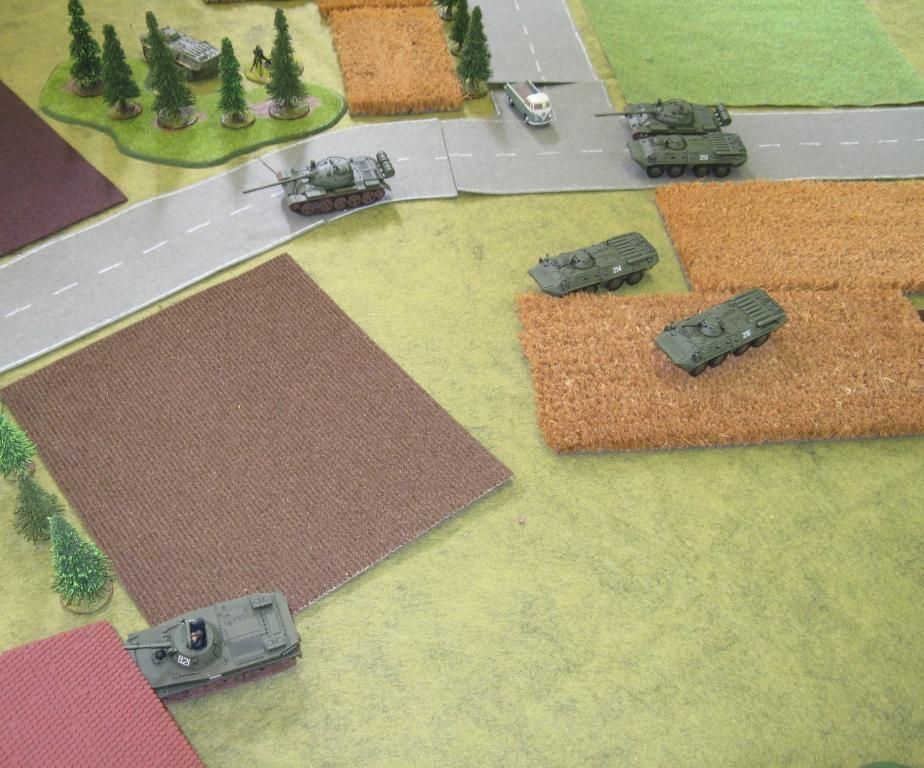
More of my chaps arrived at once so I was able to bring on a whole SNI Platoon and another T-55. By this time the PT-76 commander was proving how brave and stupid he was by trying to take on an M48A2GA2 at 60+ inches while the first T-55 took on the other one at long range. After several rounds of firing (needing sixes) I finally hit the M48 - only to then realise I couldn't penetrate its frontal armour at that range. Doh! Time to slink away methinks!

I also managed to dump my SAM team down the back of the table on Overwatch - just in case any random NATO air showed up.
Here's my 120mm team looking the biz. Which was about all they did most of the game. I think they must have had their radio switched off for the first half of the game - fired a couple of salvoes in the middle of the game and then switched it off again. Probably my most unimpressive outing for a 120mm mortar I've had - it's typically my go to cheap arty option

Another glory shot of my mortar team. They got far more photography than they deserved!

My final reinforcements come onto the board. The second SNI platoon, the T-55AMV and anotehr BTR which is to the right out of shot on the table edge. Appalling command dice for the remainder of the game kept these units completely out of the action.

Close up of the BTR-80 Platoon Command vehicle and the T-55AMV. The PC vehicle sat there for several turns, probably within a stone's throw of the 120mm mortar team desperately trying to call in fire - completely unsuccessfully...

The Jaeger let fly with a Milan, which fortunately whistled past one of my T-55s. This wood would become the most densely packed stand of trees in Germany! It also became the target for almost everything I could throw at it (that wasn't being thrown at M48s) in order to suppress that Milan!

The West German armour content to enter into a largely pointless long rane gunnery exhibition with my equally hopeless T-55 gunners. Both M48A2GA2's would end up destroyed along with both my "vanilla" T-55s. The Jagdpanzer Kanone would get the West German man-of-the-match award for taking out one of the T-55s and a BTR-80 - and for once it was not a post-humous award!

One of my Timed Airstrikes coming in - with the MiG-27 standing in for a YaK-38 Forger. I think they (Forgers) are pretty crap, and so only allowed them to carry two medium bombs. I got 4 pins from 4 dropped bombs, but nothing else.

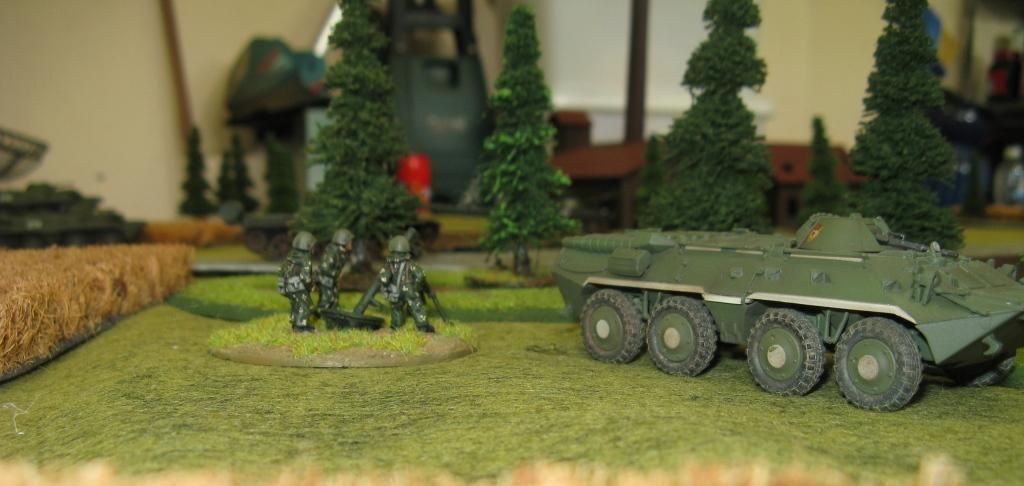
I pulled one BTR-80 around the side of the Brickworks and popped out the dismounts. The plan also called for the PT-76 to pull around - mainly with the idea for it to call mortar fire on the forest of doom. (Do you think that worked?) The marksman with the SVD you can just see (furtherest away of the dismounts) had the honor of single-handedly taking out the Milan Team over the course of 2 turns. Not bad mate.

Using a carefully planned "Reserve Move" a second BTR-80 raced past the first and deployed its dismounts even closer. The two infantry units and one of the BTRs poured fire into the woods. You can just make out a burning T-55 in the background.
Despite this BTR being knocked out (by the Jagdpanzer) the loss of the Milan team and then the Jaeger Platoon commander pushed the west Germans beyond their limit and they broke and ran.
Trying something different - here's a graphic of my side of the game:

And here's a graphic showing the limit of the West German advance:

I hope that helps a little in visualising the game.
In the end it was a pretty one-sided win to the SNI. I certainly had a bit of luck - and the 2 of the 4 chits I drew were for a plane (which I failed the roll for) and an EW chit, which allowed me to cancel a West German fire mission communication check.
I managed to take 3 objectives, suppress several units repeatedly and kill a few critical units (like the tanks) before my vanilla T-55s died,leaving me with the T-55AMV and the pathetic PT-76. Of course in the heat of battle I completely forgot to use any of my T-55AMV's AT-10 tank gun fired ATGM which I had hoped would give me some reach to match the longer ranged NATO guns.
So - things to think about. If I played this mission again I'd probably give each side another tank, and maybe a second platoon for the Germans and a third platoon for the SNI. I'd also double the Command dice from 1D6 to 2D6. I was jamming command rolls of 7 and 8 for the first part of the game with 3's and 4's for the second half so my attack became pretty 1 dimensional in the end.
I also need to consider how to give NATO more command dice - in an attempt to replicate a more "flexible" command structure - but how to allow the Soviets (with less commands) to activate more units (say a whole platoon) as long as they all do the same thing. Something to think about.
Thanks - that's it for now...
Richard
Get looking AAR and proof you don;t need wall to wall tanks in modern gaming.
ReplyDeleteThanks for posting.
Cheers
Stu
Great table layout.
ReplyDeleteInteresting scenario too- nice to see something other than the Tank and Motor Rifle Regiments get an outing.
Cheers,
Pete.
Great stuff. Nice to see another Cold War AAR.
ReplyDelete