So with the table set it was time to get on with the game. First up the Danish player was able to palce both his Centurions, the M41, a Forward Observer, 1 Mech Squad in their M113A1, the M150, a single medium Mortar, the HJV Platoon Command all in his deployment zone.
The Centurion Platoon Leader's Tank, an M113A1 and the Forward Observer deployed in and around the barn across the road from Lystrup &Jomfruens Egede Godser main house.
On the opposite side of the table the medium mortar is deployed and in the distance you can see the HJV Platoon Command Squad.
The M150 (on Overwatch) and another Centurion cover the centre of the table.
Here's another view of the centre and left flank. The M41 is hidden in the Lystrup &Jomfruens Egede Godser courtyard.
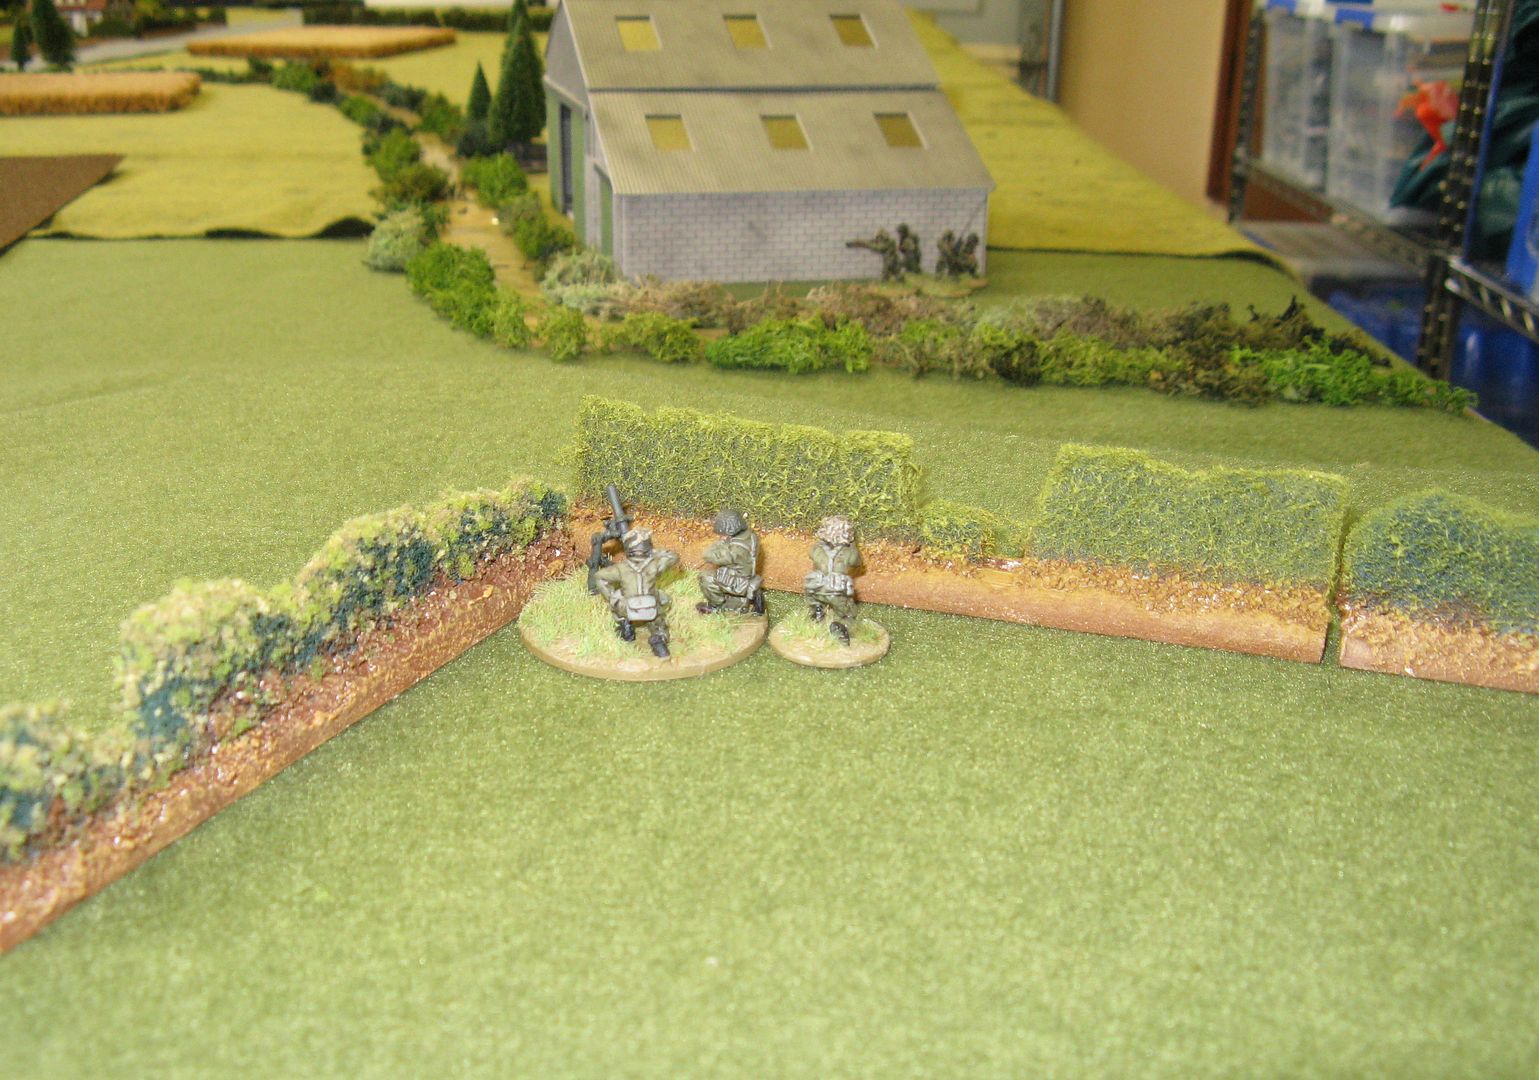
And here's another shot of the HJV Platoon Command (also shown in yesterday's post). The final 2 units on the table - an HJV Squad and the HJV MAW Team were not actually placed on the table, but were "hidden" in and around the house in the picture below - the Soviet Player had no idea of this.
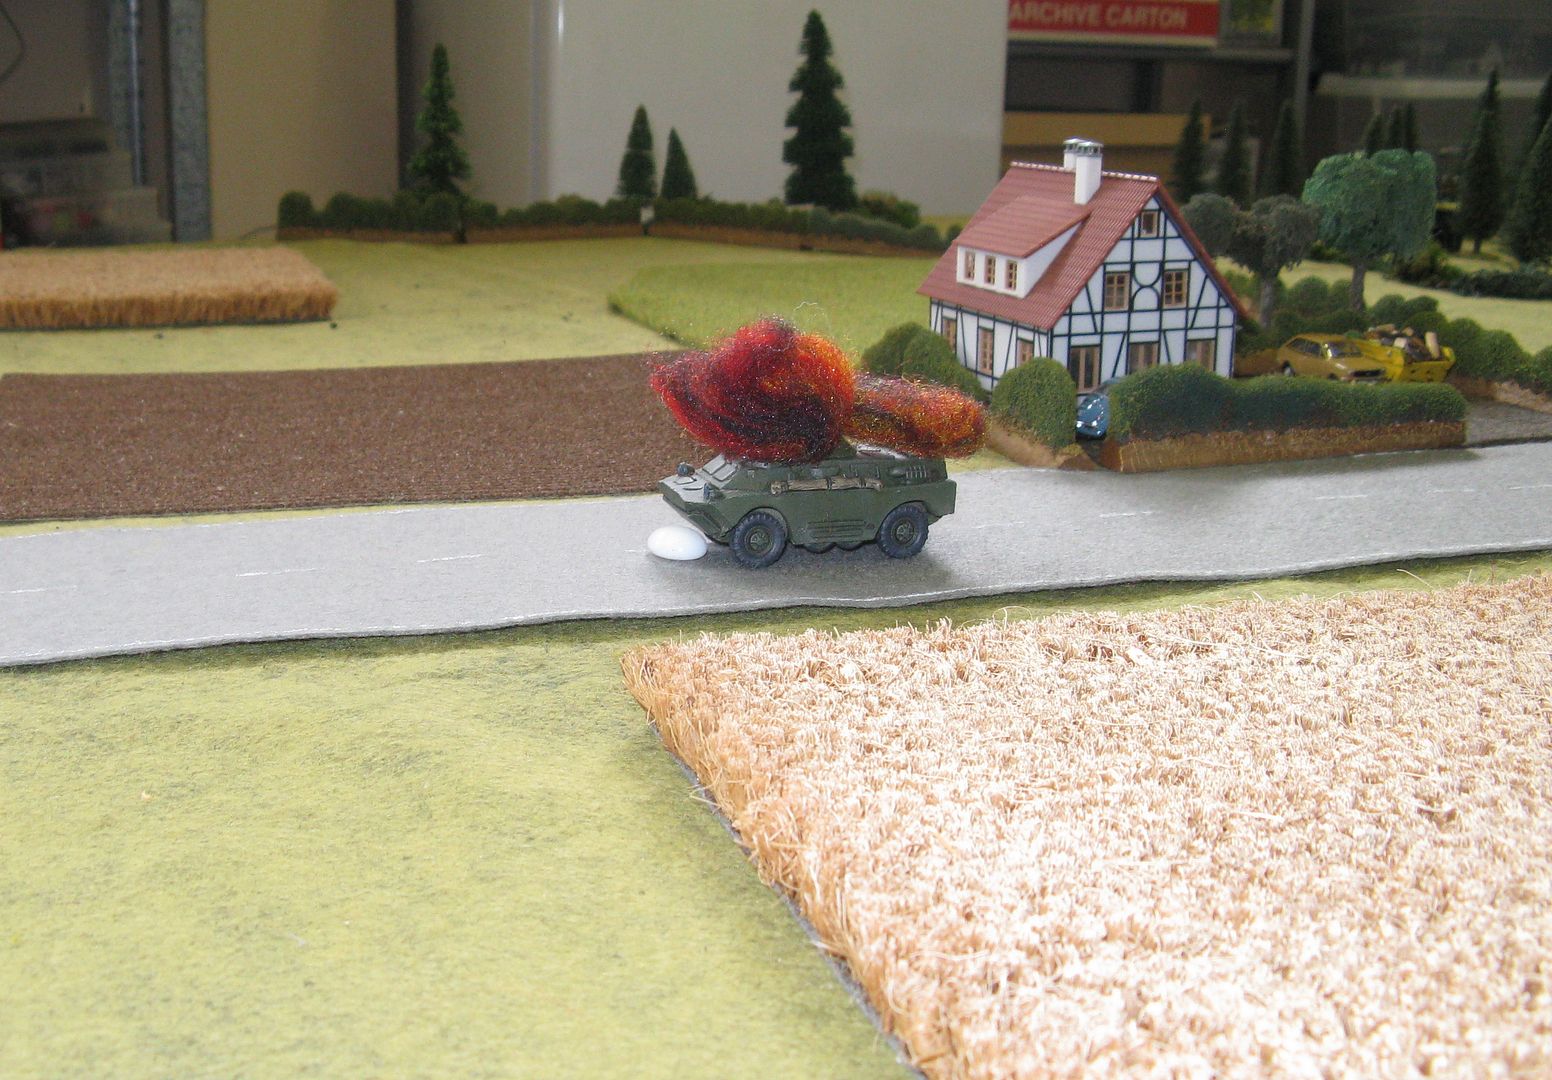
The Soviets led with their recon BRDM-2, the sacrificial lamb that was sent up the main road, mainly to see how many overwatch shots and missiles it could attract. Only 1 105mm main gun round it turned out, was necessary to ruin the BRDM's day.
3 T-55AMV's also raced up the road as far as they could, laden with 2 Soviet Naval Infantry Squad and an Anti-Armour Squad, all of whom had lost their BTR-60PBs in the previous game. In the distance you can see a blown up UAZ-469, which must have taken a round through the bonnet (hood for Americans) totally destroying it, but leaving the Mortar Fire Controller completely unharmed (but pinned for good measure. The other UAZ also emerged unscathed.
Here are the T-55AMV's and their passengers again.
Other units also started to slowly move up the table, struggling in the wet ground. The SA-9 in the background remained there for almost the entire game as the Soviet's really had a difficult time activating all the little units that were not part of a platoon. Based on what happened in this game I have had some ideas to tinker with my Soviet Orders rules.
The BTR-60PB carrying the 120mm SNI mortar team took a couple of turns to get into the right position on the edge of the woods before deploying the heavy mortar.
The Ambush is sprung. A MAW round hits the T-55AMV closest to the house but fails to penetrate due to the reactive armour. The explosive does drive the Squad riding the tank off and they are pinned behind a hedge. The HJV Squad fires their one M72 LAW at the tank adjacent to the first hit tank, which misses and the rest of the squad open fire at the tank riders, massively depleting that squad (down to two men) who are also pinned against another hedge.
A different shot of the action. The two front T-55AMV's were also shot at by a Centurion and the M150, both of which missed.
Scattering artillery did however manage to pin one of the PT-76's crawling through the mud.
Whilst the T-55AMV's tried to deal with a multitude of targets, and unpin all their units, the M150 targeted one of them from cover....
... and managed to take out the first T-55AMV. The reactive armour roll was poor, perhaps the missile hit the same spot as the Carl Gustav team, because it easily penetrated and destroyed the target.
Meanwhile the remainder of the SNI on table force continued to prepare. The ZSU-23-4 was put on Ambush Fire when after finally inflicting 3 BR chits (the loss of the MAW Team, the HJV Squad and an objective) the Danish player drew 2 planes and an Out of Ammo chit, which was played on the mortar, which did not fire another shot for the rest of the game.
Danish reserves started to show up. With the Mech Platoon Commander happy to sit in his M113A1 up the back of the table and call in fire from the off-table mortar battery, the other Squad set off across country to reinforce the Dane's right flank. Unfortunately two "1's" were rolled and the M113A1 was bogged in the mud for the rest of the game.
The first real bit of luck for the Soviets when they managed to get in contact with a battery of 122mm guns whose barrage landed exactly where it was needed, killing the Centurion Platoon Commander (and his tank) and pinning the M41
The Mortar's BTR-60PB continues to advance.
Now the flanking force started to arrive. This was a total surprise for the Danish player, whose been so busy lately he didn't get a chance to properly read the scenario. The Soviet player did read the scenario!
On they came across the stream. I actually wanted them to arrive on the road, but I couldn't get it to go exactly where I wanted it so they came on where they came on.
It didn't really make much difference for the Soviets though as they took out both the M41 and the M113A1 they could immediately see.
As this was happening in the centre of the table there was an exchange of losses. The remaining Centurion took out the second T-55AMV.
Then the remaining T-55AMV, stationary behind the two burning wrecks of his platoon mates calmly slotted the M150, the Danes most damaging weapon.
The final shot of the game was of the burning Danish wrecks. This was the end of Turn 7. The Soviets had been taking chits every turn since Turn 5 as they hadn't won the game fast enough. The Danes were down to 3 Mech Infantry Squads, 1 functional M113A1 and a Centurion, plus the FO team, the HJV Command Squad and the medium mortar.
The Soviets had only lost 2 T-55AMVs and a BRDM-2, plus some Naval Infantry.
Interestingly the Soviets had suffered much more BR damage, while the Danes were sitting pretty as they had draw 2 planes, and out of ammo chit, and one other Name chit which I can't remember.
Had we had the time for one more turn a whole BTR-60PB mounted platoon could have come onto the table and immediately assaulted the barn where the FO and 1 Mech Squad were based. They could have been supported by the 3 T-55Ms that were also on that flank and by the T-55AMV which would have started moving up the table. Turn 8 would not have been a happy turn for the Danes.
So the bottom line was that the Soviets were able to push the Danes out of this position much more effectively than Game 1 where the Danes left the table when they felt like it. The surprise flanking move really smashed the Danes, and the Danish player not being prepared for it made it much more devastating.
So once again, fun was had by all and sometime in the next 12 months we might get a couple more games in the Campaign completed!
Thanks for reading
Richard


Great little encounter - it actually looks like Denmark too!
ReplyDeleteBest wishes,
Jeremy
Thanks Jeremy
ReplyDeleteRichard