21 December 2017

Fabbri Soviet MAZ-535A Artillery Truck

Just a quick update this week.  It's been very busy here and in preparation for having friends over for Christmas I've had to drop WW3 painting and do something a little bit different for a change.  So I've been slamming my way through the contents of Fantasy Flight Games Imperial Assault, trying to get all the figures painted before we can get in a Christmas marathon of IA games.  With a marathon hopefully meaning more than 1 game!

Anyway... I found I had taken a couple of photos of another Fabbri diecast vehicle I got a while back, which I had not posted up so I thought I would share it now:


This is actually a pretty nice vehicle.  I've seen someone dirty their's up a bit and it looks even better.  I might try and pick up another one down the track.

So that's it for today, and being realistic, quite possibly it for 2017.  As always my plans for the year heavily outweighed my achievements, but I moved a few projects further along the track so all in all I'm pretty happy with the year.

I wish you all a Merry Christmas and a great 2018.  I'm thinking 2018 may turn out to be a pretty special year for me.

Thanks - and happy holidays!

Richard

13 December 2017

Soviet ATGM Ammo Markers

Just a quick post today and probably at least one more quick post before Christmas.

During the last game we tested the rule that man-packed ATGM teams had a max of 3 missiles before they had to resupply.  We used little wee dice to show the number of missiles remaining.  I thought it would be much nicer to have a visual marker that was more "real".

So this is my first attempt at some AT-4 and AT-7 tubes:


So you can see - not much to look at, just one or two missile tubes ready to be used.  Soviet tubes don't seem to have any markings on them - or they are so small I have not spotted them.  So I just went with plain tubes.

My thinking is that if you have no markers, it means you have a full missile loadout.  Once you've fired a shot you add the two missile ammo marker to the ATGM team.  Again once fired you reduce it to the single missile marker.  Once you have no missiles - turn the ATGM team away from the enemy to indicate they can't fire.

That's the plan anyway.  We'll see how it works.  I also need to make some NATO missile tube markers next.

Thanks

Richard

07 December 2017

The Zealand Campaign - Game 1 - First Clash

So - onto the actual game.  First up we established where the objectives were for the game:


They were the two major intersections along the road and the large hill that dominated the terrain.  Then the Danes set about placing their defences, knowing they would have only their recce troops and Homeguard ont he table to begin with:


The Danes access to limited engineering support in the pre-game so I allowed them to choose from a limited list of defensive options.  They selected a couple of tank fighting positions for the M41s, a standard mixed AT/AP minefield and a Claymore minefield.


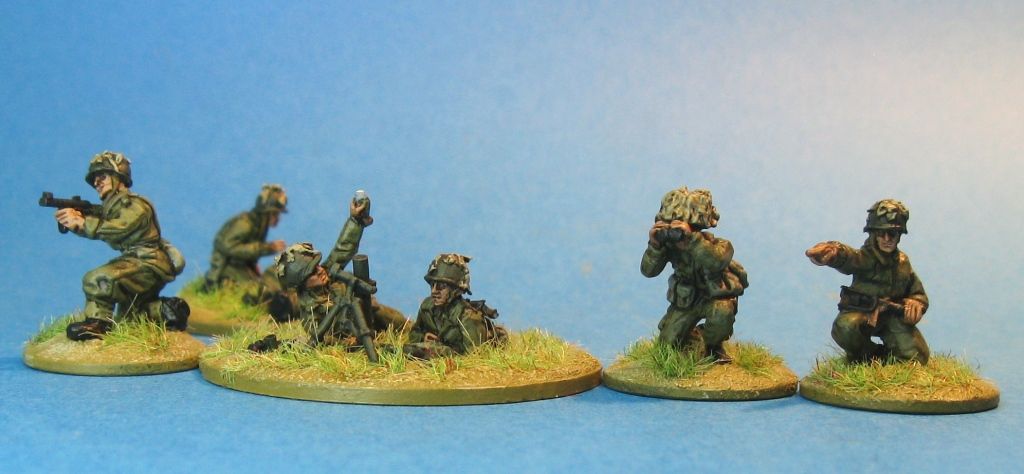
The Homeguard set up in their entirety on the Big Hill (apart from the mortar, back in Faxe.


The Soviets were allowed to play out their recce moves as part of the pre-game.  They played in the spirit of the campaign and rather than just drive the BRDM-2 up the table, spot the tanks and rapidly drive off the table, they went with the following option:


Drive up the table.  Stop at the first intersection for a look and a quick spray of 14.5mm heavy machine-gun fire at the most likely target (which was a suitably unimpressed M41 which was waiting on a Overwatch order) and then drive off the table.  One M41 took a couple of shots at the BRDM but the gunner was obviously a wee bit nervous as this was his first shot in anger, so both shots promptly missed.

The BRDM-2 took another annoyance value only shot and then promptly drove around the corner.  By now the Homeguard were determined to get in on the action and their commander called up their 81mm mortar.


And this was the outcome:


With only one M41 still on overwatch the Soviets charges up the main road with an entire BTR-60 mounted company and a couple of BRDM-2s with AT-5 Konkurs (Sprandel) ATGM.  The second M41 gunner was obviously made of sterner stuff and inflicted the Danes first kill:


This intersection would become the primary killing ground for the rest of the game.  Not only was it a bit of a bottleneck, but it was also right next to where the Danes had placed their timed strikes and on the edge of their AT/AP minefield.

Unfortunately for the Soviets, the chap in the Jeep is the Naval Infantry Mortar Controller, not their Naval Gun Fire Controller who never really got onto the board in the game.  This meant the Soviets had access to their 120mm mortars, but the big guns off the coast never got called upon.

The first Danish reinforcements started to arrive.  An FO in his acquired Land Rover headed to the top of the church tower.  M113s begin to arrive at the Big Hill in the background.


Here's a closer pic of the M113's arriving at the hill.


A couple of BTR-60PBs made it through the intersection of death and their squads spilled out in the treeline which provided good cover for the road.


Meanwhile on the other side of the intersection the Soviets Heavy Squad jumped from their BTR-60PB ready for action


The TOW armed M113 or M150 (who knows!) edged onto the board ready to start throwing missiles down range.


And meanwhile at the back of the board essentially the rest of the Soviet Wave 1 arrived.


But could do very little as the Soviet orders rolls were pretty low and were continuously needed up at the first intersection to keep the pressure on the Danes.  Little did I (as the referee) know this was all part of a Soviet cunning campaign plan.

Things at the intersection of death weren't really going the Soviets way...


... whether through M41 main gun (76mm of anger) or artillery or mortar strikes.  Both BRDM-2 Konkurs were now destroyed, the BTR which had mounted the heavy squad was knocked out and two other BTR's were pinned.

I guess loosing a few things meant the Soviet reinforcements would start moving up the table:


While things got progressively bad near the intersection


But at least the mortar fire controller had made it to the firing line and could start calling in some useful support.

To be sure it wasn't entirely one-way (just heavily one way).  In three rounds of Soviet shooting the M41 on the big hill was hit by a AT-13 Metis (Saxhorn) ATGM - and pinned, a recoilless rifle round - and pinned before being destroyed by another Saxhorn missile.


The majority of the Homeguard squad camped out next to the destroyed M41 had also taken serious damage and were pinned.

The Soviet advance continued


And the second BTR-60PB mounted naval infantry platoon began to arrive around the first intersection.

Importantly the Soviets managed to knock out a single Centurion that had arrived on the table


At this point the Danes decided enough damage had been inflicted on the Soviets and it was time to relocate back to the next defensive position.

In terms of BR, the Danes had inflicted loads more chits on the Soviets than they themselves had taken so in game terms it was a victory for the Danes.  They had lost a M41, a Centurion and a few citizen soldiers from the Homeguard, while taking out 4 BTR-60PBs and a couple of BRDM-2 ATGM vehicles.

However, in Campaign terms, the Soviet player was perfectly happy to have only lost a BTR-60PB platoon (and primarily only the vehicles) and 2 ATGM vehicles to push through the first defensive line.  It felt to him like a reasonable exchange so the Soviets certainly don't feel like they lost this one.  They've also got many more troops coming along in the next wave or two, so can easily replace those losses, while Danish losses, at least for the moment - cannot be so easily replaced.

So - that was kind of a win/win scenario.  Both players achieved what the wanted to achieve with terms that were acceptable to them.  Neither side got a clear advantage and both have the majority of their assets available for the next game.

Thanks

Richard

06 December 2017

The Zealand Campaign - Part Four - Pre-Game and Table Set Up

So with each player having been provided with the Operation Orders (which also includes their TO&Es for the beginning of the campaign) and the map sets it was up to them to start working out how they would tackle the tactical situation.


The Danish went with what might have been the simplest option from their initial set-up shown below.


One Mech platoon would move north to block the northern beach exit, one Mech platoon would move south to block the southern exit while the last Mech platoon in Faxe would move towards the beach - really to the edge of town to back up the recce and Homeguard units positioned there.  Something like this:


The Danes pretty much expect the main Soviet thrust will come straight down the central road as it is the fastest route to what the Danes think is the Soviet primary objective beside securing the beachhead.

The Soviet plan was also pretty simple.  So simple I can't really see the need to draw a map for it.  The plan was upon landing to push their limited recce down the central beach exit route until it discovered Danish positions.  Upon discovery (and assuming they survived the encounter) the BRDMs would either double back or use side roads to move north and push up the northern route until they came into contact again.  If the made it out of that one alive they would skedaddle back to Faxe Ladeplads and the recce the southern route.

In the meantime, once they got themselves organised from the landing the BTR equipped company would charge down the main road and try and bounce the first Danish positions previously reconnoitered by the BRDMs.  Tanks and other assets that landed in the first wave would basically move to the sound of the guns while the second wave started landing.

Troops without vehicles would help secure Faxe Ladplads and push north and south to prepare immediate defensible positions whilst waiting for their vehicles to arrive.

So - the first clash would take place on the central route directly in front of Faxe with the table attempting to replicate the area in the red box below.


To get my total nerd on, I used Google Maps to virtually "drive" down the central route towards Faxe, looking for specific terrain features.  The main thing I got out of that was that the two heavily wooded sections on the table (inside the red box) were both actually raised areas or small hills.  The woods or dense scrub is so dense I decided vehicular movement would be even more restricted than normal difficult terrain and as it has been raining non-stop all off-road movement would count as difficult terrain.  The other factor cause by the weather was that all weapons with Thermal sights (meaning essentially TOW ATGM only) would be +1 to hit.

So this is the table from the Soviet end.  The edge of Faxe can be seen in the distance, along with a small and larger hill on the right hand side of the road.


Here's the table from the Danish point-of-view.


Again you sould be able to see the two hills pretty clearly here.  But just in case you can't - here's the big hill (which is in the Danish deployment zone):


And the little hill which is on the Soviet's side of the table:


And that's it for the table set up.

Next up - the AAR.

Thanks

Richard


28 November 2017

The Zealand Campaign – Part Three – The Operational Orders

So this will be the last post for the week, but it will contain a fair amount of information - mainly in the form of links to documents that will assist in setting up the campaign.

I prepared an Operational Order for each side - I tried to make it look "real", but I've never been in the military so I've probably got it more than a little wrong!  The Soviet Combat Order style is loosely based on an article or two that I found, but mainly from a section in FM 100-2-1 on page 3-10 which talks about Division Command and Staff Procedures.

I'll provide all the links here - and they will also be reflected in the Battle for Denmark - Documents section on the right.

First up - the Soviet documents:

Soviet Naval Infantry Combat Order

Soviet Naval Infantry Map Set

Soviet Naval Infantry Map Key

Here's a pic of the port at Faxe Ladeplads to give you a look at the primary objective and the landing beaches:


You can also see the Air Assault elements LZ between the two wooded areas near the top right hand corner.

Now the Danish documents:

Danish OPORD

Danish Map Set

Danish Map Key

Here's another pic of the port.  This time taken from the south:


Although this is replicated in the Map Sets - here is a picture of the planned campaign area:


Once again I'd be very happy for any feedback, corrections, additions etc.  Please feel free to have a look and let me know what you think.

Thanks

Richard

26 November 2017

The Zealand Campaign – Part Two – The Army Lists

So - onto the Army Lists.  First a couple of caveats:

1.  Part of the reason I'm looking at this campaign, in this setting (i.e. 1986 - NATO Northern Front) and these Army Lists is that I believe that there is very little chance of them having any cross-over with what may appear at some point in the future in Battlegroup: NORTHAG.  I very much want that Ironfist/PSC project to succeed and have played a little part in the project to date - and want that to continue.  So this is my effort to keep the Battlegroup Cold War flame burning - without competing in anyway with BG:NORTHAG.  So with that in mind:

2.  These Army Lists are completely unofficial work by a fan of the Battlegroup system and in no way endorsed by Battlegroup TM Ironfist Publishing Ltd or PSC.  Used without permission.  No challenge to their status intended.  All rights Reserved to their respective owners.

3.  These Army Lists are completely my own work and all mistakes etc are mine.

4.  The points values - while reasonably good - could probably be better and I consider them to be a work-in-progress but good enough to get in some balanced games

So with the caveats out of the way - here are the lists.  The links should work directly from here and I'll put them in the Battle for Denmark Documents section on the right

DANISH ARMY BATTLEGROUP


This list should allow you to make a LANDJUT or LANDZEELAND force with regular, territorial or Home Guard troops and a range of other options.

SOVIET NAVAL INFANTRY BATTLEGROUP


This list should allow you to make a 63rd Guards Kirkenneskaya Naval Infantry Brigade (Red Banner Northern Fleet) to attack Norway or a 36th Guards Naval Infantry Brigade (Twice Red Banner BalticFleet) to attack Denmark and/or the northern shore of West Germany.

Hopefully you'll find the lists relatively comprehensive (maybe a bit too comprehensive...) but I'd be happy for any feedback, corrections, additions etc.  Any help will be gratefully accepted.  Please let me know what you think.

Later this week - I'll be adding the NATO and Soviet Operation Orders for the beginning of the campaign.

Thanks

Richard

22 November 2017

The Zealand Campaign – Part One – Some Background Information

OK – so anyone who’s paid any attention to this blog since at least November 2014 will know I’m pretty interested in the battles that might have occurred on NATO’s Northern Front during a Third World War.  Way back then I called the project:  THE SOVIET INVASION OF SCANDANAVIA - 1986

So to give my gaming life some semblance of direction I’ve tried (with numerous distractions) to make that happen – and to prove it I can happily say I’ve written Army Lists and/or built/painted forces for:

WARPAC
Soviet Naval Infantry                                                   (List and Painted Forces)
Soviet Air Assault                                                        (List and Painted Forces)
Soviet Arctic Front Motor Rifle                                   (List and Painted Forces)
Polish Motor Rifle                                                        (Painted Forces)

NATO
Royal Marines                                                               (List and Painted Forces)
Danish Army                                                                 (List and Painted Forces)
US Marine Corps                                                           (List and Forces)
Norwegian Army                                                           (List and some Forces)
Canadian Air/Sea Transportable Brigade                      (List only)
West German 6th Panzergrenadier Div                          (List and Painted Forces)


As my Danish force was ready for gaming I decided to push the boat out a little further than normal and potentially start a small campaign set in on the island of Zealand or Sjælland in Denmark.  

Why Zealand?  

As I had figures for the Danish Hjemmeværnet (Home Guard) the campaign would need to take place in Denmark.  As I didn’t have any Leopard 1A4s for my Danes (just Centurions) it couldn’t really be a LANDJUT force and pretty much had to be a LANDZEELAND force.  So to make sense – the game(s) had to be set in an imaginary invasion of Denmark, particularly the invasion of Zealand.

Before I go any further I have to mention an awesome pdf that is a must to download if you have any interest in the Soviet invasion of Scandanavia.  It’s called “The Northwestern TVD in Soviet Operational-Strategic Planning” and it is written by Phillip A Petersen.  I was planning on doing a full-blown book review at some point but never quite got around to it.  Just to be useful I've also added this pdf into my Useful Documents links box thingy on the right hand side of my blog.


This large document (book?) is pretty much gold for wargamers.  Not only does the author describe the probable invasion routes for the Soviets into Norway, Finland, Sweden and Denmark he provides loads of maps and photos of the landscape, landing beaches, airfields, coastal forts, bridges, defiles and much, much more.

He goes on to describe the weather, off-road trafficability, alternate routes, problems with logistical trails, difficult terrain etc etc.  Not only does he outline where the Soviets might have attacked, but where NATO reinforcements might have landed.

Regarding Denmark he outlines BALTAP and how it works and includes how the WARPAC forces would have attacked through Schleswig-Holstein into Jutland and the Polish lead attack on Zealand, primarily to take Copenhagen.

The book pretty much gives you a brilliant skeleton for you to build a campaign on.  This is what I have done for my Zealand Campaign.  As I don't have any Polish Paratroopers or Naval Infantry (right now) I couldn't really focus on those.  I could however run a campaign surrounding the Soviet Naval Infantry landing near Faxe in Denmark.  So that's where I'll start.

Next up - Army Lists.  In the meantime - download the pdf and have a flick through it!

Thanks

Richard


13 November 2017

Airfix Sheridan

Something a little out of left (or perhaps right) field to keep you all on your toes.  I was never really going to get any Sheridan's as they had pretty much disappeared - at least in Cavalry units - by my preferred 1986/87 timeframe.  I think the 82nd Airborne still fielded them then.

But with Battlegroup NORTHAG looking at an earlier timeframe I can see the value in having a couple of Sheridan's should I need them.

I got this at my local Wargaming Convention - MOAB - which was just over a month ago in Sydney.  It was a good decent price as well.  Please note I did not make or paint this - what you see in the pick is what I paid for.  So here it is:


Pretty damn well painted in my opinion.

Thanks for looking

Richard

05 November 2017

Back to Denmark - Final figures Part 2

OK - so for once I actually finished something when I said I would!  So without further ado I'll jump straight into the pics.  They are a bit large - so you'll have to use your imagination a bit to think that they are actually just 20mm figures.

First up my Hovea SMG armed NCO.  This is a Wartime Miniatures WW2 US Army figure with a Thompson SMG from this set:


Next up my Forward Observer Team - made up of an Elhiem Miniature (the observer) and a Wartime Miniature (the big fingered pointer) from the same previous set - so he was holding a tommy gun.  This was replaced by the scratch-built Hovea. Perhaps I should have reduced the size of his pointing finger - its a monster!


Now my Medic and casualty.  Both are Wartime Figures with the Medic coming from this set while the casualty (more obviously) comes from this set.  The only thing I did was remove the M1 Garand from the casualty as I thought it made him look more like a WW2 figure, while without the gun he could be either a standard Infantry man or a Homeguard figure.


Last up is the 60mm Light Mortar team.  Both AB Figures from this set.   As shown previously they had their small arms removed and replaced by Hovea SMGs and like all the rest, scrim was added to their helmets.


And now the final pic of the whole bunch - with the Medic/casualty in the background.


So that is that job done.  Now the only Danes I have left to do are a small, 8 man,  HJV Special Intelligence Patrol (at some point in the future) and some vehicle crew for a couple of Land Rovers.

Thanks

Richard