Showing posts with label Airfix. Show all posts

30 July 2022

Rapier SAM System

 It's been very cold lately, so any desire to go into my freezing garage and take pics has been easily squashed.  Today wasn't so bad, and I had found all the bits for this little Rapier SAM Troop, so I decided to give it a go.

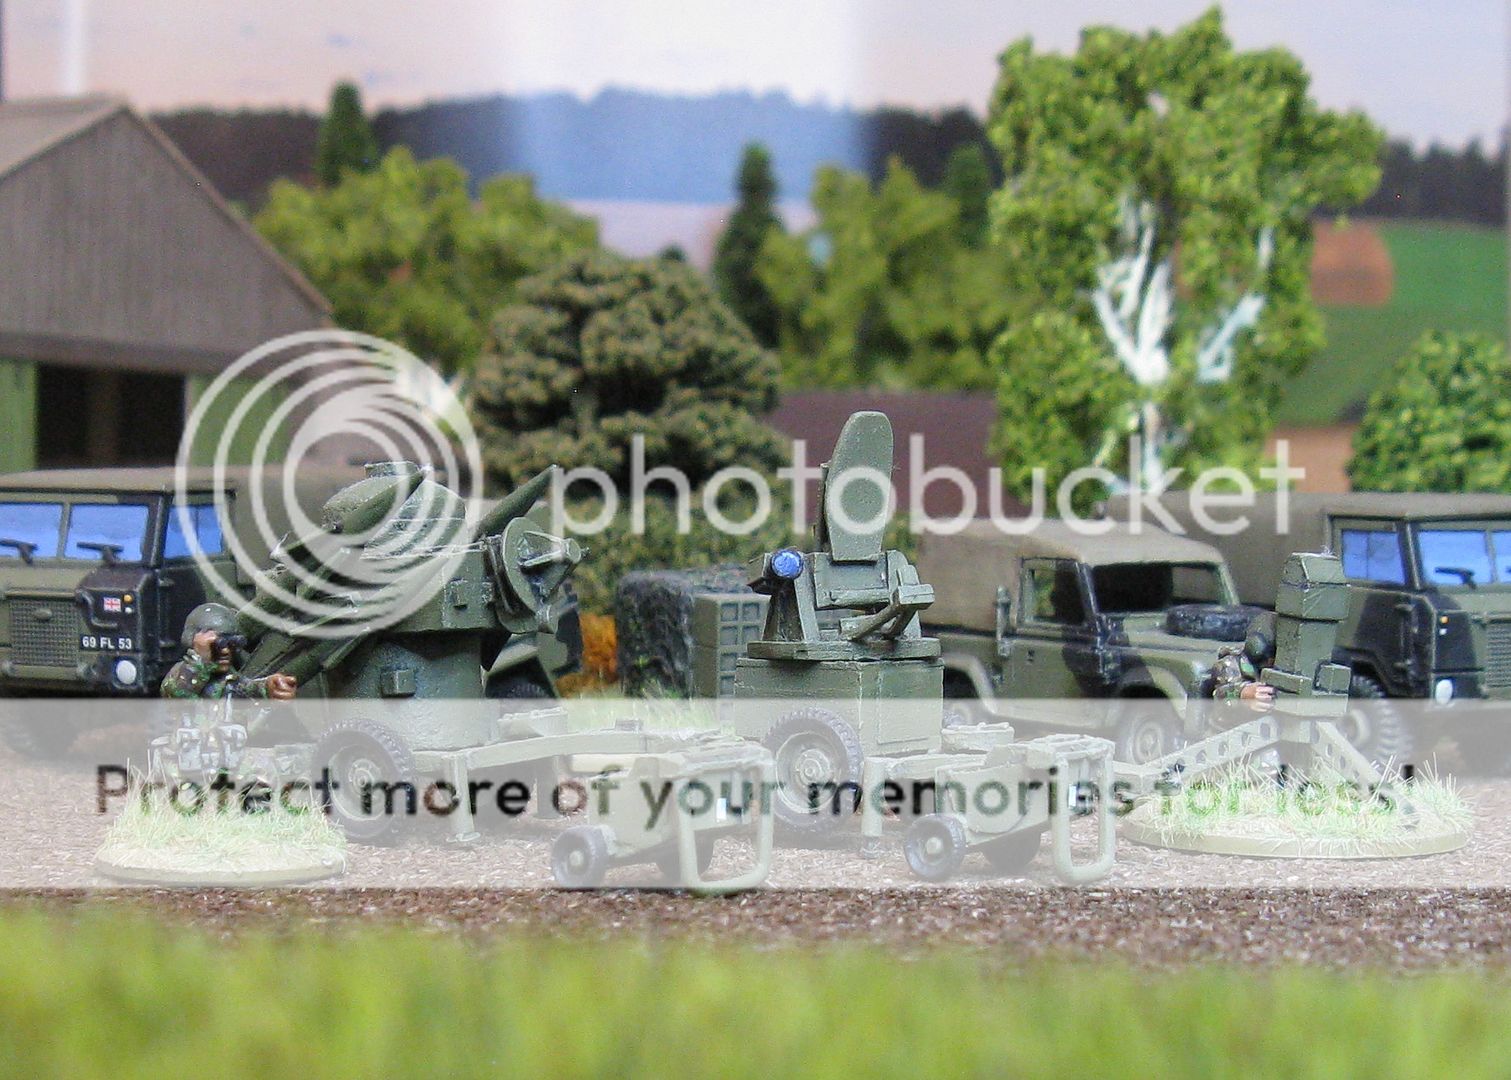
Here is the Rapier in action:

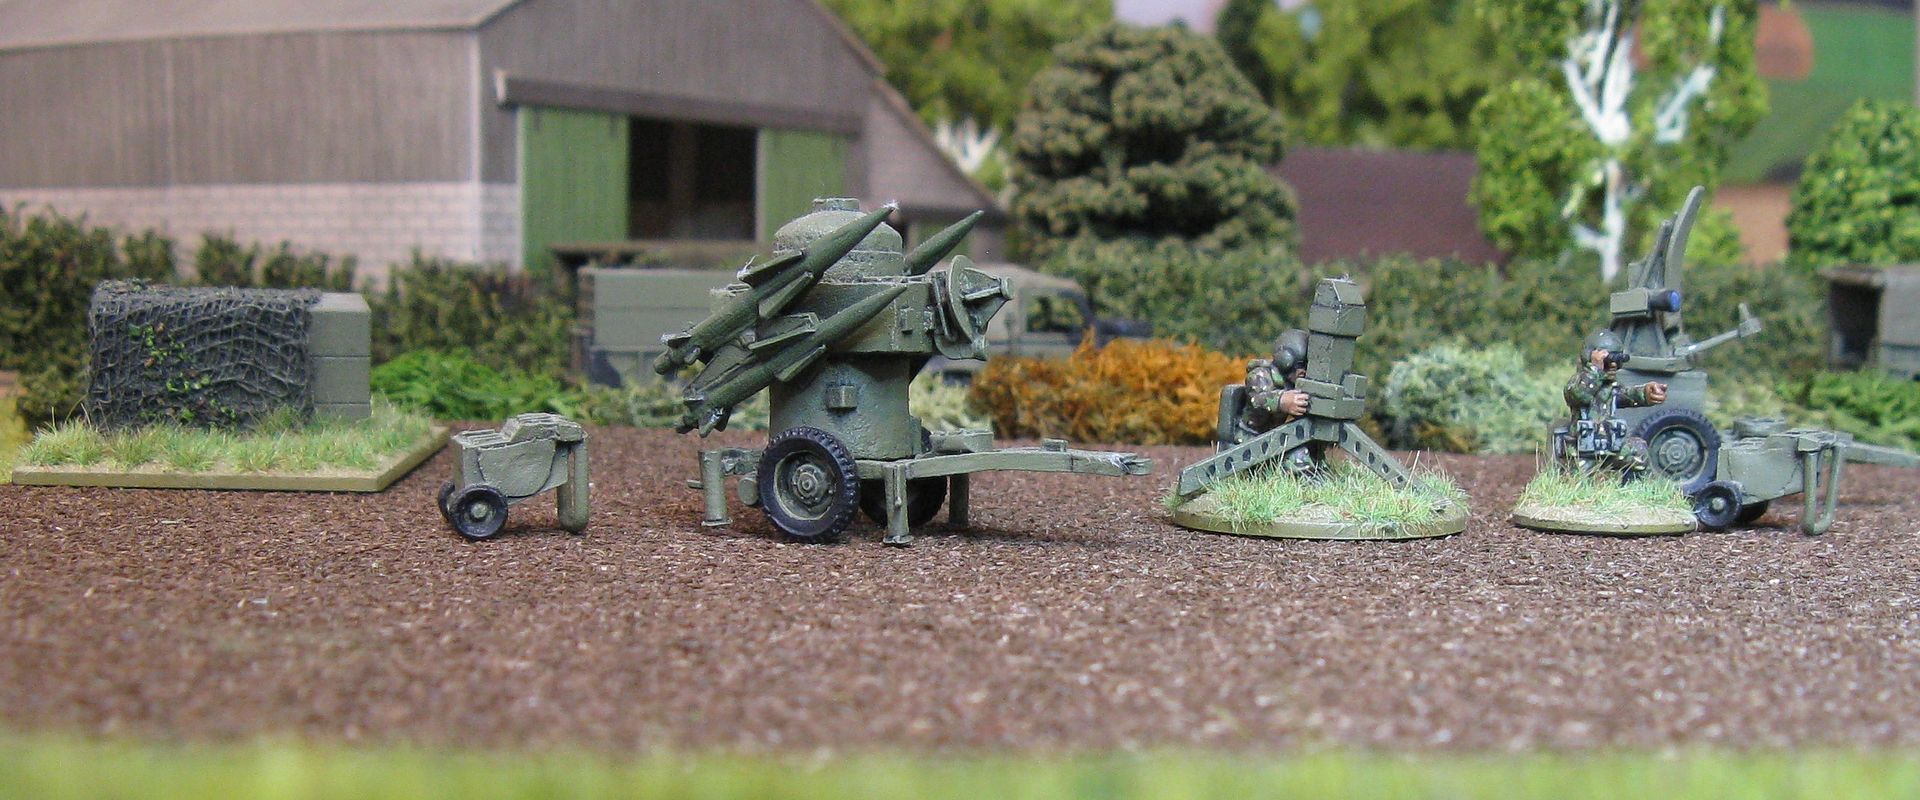
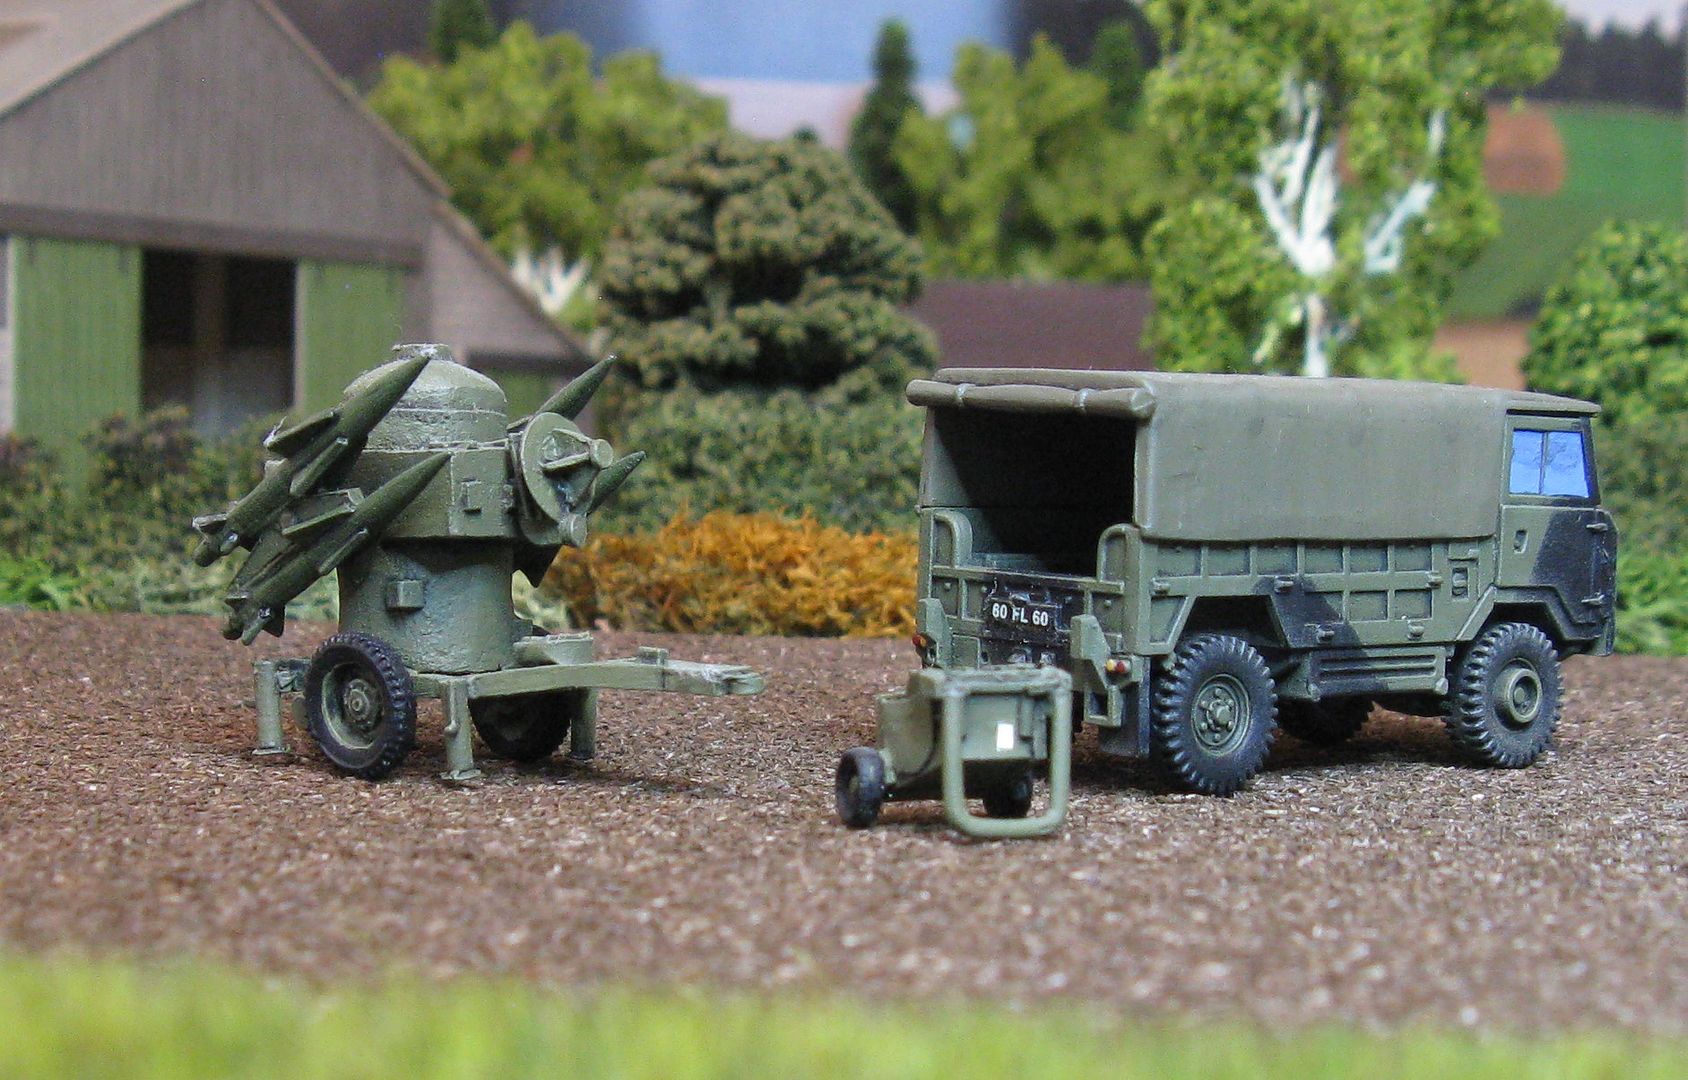
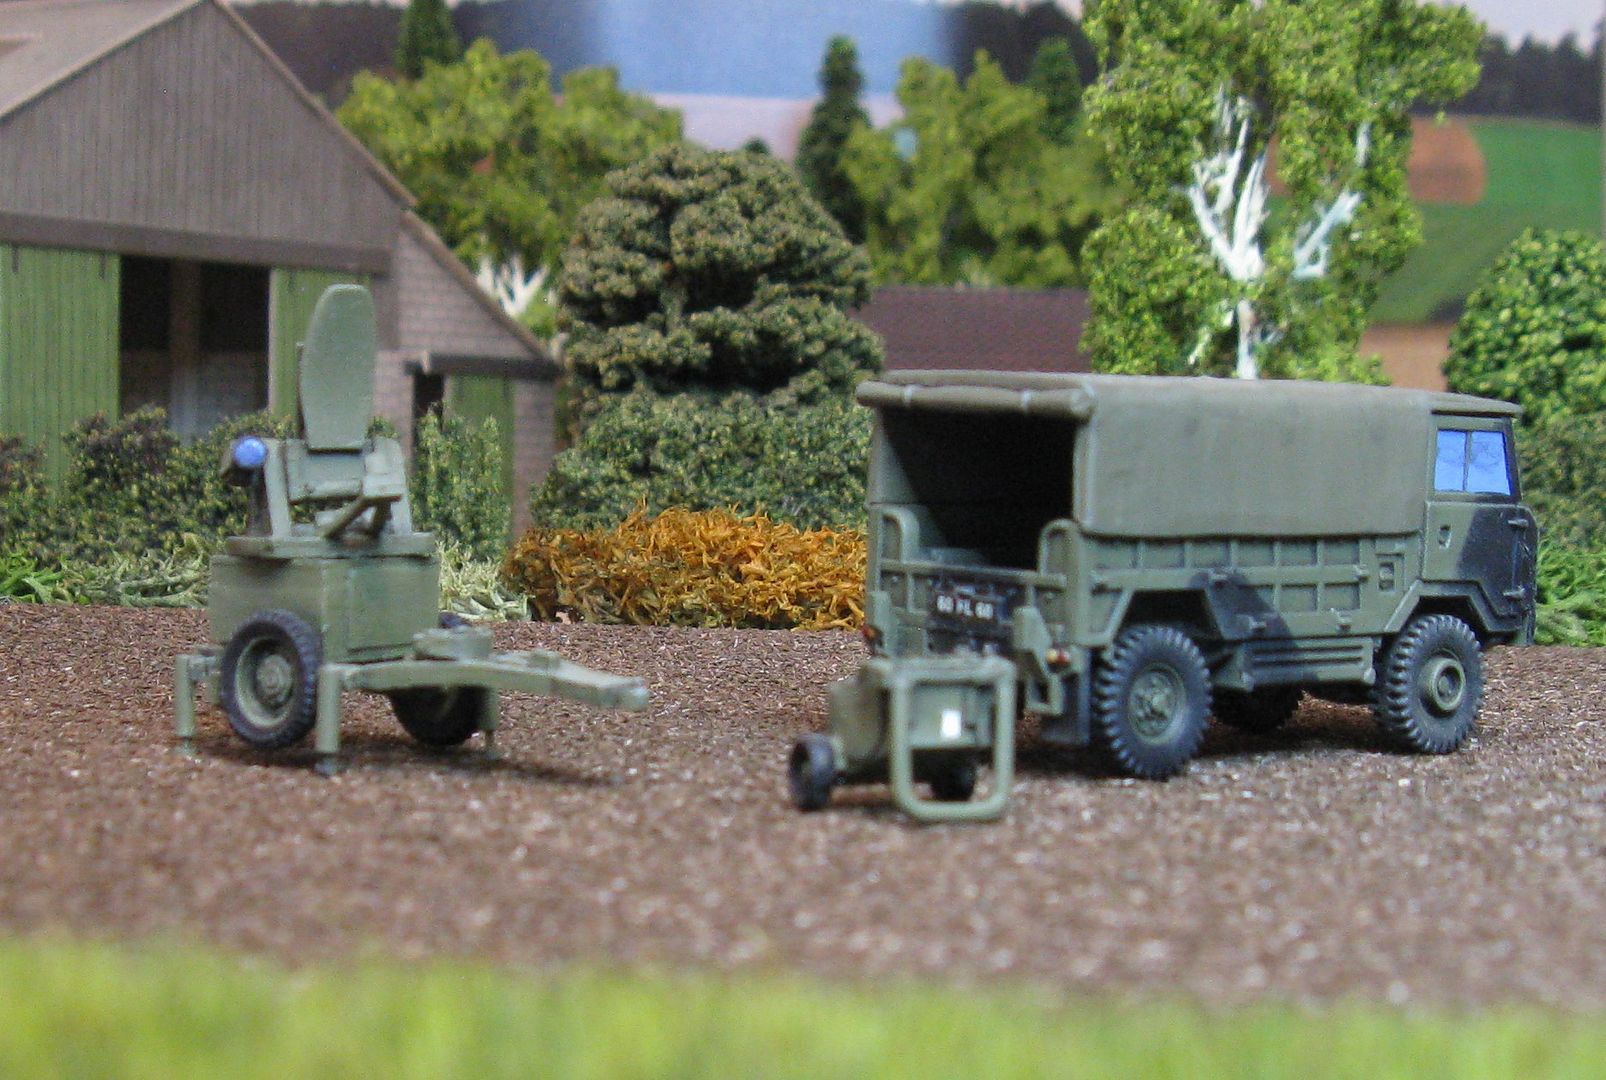
This is an S&S Models Rapier SAM.  S&S can provide you with an entire troop, emplaced or in the open (like this one), including all the vehicles etc.  Here I have used the launcher (with 4 missiles as per the 1980s) which comes with a small generator and the Blindfire Radar - which also comes with its own generator.  I have both of mine in the deployed position, but you could easily have them made up to look like they are being towed.

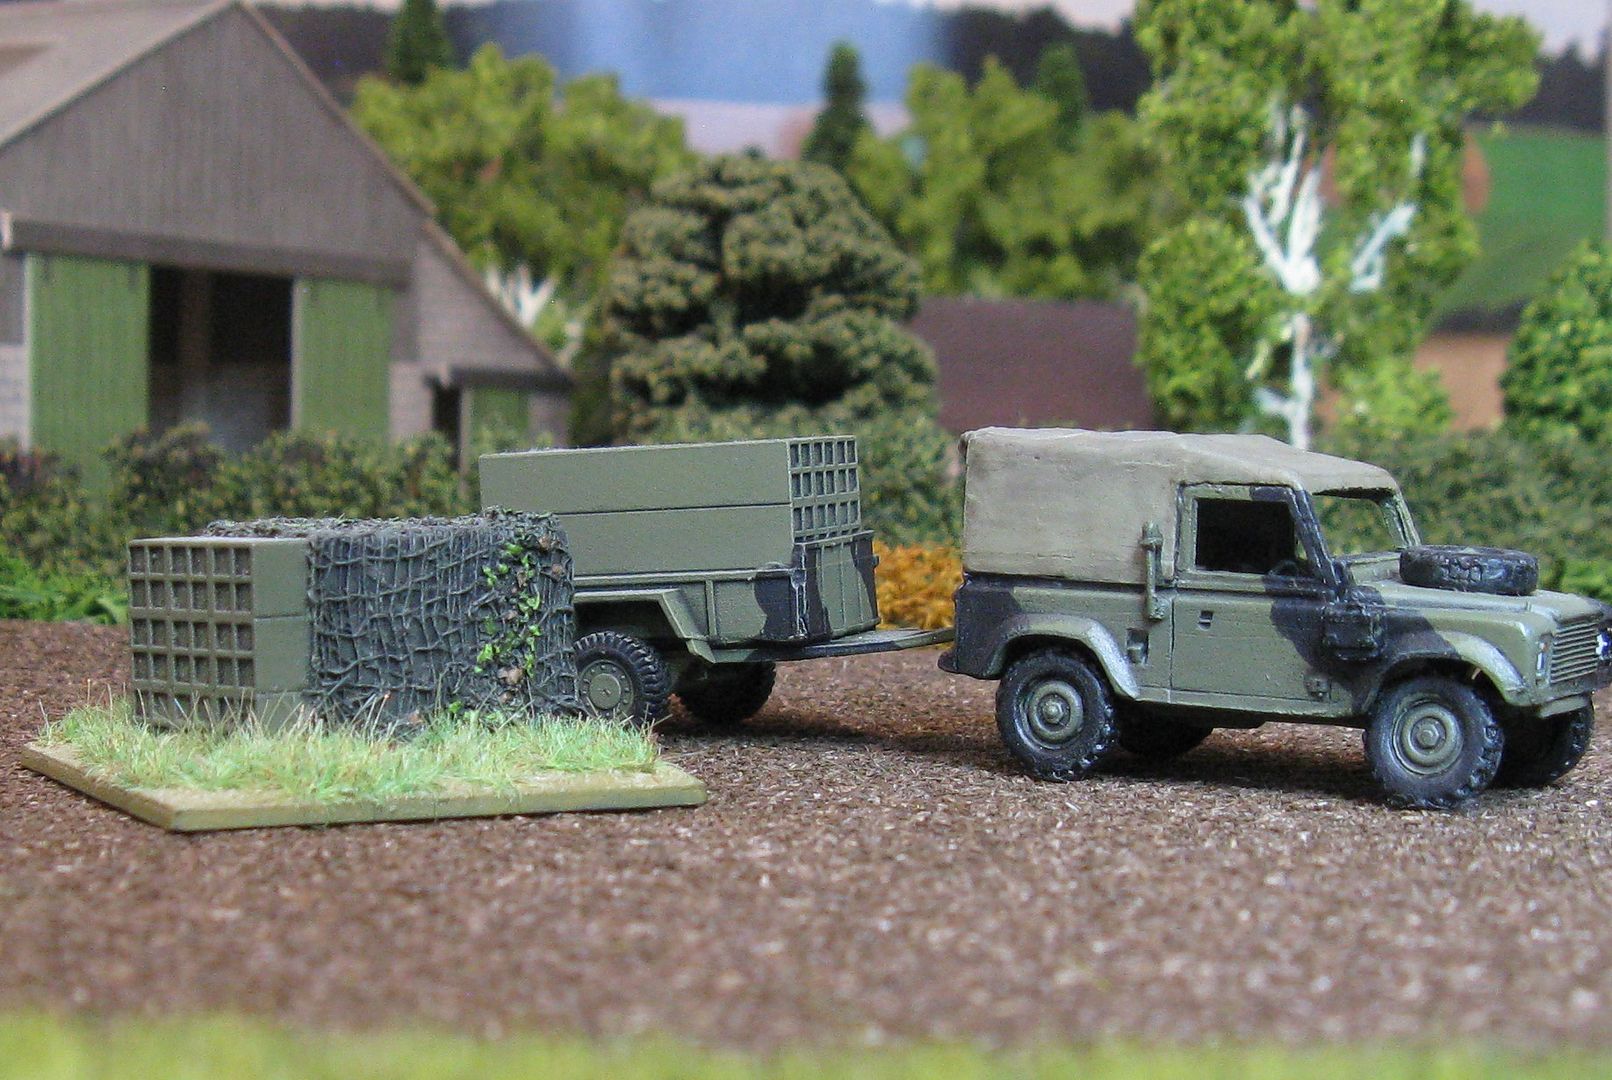
Here's a couple of close-ups, along with the vehicle that would have towed them:


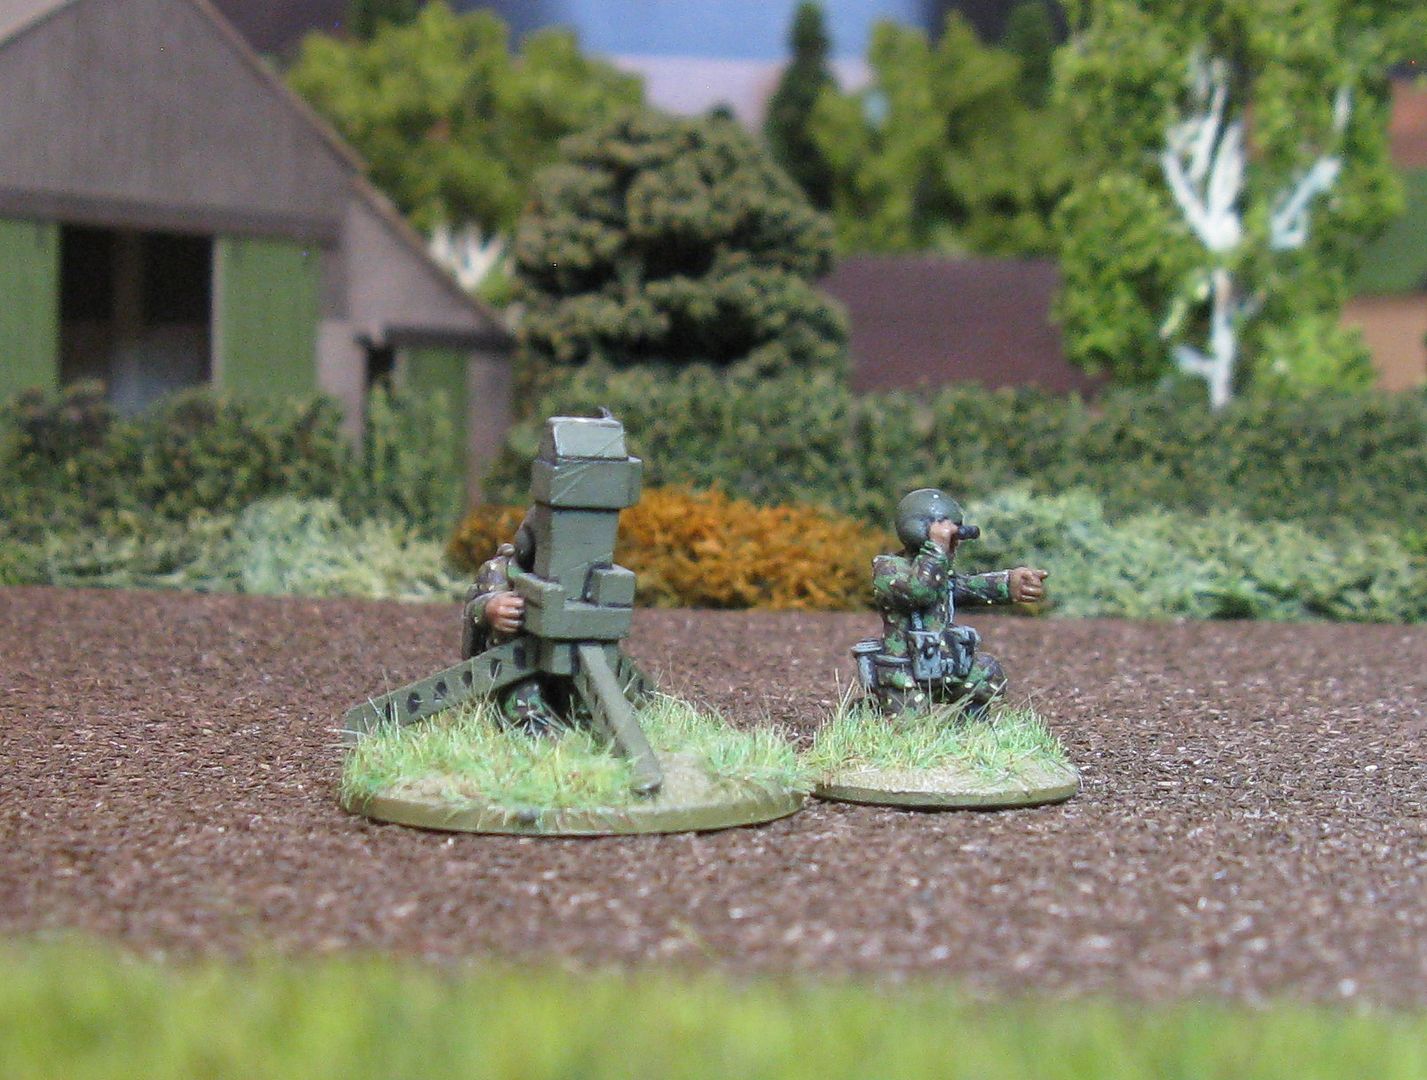
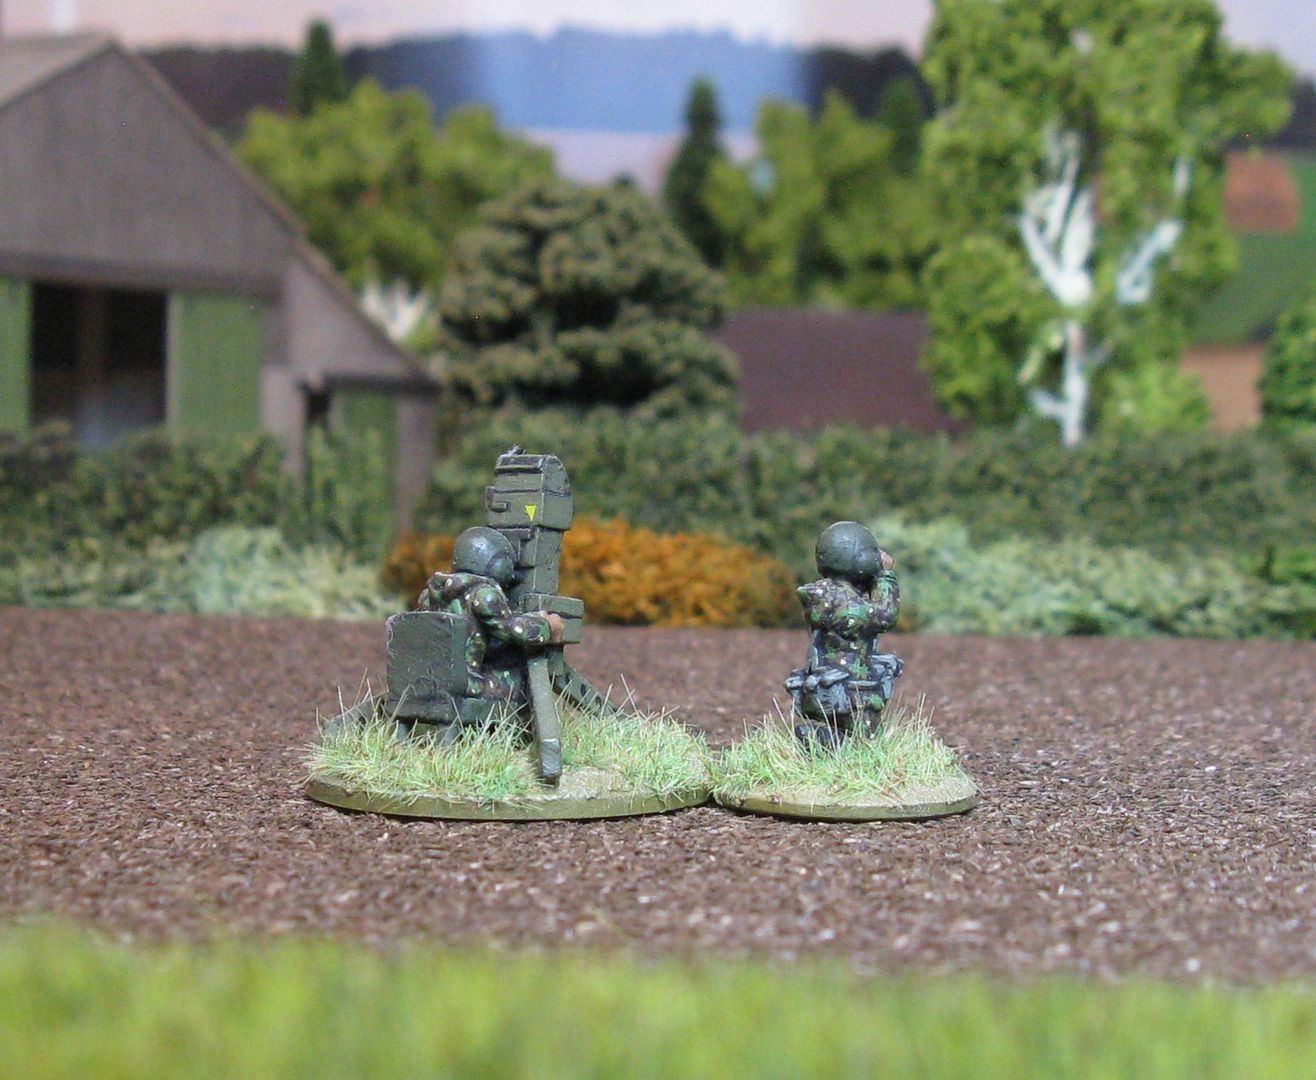
The crewed optical tracker and the chaps saying look over there! both come from Armybits and were provided to me, very kindly, by Keith Armstrong, the designer.  I fiddled with them to convert them from 15mm to 20mm, which was a bit of fun.  Here's a couple of close-ups of them:


Finally, I found a Rapier resupply trailer (here) on the Wargaming3D website designed by VJM787 - who I'll just let you know is also a lovely chap - and printed it and a couple of piles of missiles - to go in the trailer and in a neat stack on the ground covered in a cam net.  Here you go:


Here's the trailer being towed by a Land Rover FFR.

Finally the "squeeze together" group shot.


So finally I have a Towed Rapier system and a Tracked Rapier system.  My British battlefield SAM systems are complete!

Thanks for looking

Richard

13 October 2020

Canadian M113 Platoon

 Today I was able to take some photos of the finished Canadian M113 Platoon - this time just the AFVs.  I'll jump straight into the photos.


Here's M113 No. 1.  Not exactly sure how the vehicle commander ended up looking quite so relaxed in the cupola - I hope I can fix that at some point in the future.  So No. 1 is an S-Model M113, with a variety of stowage including an old Airfix bicycle and an Elhiem .30 Cal.  The commander is from AB figures.


This M113 No. 2.  No. 2 is another S-Model M113, again with a variety of stowage, an Elhiem .30 Cal and an AB figures commander.


M113 No. 3 is a little bit different.  It is an old ESCI kit I made years ago and was going to be an American M113, but I needed just one more AFV to make up the platoon so the Canadians won out.  It to has a variety of stowage from different sources, AB Figures commander and driver and 2 Elhiem troopers riding in the back with the rear hatch opened.


M1113 No. 4 is a straight forward S-Model kit with no crew.  Nothing to exciting to add here...


Finally the obligatory group shots of the whole platoon.  I haven't totally decided which is the platoon commander's vehicle, but at the moment I'm gunning for M113 No. 2.  Each is unique enough that I will be able to note which squad is in which vehicle at the start of any game - which is always handy.

I tried a couple of different things on these vehicles.  I used Vallejo gloss and matt spray-can varnish on them.  Not 100% sold to be honest - but I'm willing to give them another go.

I also used 2 MiG Productions Oilbrushers on the vehicles.  I only have two colours - Dusty Earth (a light tan colour) and Starship Filth (a grey colour) and I tried to give the vehicles a dusty, grimy streaky look.  I'd be interested in any feedback - as I think I may have overdone it a little.  Who knows...

Anyway - I'm very happy to have these finished and to be able to move onto something else.  This will be it for the Canadians for a little while, as I wait for my 3D Printer to arrive.  Then I will jump back into this particular project with bells on!

Thanks for looking

Richard 

11 July 2020

Progressing my Norwegian project

Over the last couple of years, and especially in the last few months, I've been purchasing the final pieces for my Norwegian project that has been discussed previously here. 

One of the primary reasons I had not pushed my Norwegian project was the lack of a NM135 model.  Recently I've discovered a couple.  One a 3D print file and the other from Hobbyden.  Brian Walsh there has recently produced a NM135, which is a primary component of a 1986 Norwegian  mechanised infantry force.  Hopefully I'll have 4 NM135s coming in the next little while. 

As a result of some commission work I did recently for a friend, I have also been able to get enough troops for a Norwegian platoon, plus a few others. I won't be showing them until they are painted though.

I have a bunch of diecast Leopard 1s and M48A5s so that's the tanks taken care of, with a bit of tinkering.

So what I was missing for my Norwegian's was primarily aircraft.  This has now been resolved:


Obviously the first thing you need is a F-16.  What better than this specific Norwegian F-16A+ by Fujimi.


Next I needed a F-5A Freedom Fighter.  These are relatively hard to find - everywhere you look you can find F-5E which are just not right.  Although this is Hasegawa kit comes with Dutch and Canadian decals, I'll sort out something to make it Norwegian.


The final aircraft I needed was one of these.  Talk about rare as hen's teeth.  Just had to have one of these for my Aerial Forward Observer.  No choppers here pal.  This is an original 1970's Airfix kit.  Only problem is now I feel like I'm being barbaric if I open it up and make it... 

Anyway - that's it for today.  Next update will be another project, where I've actually made some real progress, not just bought stuff.

Thanks

Richard

12 July 2017

Danish Battlegroup

OK - back to 20mm, and back to the Danes for the last time for a while I think.

When finishing the Centurions I thought it might be nice to take a couple of photos of all the Danish armour finished thus far.  So without further ado - here we go:


Front Row Left to Right: 3 x S-Model M113 forming a Danish Mechanised Platoon, and a S-Model conversion to a M150 TOW Carrier

Back Row Left to Right: 2 x Airfix and 1 x Britannia Centurion forming a Tank Platoon, 2 x Warmaster M41 Walker Bulldog tanks to field as individual light recon tanks.

I've built an Italeri M106 to add some mortar support to my force, and will also be adding a couple of Unimog trucks, which can play a couple of roles.  One day I'd like to add a platoon of Leopard 1A4s as well - maybe when PSC does the Leopard 1 in 20mm.

Anyway - it's likely you'll see West Germans next...

Thanks

Richard

04 July 2017

Danish Centurion Platoon

OK - so there are some benefits of getting sick and having to spend a couple of days at home.  For one, despite the remnants of a killer headache, I was able to spend a bit of time and finish off the Centurion platoon.

So - let's get straight into it then:

Centurion 1


Centurion 2 (Platoon Commander)


Centurion 3


So Centurion 1 and 2 are Airfix, while Centurion 3 is by Britannia.  It appears that I completely forgot to green stuff the Britannia tank, which I'm both annoyed at and thankful for.  Annoyed that I forgot to do it, and thankful I didn't, coz I'd still be doing it months later!

All the tanks have AB Figures crew and S&S Centurion smoke dischargers.  Centurion 1 also has an S&S turret bustle.  The LLTV sights were scratch built by me, along with the turret bustle on Centurion 2 and some other bits and pieces on the two Airfix Centurions.  I added all the camo nets of course.

Finally some shots of the Platoon together:


02 July 2017

Danish Centurions - Work-In-Progress - Part 5

Well my plan to have these finished about a week ago got interrupted by real life, Battlegroup: NORTHAG and plain old end-of-financial-year exhaustion.  So things have not progressed as quickly as I hoped, but over the weekend I made some progress.


First thing you'll notice is that I'm back to 3 tanks.  I followed the advice of Rolf from a week or two back, and covered the tacky tracks with undiluted PVA glue (and then threw away the brush!).  I left it to dry for 24 hours and lo and behold, it was no longer sticky!  Yah!  So the Centurion on the left is the one I put to one side previously, but is now returned to the fold.

The central tank is the Britannia one.  It comes with the driver hatch open and crew figure molded in as part of the resin tank.  The driver was missing most of his head so I loped it off long ago.  I decided to replaced it with a AB Figures head (to match the rest of the crew), but after chopping up the AB figure and cleaning up the head it just didn't look right.  So I decided that I needed to clean out the whole driver and put in a new Britannia 1/2 figure.  So I did that, then decided he would look out of place and decided to do another AB half figure.

So long story short, once I stopped dithering I started work on all the crew figures, which should be ready for the next photo.  Before I add them I have to decide on decals, then do the weathering, and then add the crew.

So maybe next week... who knows... obviously not me!

Thanks

Richard

21 June 2017

Danish Centurions - Work-In-Progress - Part 4

Another quick update as we are closing in on the finish line with these 2 Centurions.  Last night I was able to get a fair bit of work done (not that you can really tell in the photos...) with several dry-brush coats over the light green:


Then I had a little time left so started to paint the first colour on the cam nets on both, and the ammo cans and Jerry cans on the Britannia Centurion.


So hopefully these two will be finished over the weekend and ten I just have to deal with the "Tacky Tracked Beast from Hell" to finish off the platoon.

Thanks

Richard

20 June 2017

Danish Centurions - Work-In-Progress - Part 3

Very quick update today.  Last night I black-lined 2 of the Centurions and took a quick pic:


I was trying to have these finished by Friday, but very much doubt that will be the case!

Anyhow - that's it for now.

Richard

19 June 2017

Danish Centurions - Work-In-Progress - Part 2

Back in May 2015 I posted Part One of a Work-In-Progress for my Danish Centurions.  At the time I had made two Airfix Centurions and needed another one to make up a Platoon.  Finding a third Airfix one proved essentially impossible, so I got a Britannia Centurion instead.

I needed to adjust the Britannia Centurion slightly as it is representing an Aussie Cent in Vietnam and has two spare wheels on the front glacis.  They were carefully removed and some camo netting placed there to cover any mistakes.  The head of the driver was severely miscast and had to be loped off!  Poor chap.  Apart from that I added some S&S Centurion smoke dischargers and filled in as many holes as I could before it drove me insane.  (Still missed plenty).

I sprayed all 3 of them black a month ago or so and that's when I hit my first major (and still not resolved) problem.  One Airfix Centurion took the spray perfectly, while the tracks on the second one turned extremely tacky and went glossy and remain so to this day.  It makes it really tough to handle the tank and I'm not 100% sure what to do at this point.  So after this WIP I'll concentrate on finishing the other 2 and then turn my attention to the one that's not playing nice.

Anyway - so rather than taking my normal route of masking off some black areas and spraying, I decided to simply brush paint on the light green cam colour.  Here is how they turned out:


So that's looking OK - ready of the next few steps...  You can see the Centurion in the middle is sitting on an old Itunes card.  I didn't want it sticking to my desk and if you look closely you can see track marks on the card!  It leaves marks on you finger when you pick it up wrong as well.

So let's ignore that one for now and over the next few days, I hope we'll see progress in the other two.

Onwards and upwards

Richard

26 November 2016

New Airfix Harrier GR.3

I've just finished taking a bunch of photos so I thought I would post a few now rather than wait until tomorrow.

So ages and ages ago when I first started this blog I posted up first one and then another  old Airfix Harrier GR.3s - on the ground.  I knew one day I'd need a flying one for some air support, and now I've finally finished it.

Truth be told, I stole the two laser-guided bombs from one of the old Harrier's (previously stolen from a Buccaneer kit) and stuck them on this Harrier - just for something a bit 'cool'.  The only downside of the kit, from memory, is the only offensive armament is a couple of AIM-9L sidewinder AAM.  I needed something to give it a more CAS feeling!

So here it is:


The last photo is a little dodgy - I was trying to show the ordnance.

Anyway - that's another job done.  Now I just need to finish that RAF Phantom and one day add a Tornado and a Hawk to my asset list.

Thanks for looking

Richard

09 November 2016

Airfix 105mm Light Guns - In Towed Configuration

I wasn't planning on posting this today - rather I was going to post some W-I-P shots of a new mini-project - but I thought better of it and decided to post up one of the "final" components of my Royal Marine Commandos in Norway project.


I have no real idea why I wanted to do this particular part of the project - I guess because I could do it, and a small part of my thinks it's kind of cool.  How sad does that make me!


I've previously shown in a couple of posts the Airfix 105mm L118 Light Field Guns in their firing position with Elhiem crew and then together with the Airfix 1 Tonne FC Truck GS Body tow


Anyway - here is what I'm talking about:


This is obviously the gun in its towed position.


I have done this before with WW2 games where I have a towed variant and a deployed variant of the same gun.  Normally only anti-tank guns as in most of my games the artillery sets up right on the rear table edge.  As it comes onto the table I use the tow (and the towed gun) until I get to the point where I want to deploy the gun.  Then I simply remove the towed gun and replace it with the deployed gun and crew.


Works for me anyway...


So - there it is.  The last ground component for my Royal Marines (which also has other uses for some of the light troops reinforcing BAOR or Denmark)


Thanks for looking


Richard