Now I know this doesn’t fit in with my standard Cold War timeframe – but this news is just to sad for any long term Harrier Jump Jet lover to not comment on.
I was at high school in the 1980s and interested in all things military, so was probably heavily influenced by the success of the Harriers involved in the Falklands War. About this time we had a teacher who loved planes and showed us instructional movies on the Harrier that I found simply fascinating. I one point I was already to join the Royal Australian Navy because we were going to buy the HMS Invincible and I want to fly Sea Harriers!
Well, yesterday (my time) was the last flight of the Harrier in service with the RAF and Royal Navy. I don’t live in the UK so am a little distant from the whole argument as to why this is happening – years before the Joint Strike Fighter comes into service – and when I read comments like the following from the ABC website you have to wonder:
“Despite objections from the army, the Royal Navy and the Royal Air Force (RAF), the decommissioning of the last 16 jets went ahead anyway.
The British government claims the plane's retirement is not just about cost cutting, but many believe there is no sound military reason for their mothballing.”
So – in memory of a revolutionary and awesome plane – here’s a few more Harrier clips:
In Oz we’ve just decommissioned our F-111s so it sad all round
So have fun
Richard
19 December 2010
12 December 2010
Able Archer - 1983
About a year ago or so SBS TV in Australia showed a brilliant documentary about the Cold War - in particular a NATO command post exercise called "Able Archer" which inadvertantly almost lead to the Cold War.
This is well worth watching - if only to get a glimpse into the Soviet mind-set and the paranoia at the time amongst the Kremlin leadership with regard to the US Build up of nuclear forces in the early 1980's. There is also the eighties music playing through the doco!
So please - if you have the time - watch this doco
Have fun
Richard
30 November 2010
Book Review: Red Thrust
The full title of the book is - Red Thrust: Attack on the Central Front, Soviet Tactics and Capabilities in the 1990s – Steven J. Zaloga
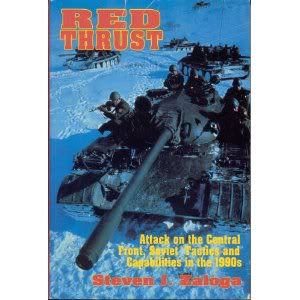
In my never ending quest for good quality books on a Cold War turned hot, I recently acquired a copy of Red Thrust: Attack on the Central Front, Soviet Tactics and Capabilities in the 1990s by Steven Zaloga. At first I was a little worried that the book would be perhaps a little too modern – as my standard timeframe for the Cold War is the mid to late 1980’s, but upon reading it, Red Thrust more than suited my purposes.
Basic Premise
Written in 1989, before the fall of the Berlin Wall and the general implosion of the Warsaw Pact and the Soviet Union, Zaloga creates an interesting and extremely plausible scenario where a moment of general slackness during a fire of a Soviet base in East Germany leads to an ammunition explosion that kills a large number of civilians (including children).
This simple incident leads to a series of national protests and even some terrorist incidents directed at Soviet troops. Martial law is declared and things go from bad to worse when Soviet motor rifle troops are thrown into police actions with no police training and AKs instead of riot gear.
The East Germany army – considered by NATO and the Soviets to be the most reliable is not happy with the way the Soviets are dealing with their citizens and at times help the rioters. It reaches a point in Berlin where an East German army unit actively helps civilians cross into West Berlin and then engage in a battle with Soviet forces. Inevitably fighting spreads and West German army and police units also engage Soviet forces when civilians are targeted.
Once the fighting cools down, the Soviets start a new blockade of Berlin. The West German attempt to break the air blockade and a number of air battles occur and SAM sites both in East and est Germany are targeted, including US sites. Polish and Czech nationalists start to seize on the Soviets inability to deal with East Germany by starting their own anti-soviet actions.
All this basically leads the Soviets to decide to take out West Germany before NATO can get ready to maybe drive on East Germany to relieve Berlin. The Soviets believe they can reach the Rhine in 7 days – well before the US can effectively reinforce NATO.
Remainder of the Book
This premise sets up the rest of the book. The focus shifts from the strategic view to events in Bavaria where The Southwestern front attacks out of Czechoslavakia. Each chapter (including the introduction which outlines the plans and events that I briefly described above) focuses on a particularly element of the Soviet military – firstly in a fictional scenario, then an analysis of what just happened, providing background, explanations and comparisons.
The chapters are as follows:
1. Plan Buran: The Invasion of Western Europe
2. Motor Rifle Attack: The skirmish in Hofzell Woods
3. Tank Attack: The Charge at Presbach
4. Spetsnaz in Action: Scouting the Danube Bridgehead
5. Attack Helicopters: The Air Assault at Irlbach
6. Red Artillery: The God of War
7. Fighter Combat: The Battle for the Airfields
8. Chemical Warfare: Gas Attack at Geiselhoring.
I very much enjoyed reading this excellent book. The fictional scenarios at the beginning of each chapter are very well written, and transfer information in an engaging manner. Zaloga can write good fiction, including gritty action scenes, not just the facts and figures he’s probably more well known for.
The book is solely written from the Soviet perspective and vehicles and weapons systems are called by their Soviet names and nicknames rather than NATO titles. It includes things like why the Soviet’s tanks are smaller than their NATO counterparts, what its like to go into combat in a BMP-2, the difficulties involved in air assaults, Soviet NBC suits, a good review of the thinking behind the Hind helicopter etc.
Although set in the 1990s, I’d say that 99.9% of the information is applicable to the late 80’s and the stuff that probably isn’t applicable is more likely to do with NATO advances such as precision guided munitions, SADARM and DPICM munitions.
All-in-all, if you’re interested in this stuff at all (and by stuff I mean Cold War Hot Hot Hot stuff), I think you’d be pretty happy with this book and I heartily recommend it to you.
Have fun
Richard
24 November 2010
Cold War Hot AAR - Part 3
WARPAC forces continued to steam roller up the table towards the FEBA

Mainly T-72s in this case
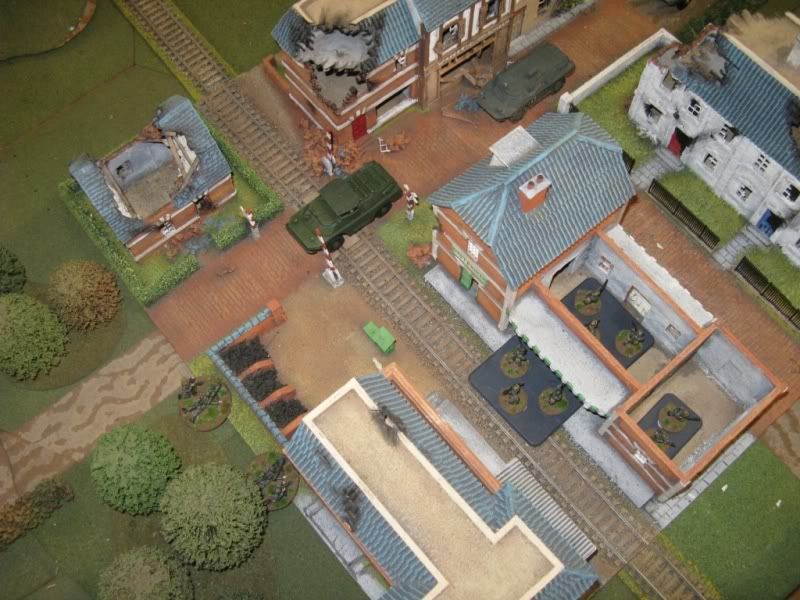
The first NATO reinforcements arrive and take up position near the bridge.
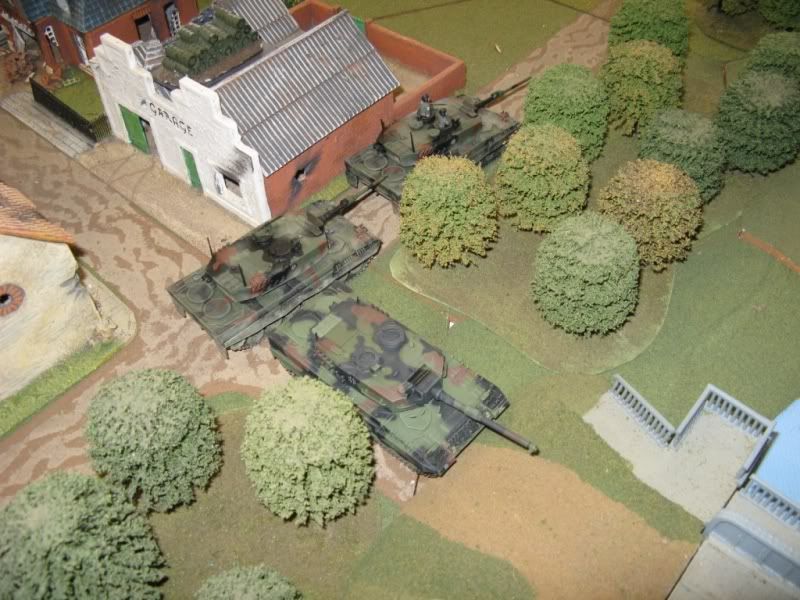
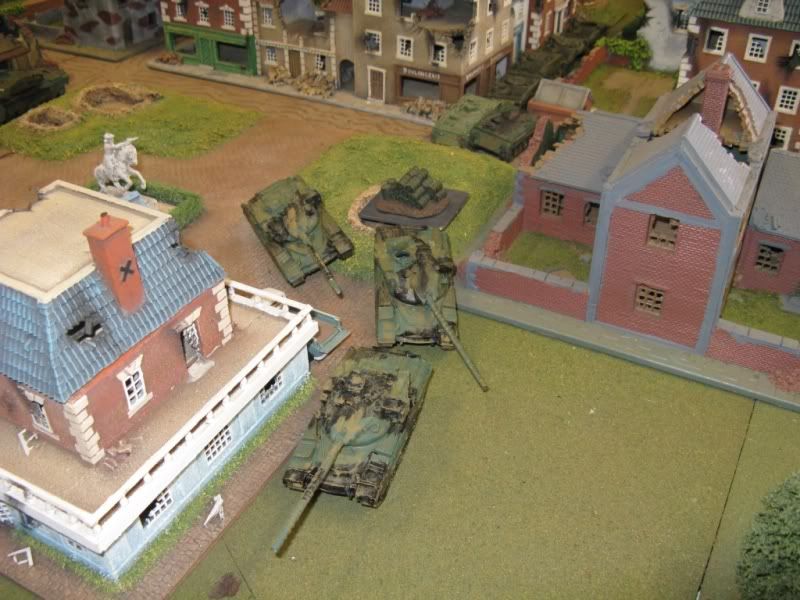
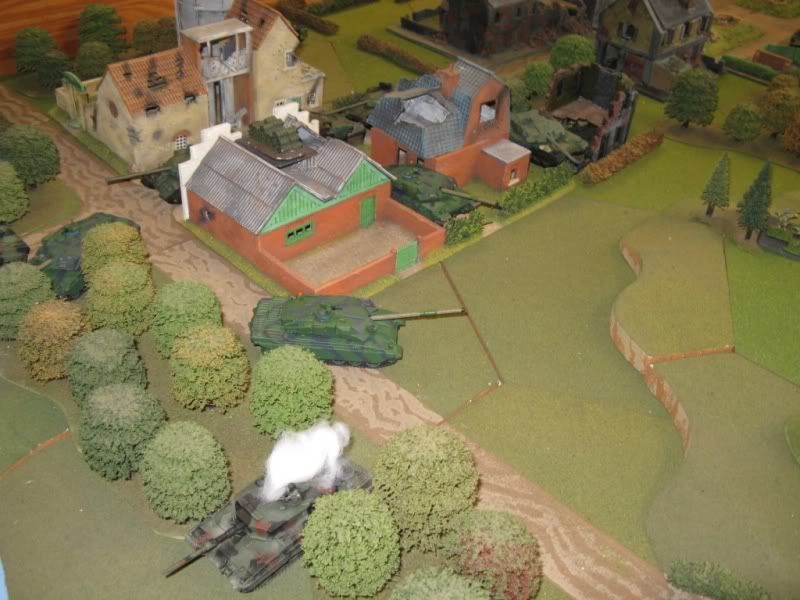
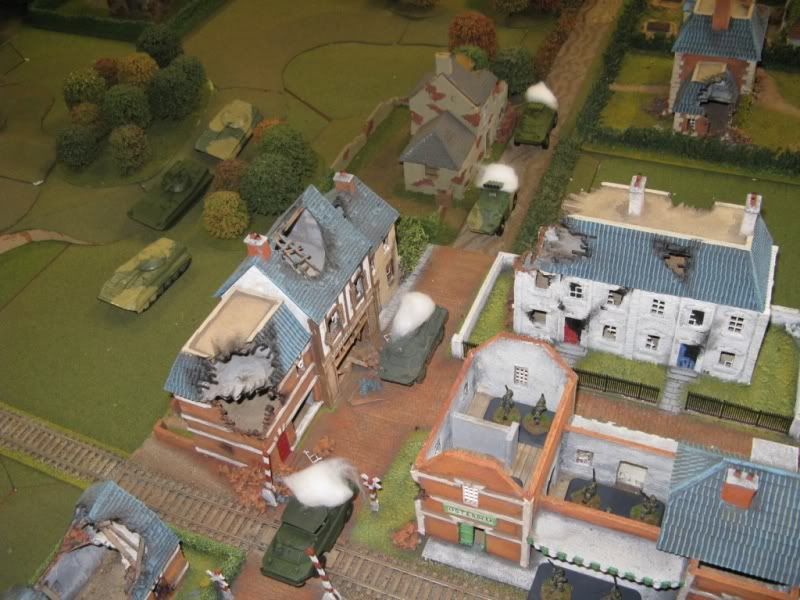
A convoy of Challengers creeps down the narrow streets
Soviet tanks continue to advance and through a couple of rounds of good shooting and some artillery strikes took out the Panzer-Grenadiers in the small village. The Motorised Rifle Troops who were coming up in their BMPs and dismounted to take on the Pzr-Gren, then had to get back in their BMPs - all for nothing.
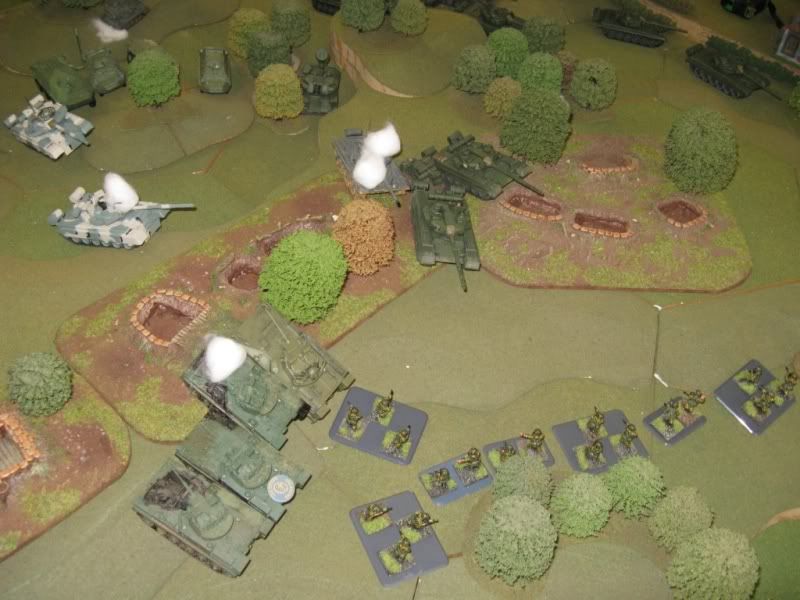
T-80s take over the positions previously held by the Scimitars
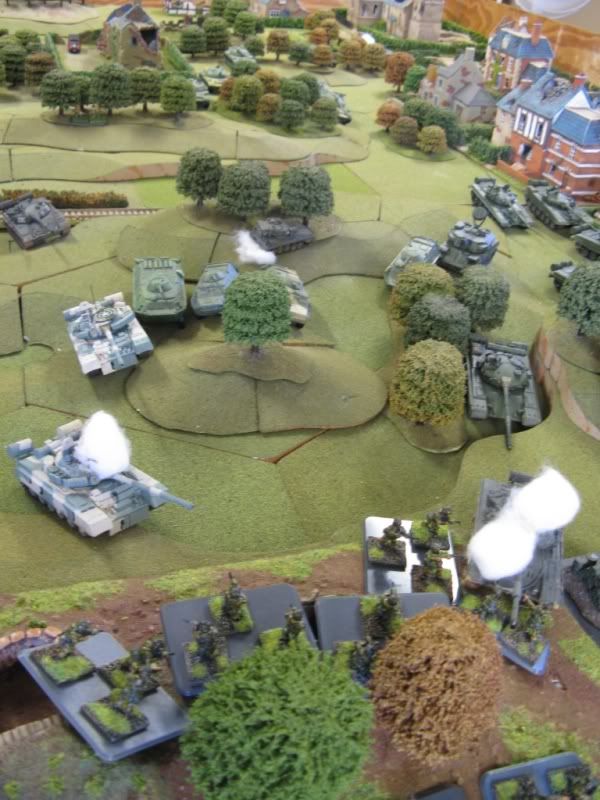
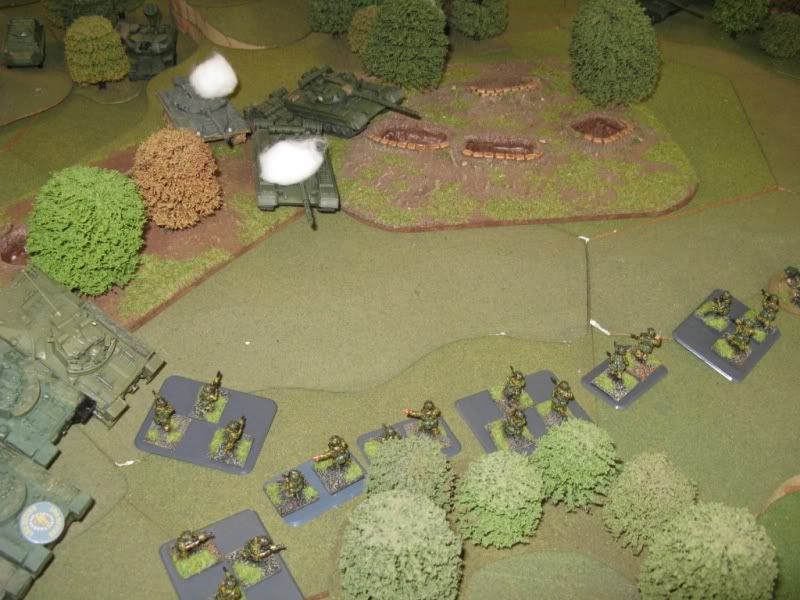
British Infantry take up their forward positions - ready for the T-80s...
The main unit of T-72s is getting nearer to the bridge. One T-72 is successfully sniped by a Leopard on the other side of the river.
Behind the river a new menace arrives:
A air assault takes place - a Czech (don't ask) Hip lands.
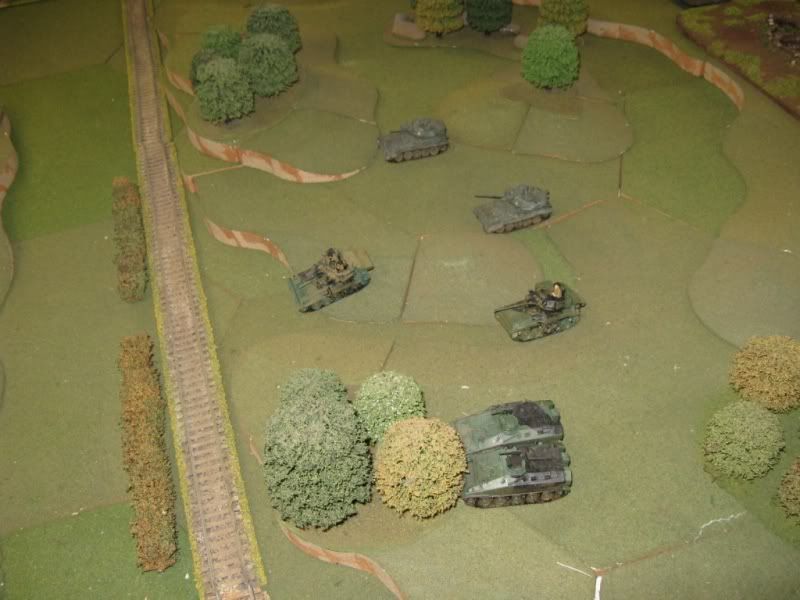
The VDV assault troops take position around the edge of the Landing Zone, seizing one of the games objectives.
The second wave, whittled down by the Gepard, arrives and disgorges the BMDs
British Chieftains race towards the landing zone, backed up by infantry in FV432 in the distance.
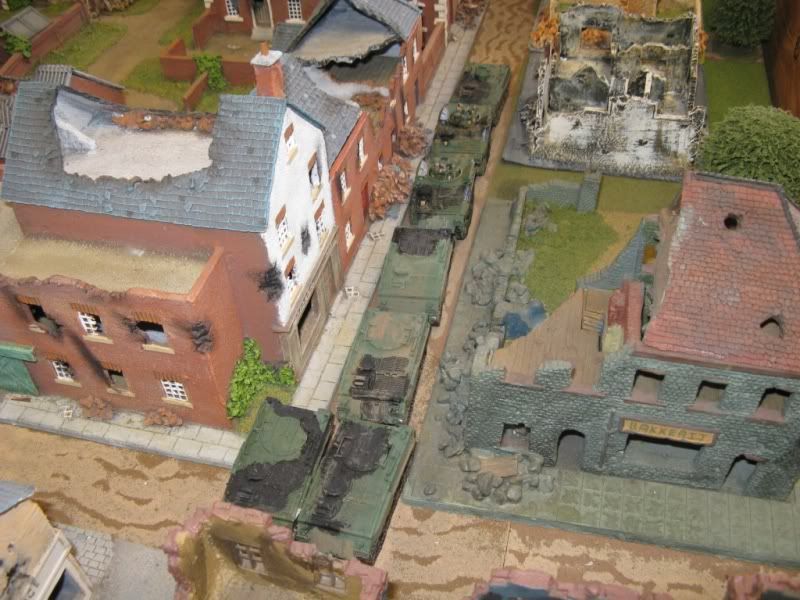
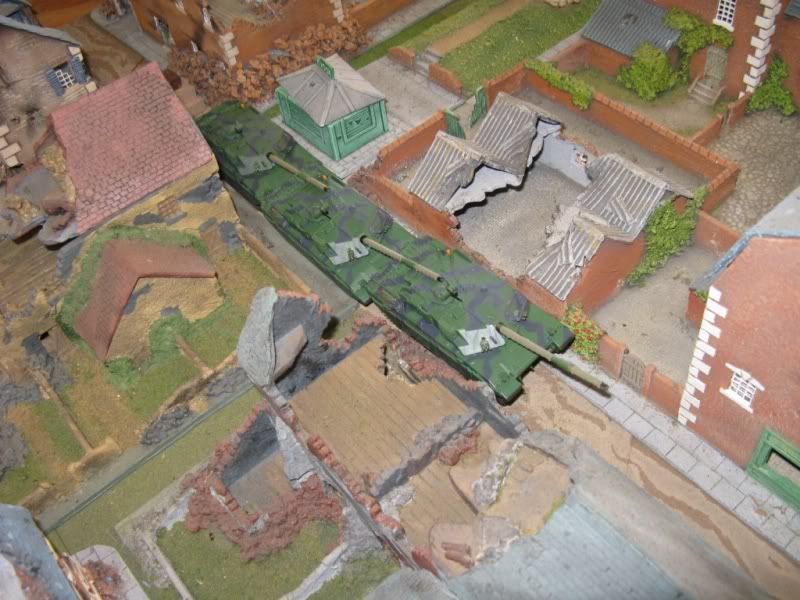
A close up of the British Infantry mounted in FV432 drive through the small streets of the town
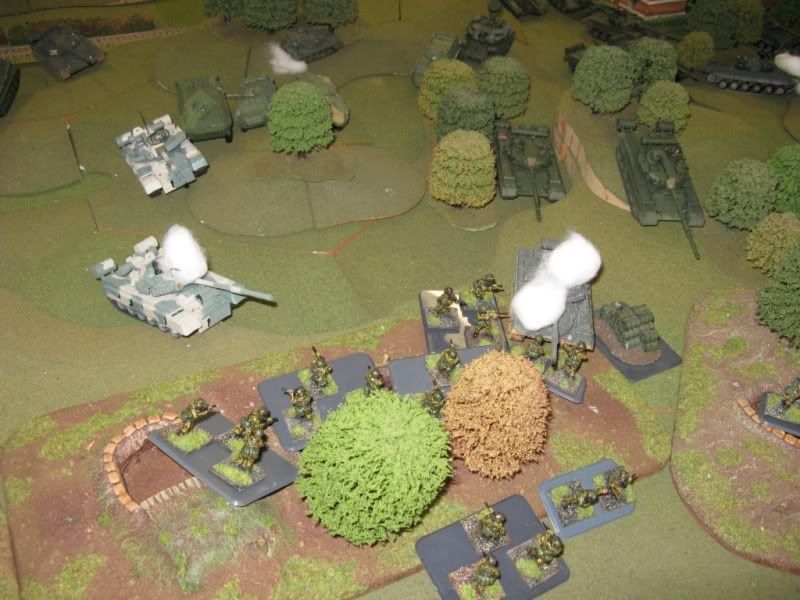
T-80s drive on the British troops clinging to the forward defensive line in an attempt to assault them out of their positions - but end up being driven off themselves through massed LAW-80 fire.
Eventually though, the situation turned and the infantry were pushed out and the Soviets claimed the FEBA objective.
Back at the LZ
Things were not looking so good for the VDV. The AT-5 missiles on the BMDs proved incapable of defeating the front Stillbrew armour of the Chieftains which had no problem knocking out 3 of the 4 BMDs.
Not impressed with the deaths of their mates, a couple of VDV RPG teams went a'huntin'. In one turn of massed RPG fire they took out the Gepard and most impressively, knocked out a Leopard 2 from behind - thus becoming Heroes of the Soviet Union.
The awards however would turn out to be posthumous when a number of Challengers turned up and machine-guned the VDV in the open
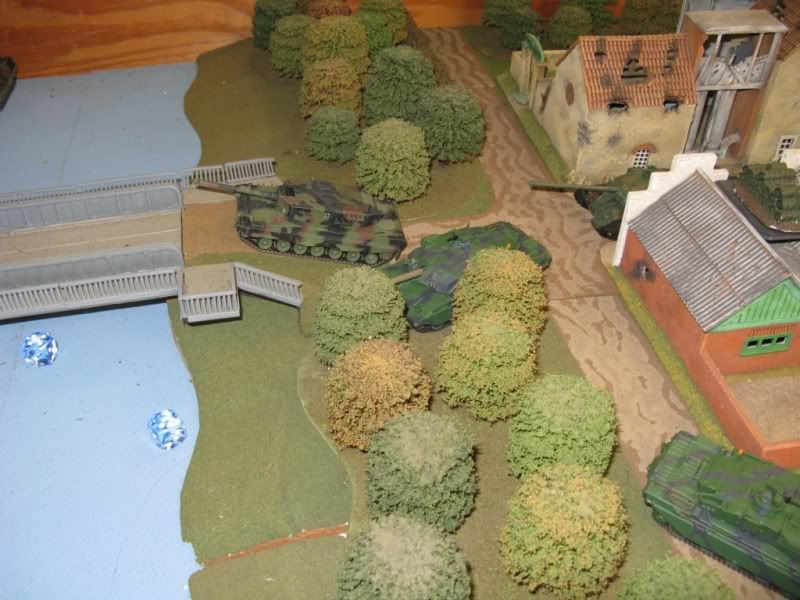
NATO tanks consolidate around the main bridge.
We decided to call the game about there. Basically the Soviets had taken the FEBA, and would shortly likely mow down the remaining British troops and Warriors there. However, on the other side of the river, the VDV were really up against it and, although they may have made life difficult for the NATO troops who were just arriving, its likely they would not have survived the encounter for very long.
The big NATO tanks would have made it near impossible for the Soviet tanks to cross the river, thus the game was deadlocked with victory - in our eyes going to NATO.
A small NATO force along with dense terrain, was able to hold up the Soviet assault long enough so that the air assault could not be supported and was doomed to failure. We had a very enjoyable day and I think everyone left feeling happy with the day's play.
Thanks for viewing. Have fun...
Richard

Mainly T-72s in this case

The first NATO reinforcements arrive and take up position near the bridge.

A convoy of Challengers creeps down the narrow streets

Soviet tanks continue to advance and through a couple of rounds of good shooting and some artillery strikes took out the Panzer-Grenadiers in the small village. The Motorised Rifle Troops who were coming up in their BMPs and dismounted to take on the Pzr-Gren, then had to get back in their BMPs - all for nothing.

T-80s take over the positions previously held by the Scimitars

British Infantry take up their forward positions - ready for the T-80s...

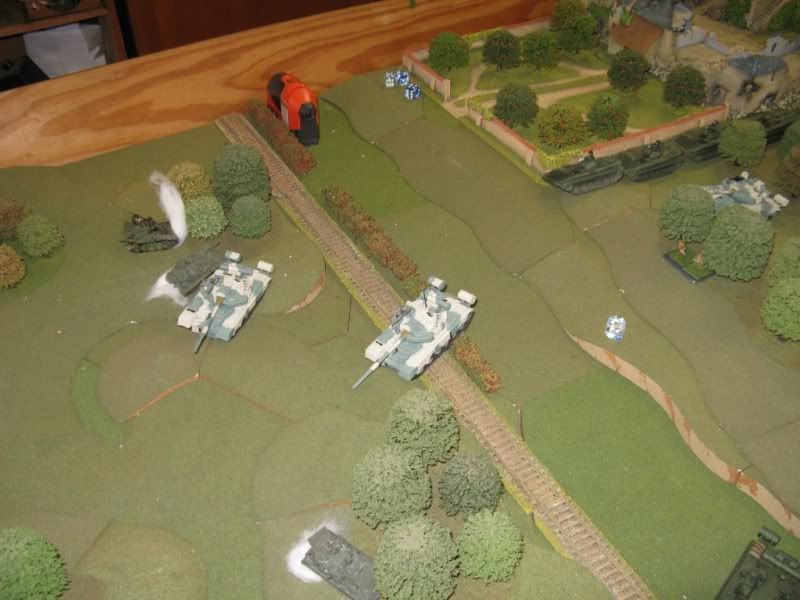
The main unit of T-72s is getting nearer to the bridge. One T-72 is successfully sniped by a Leopard on the other side of the river.
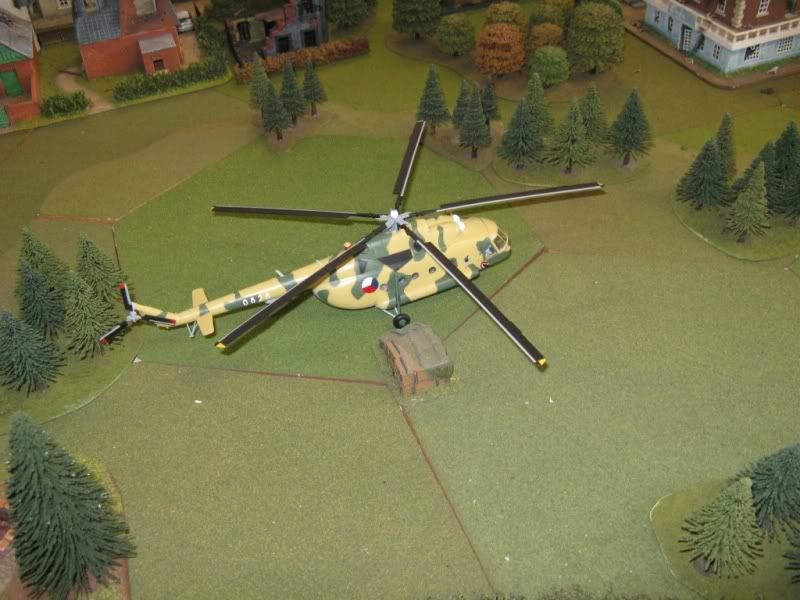
Behind the river a new menace arrives:

A air assault takes place - a Czech (don't ask) Hip lands.

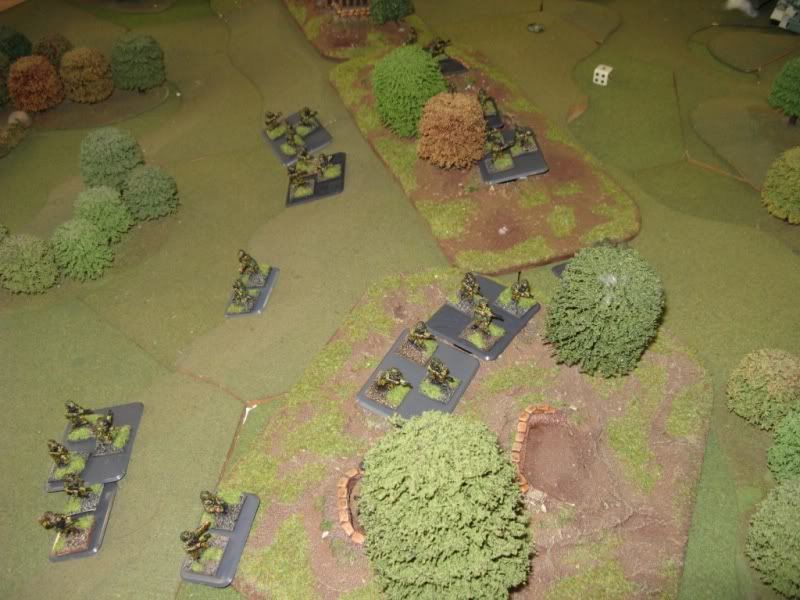
The VDV assault troops take position around the edge of the Landing Zone, seizing one of the games objectives.

The second wave, whittled down by the Gepard, arrives and disgorges the BMDs

British Chieftains race towards the landing zone, backed up by infantry in FV432 in the distance.

A close up of the British Infantry mounted in FV432 drive through the small streets of the town


T-80s drive on the British troops clinging to the forward defensive line in an attempt to assault them out of their positions - but end up being driven off themselves through massed LAW-80 fire.


Eventually though, the situation turned and the infantry were pushed out and the Soviets claimed the FEBA objective.
Back at the LZ

Things were not looking so good for the VDV. The AT-5 missiles on the BMDs proved incapable of defeating the front Stillbrew armour of the Chieftains which had no problem knocking out 3 of the 4 BMDs.

Not impressed with the deaths of their mates, a couple of VDV RPG teams went a'huntin'. In one turn of massed RPG fire they took out the Gepard and most impressively, knocked out a Leopard 2 from behind - thus becoming Heroes of the Soviet Union.

The awards however would turn out to be posthumous when a number of Challengers turned up and machine-guned the VDV in the open

NATO tanks consolidate around the main bridge.
We decided to call the game about there. Basically the Soviets had taken the FEBA, and would shortly likely mow down the remaining British troops and Warriors there. However, on the other side of the river, the VDV were really up against it and, although they may have made life difficult for the NATO troops who were just arriving, its likely they would not have survived the encounter for very long.
The big NATO tanks would have made it near impossible for the Soviet tanks to cross the river, thus the game was deadlocked with victory - in our eyes going to NATO.
A small NATO force along with dense terrain, was able to hold up the Soviet assault long enough so that the air assault could not be supported and was doomed to failure. We had a very enjoyable day and I think everyone left feeling happy with the day's play.
Thanks for viewing. Have fun...
Richard
23 November 2010
Cold War Hot AAR - Part 2
And so the game begins...
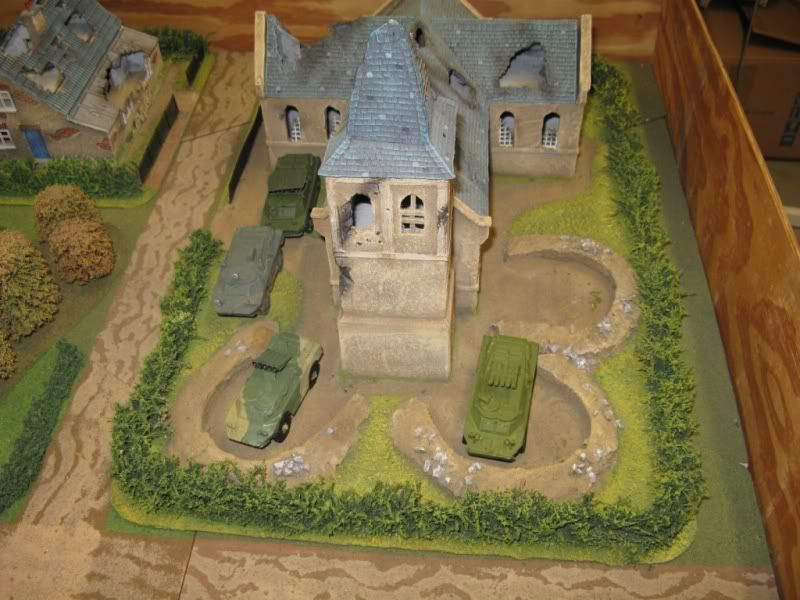
NATO Deployment
A troop of Scimitars (those Scorpions you see are actually Scimitars - OK?) deploy forward of the FEBA supported by a couple of Spartans. On the other flank,well out of picture, a small unit of Panzer-Grenadiers take residence on a couple of buildings, which hide their Marders.
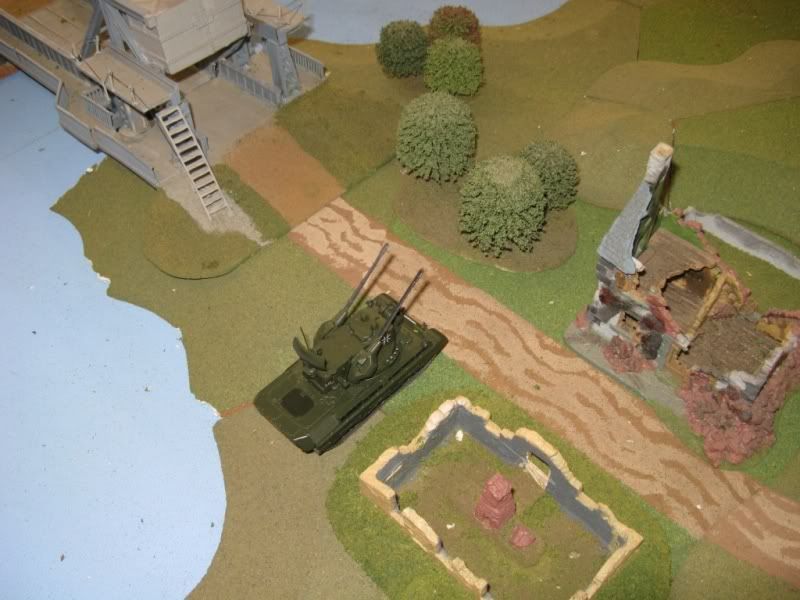
A lone Gepard guards the bridge - which despite the German locations, looks remarkedly like Pegasus Bridge!
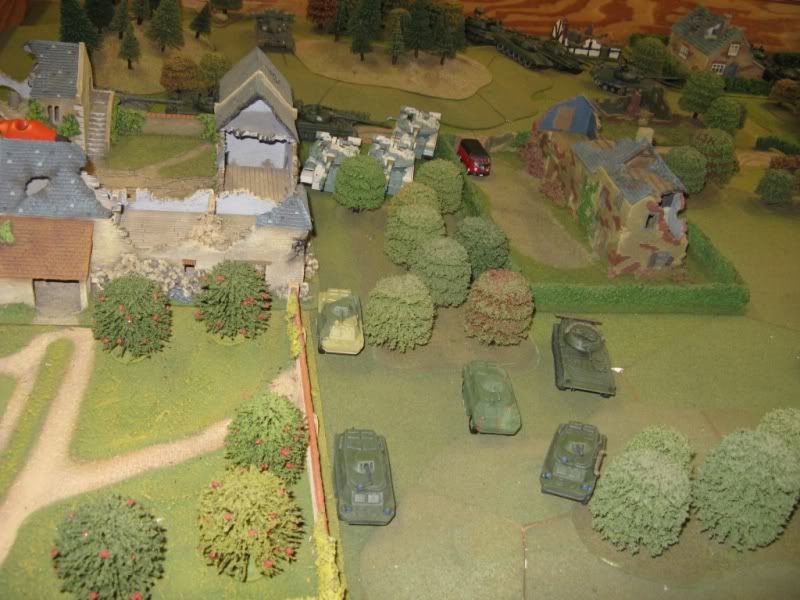
Deployment of the Soviets
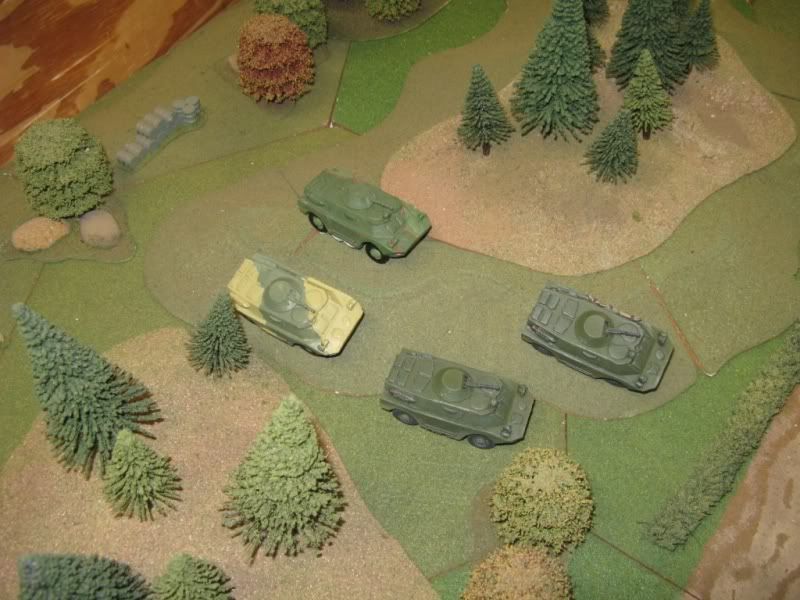
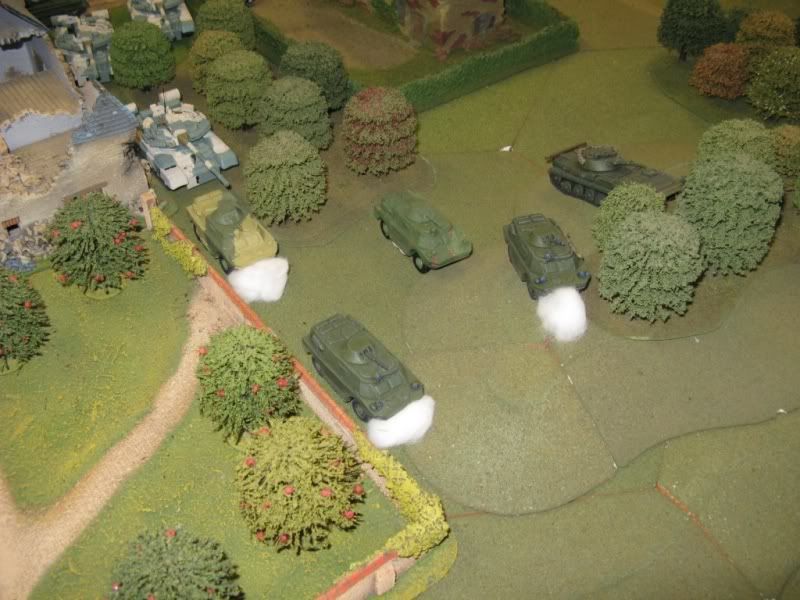
On NATO's left flank and platoon of BRDMs from the Recon Company scout ahead.
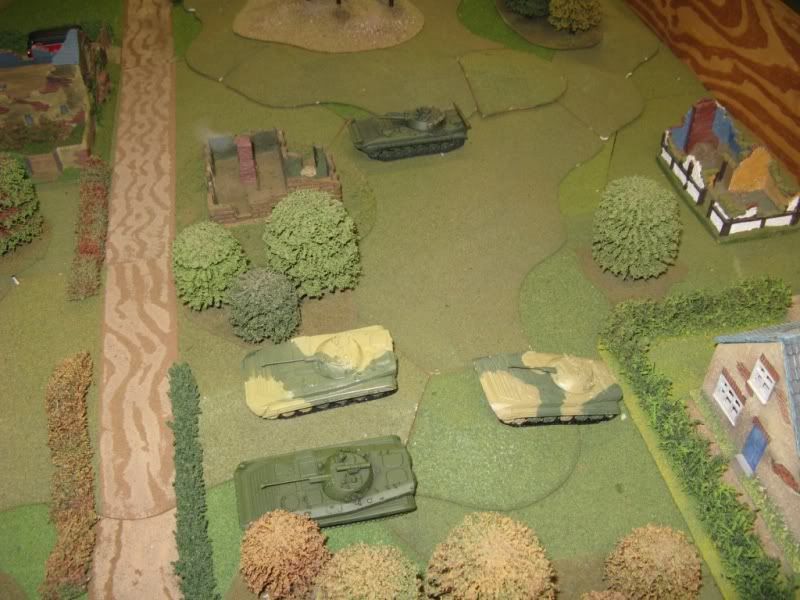
In the centre is the Recon Company's CO in a BRM, which a support platoon in BMP-2s.
On NATO's right flank is the BRDM mounted AT Company.
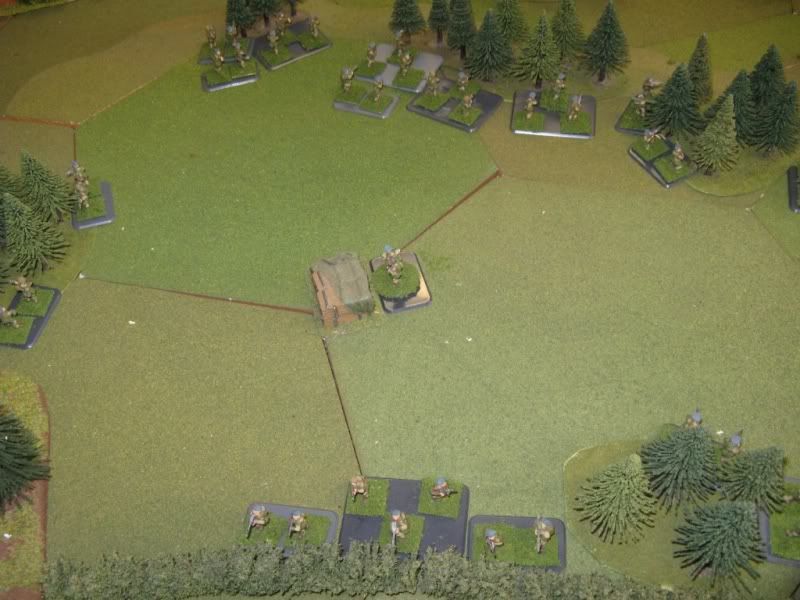
A massive Soviet Preliminary bombardment comes down on the NATO forward positions, destroying both the Spartans (and the chaps inside) and also taking out both the Marders. The Panzer-Grenadiers have lost their transport, but grimly dig in to hold up the Soviet advance.
On the left, BRDMs lead the T-80 company forward.
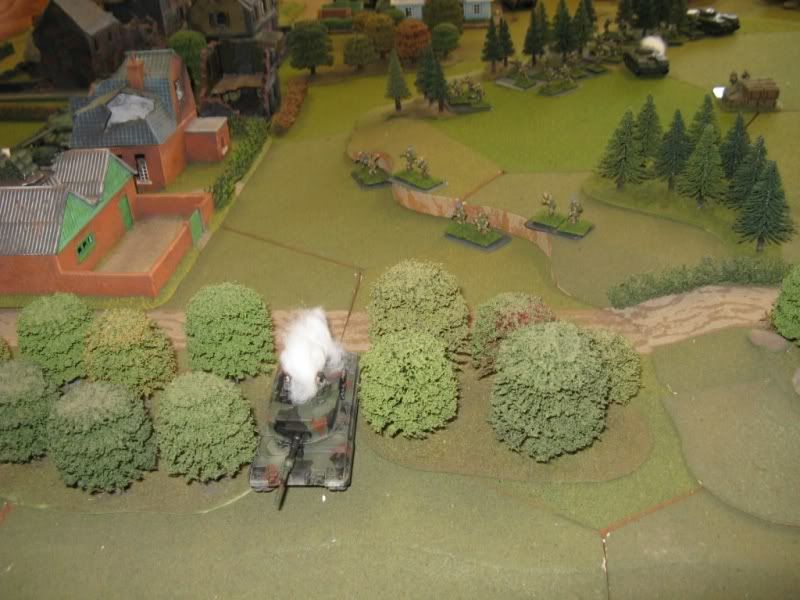
Meanwhile, on the right the AT company advances down the road towards a small village as if on a Victory parade through Red Square.
The British troops on the other side of the river mount up and start to cross the pontoon bridge in their Warriors.
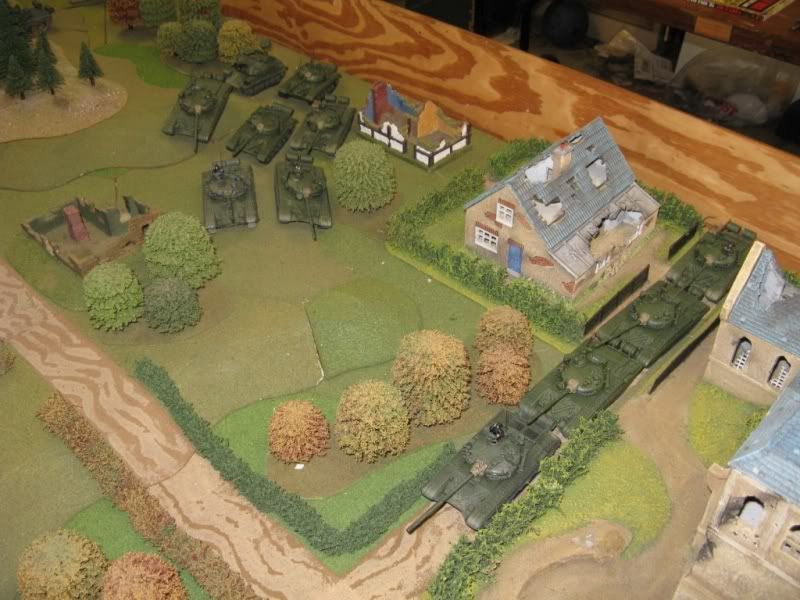
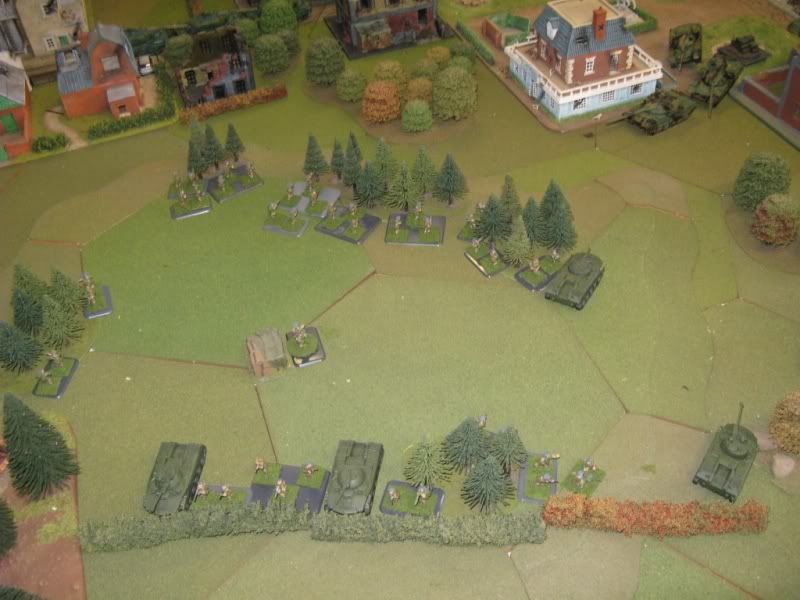
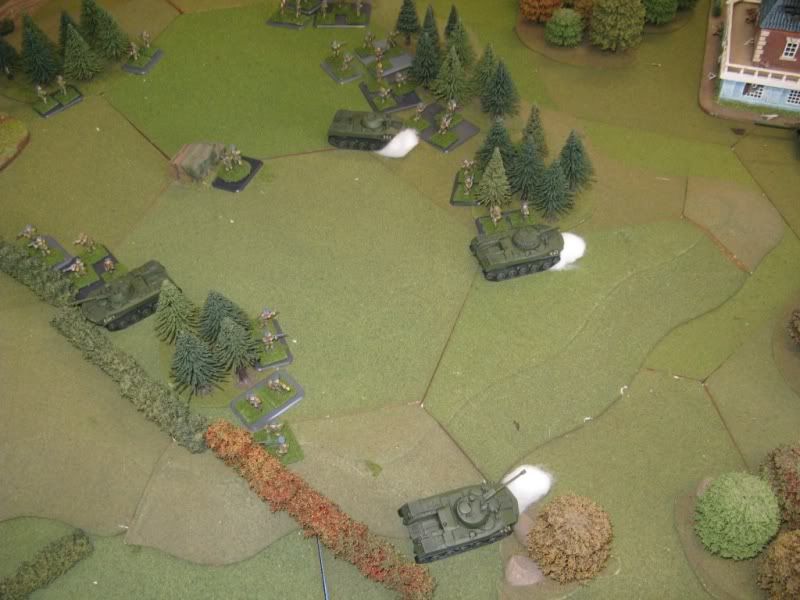
The T-72 company enters the table and start to advance through the dense terrain.
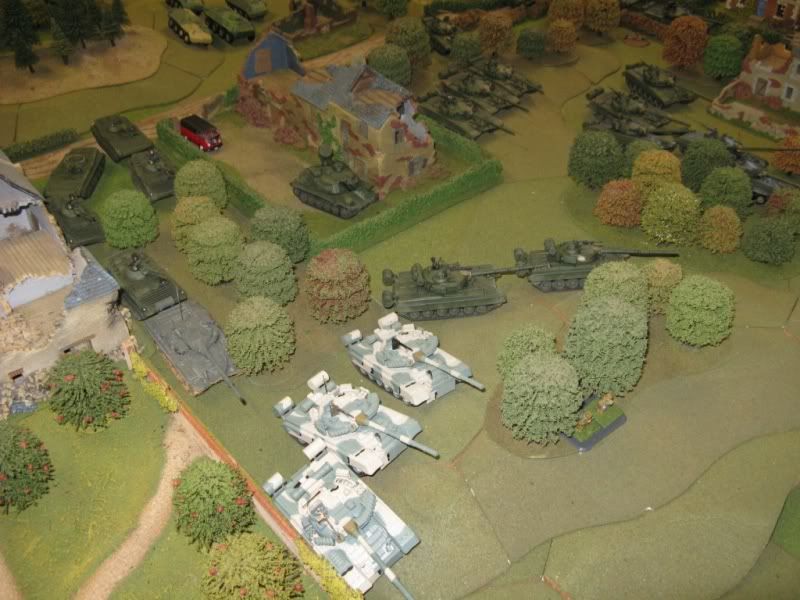
The happy-go-lucky AT Company continues into the village, obviously trusting that Milans and Pzf-44s cannot dent their armour protection.
A close up of the tragedy that is about to unfold on the AT Company.
A successful round of shooting from the West German Pzr-Gren takes care of the Victory parade!
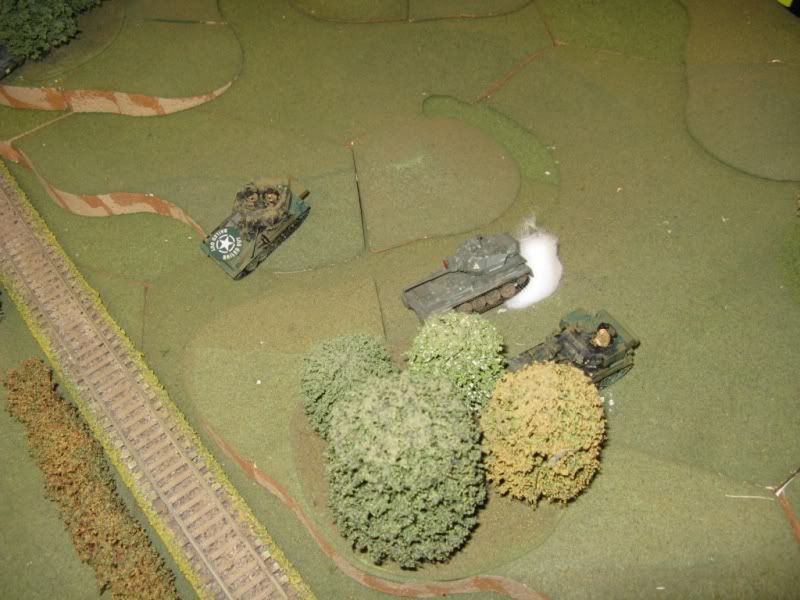
Across the other side of the table from the exploding AT Company - the Scimitars tried to see how their Rarden cannon went up against BRDM armour.
Not to badly actually!
So the T-80s take over
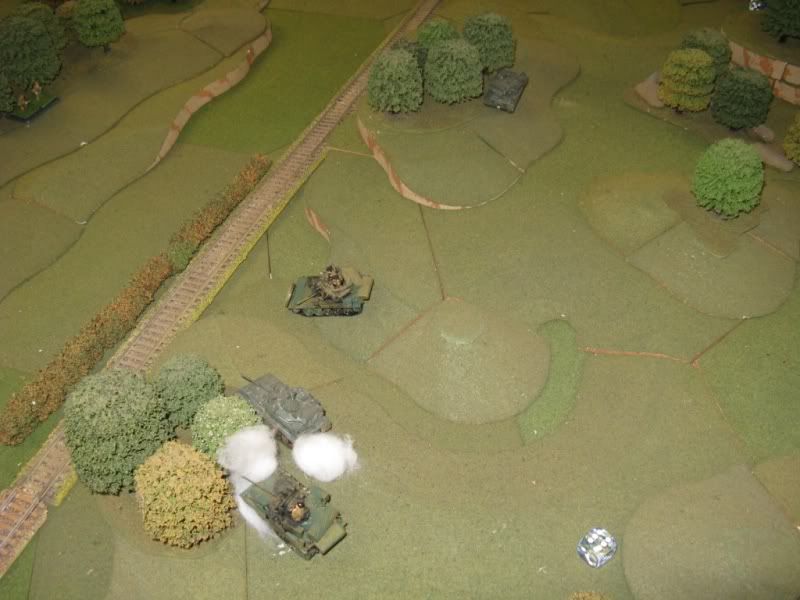
And in a couple of rounds of shooting take care of the majority of the Scimitars
Tomorrow night in Part 3 is the conclusion of the game...
Have fun
Richard
NATO Deployment

A troop of Scimitars (those Scorpions you see are actually Scimitars - OK?) deploy forward of the FEBA supported by a couple of Spartans. On the other flank,well out of picture, a small unit of Panzer-Grenadiers take residence on a couple of buildings, which hide their Marders.

A lone Gepard guards the bridge - which despite the German locations, looks remarkedly like Pegasus Bridge!
Deployment of the Soviets

On NATO's left flank and platoon of BRDMs from the Recon Company scout ahead.

In the centre is the Recon Company's CO in a BRM, which a support platoon in BMP-2s.

On NATO's right flank is the BRDM mounted AT Company.
A massive Soviet Preliminary bombardment comes down on the NATO forward positions, destroying both the Spartans (and the chaps inside) and also taking out both the Marders. The Panzer-Grenadiers have lost their transport, but grimly dig in to hold up the Soviet advance.

On the left, BRDMs lead the T-80 company forward.

Meanwhile, on the right the AT company advances down the road towards a small village as if on a Victory parade through Red Square.

The British troops on the other side of the river mount up and start to cross the pontoon bridge in their Warriors.

The T-72 company enters the table and start to advance through the dense terrain.
The happy-go-lucky AT Company continues into the village, obviously trusting that Milans and Pzf-44s cannot dent their armour protection.

A close up of the tragedy that is about to unfold on the AT Company.

A successful round of shooting from the West German Pzr-Gren takes care of the Victory parade!
Across the other side of the table from the exploding AT Company - the Scimitars tried to see how their Rarden cannon went up against BRDM armour.

Not to badly actually!

So the T-80s take over


And in a couple of rounds of shooting take care of the majority of the Scimitars
Tomorrow night in Part 3 is the conclusion of the game...
Have fun
Richard
Cold War Hot AAR - Part 1
If you've been following this blog you'd be aware that I was hoping to have a decent sized force ready in time for a big Cold War Hot game similar (but a lot smaller) to the one held in Ireland by the Guild. Our hopes of holding the game on the same weekend as the Guild game were dashed by the Federal election - so we decided to hold the game in November.
This game me a bit more time to get stuff done and over the last week or so I was trying to knock over a fair amount of Soviet stuff. In the end I didn't do any more British kit, but knocked out 30 odd more Soviet Motor Rifle troops.
Weel, we finally had the Sydney Big Game on Saturday. Whilst we didn't end up with lots of players we did manage to get in a pretty reasonable game - with a fair amount of kit. Players were - WARPAC - Simon & NATO - Dean. I was the umpire and ended up helping Simon a little, while Patrick arrived late in the day and ended up helping Dean a little.
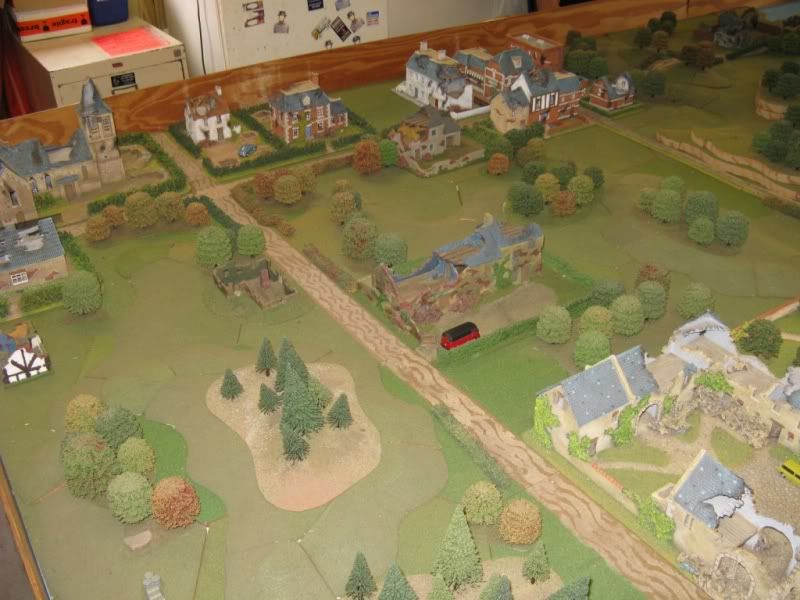
Here is the layout of the table:
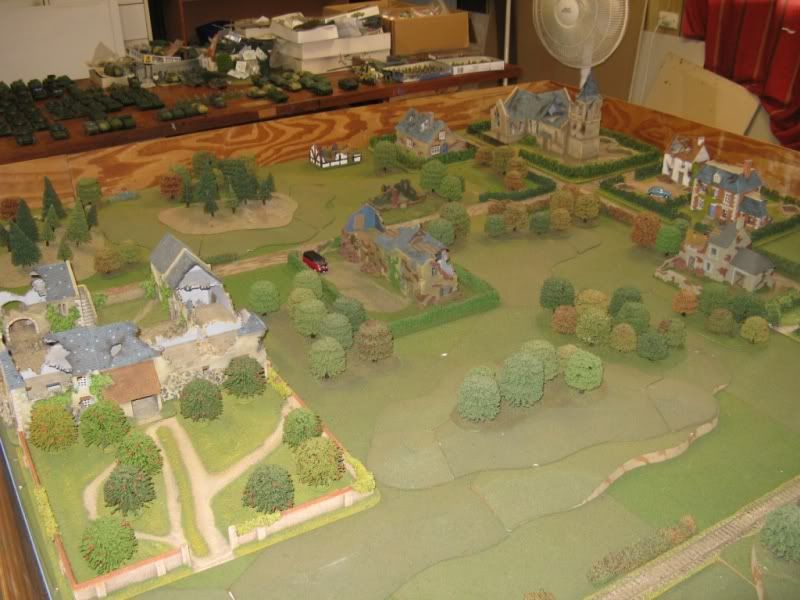
2 views of the Soviet end of the table.
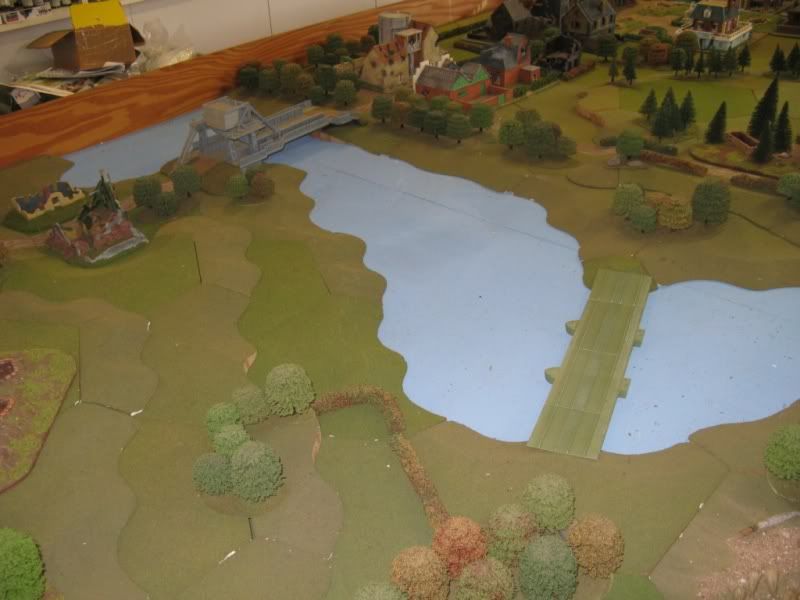

2 views of the centre of the table showing the river. In the lower picture you can see the NATO Foward Edge of Battle Area (FEBA) towards the top of the picture and NATO's second defensive line towards the bottom of the picture.
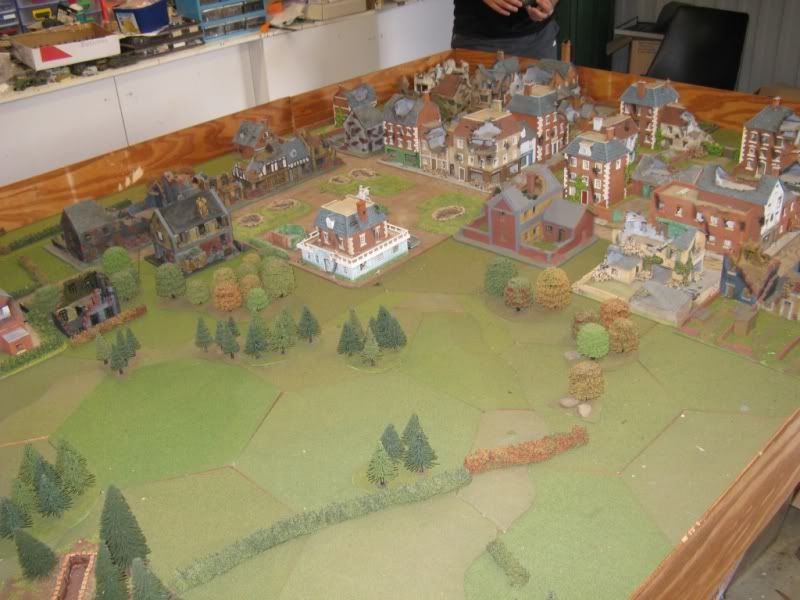
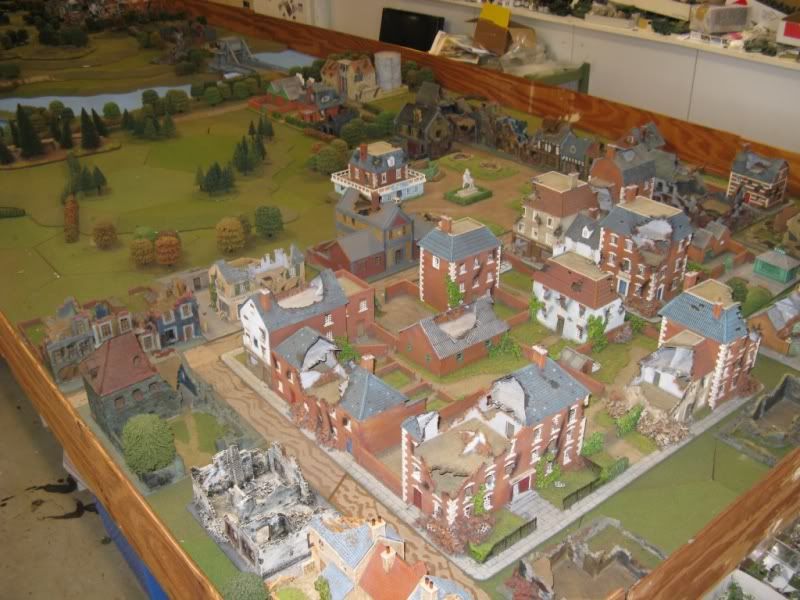
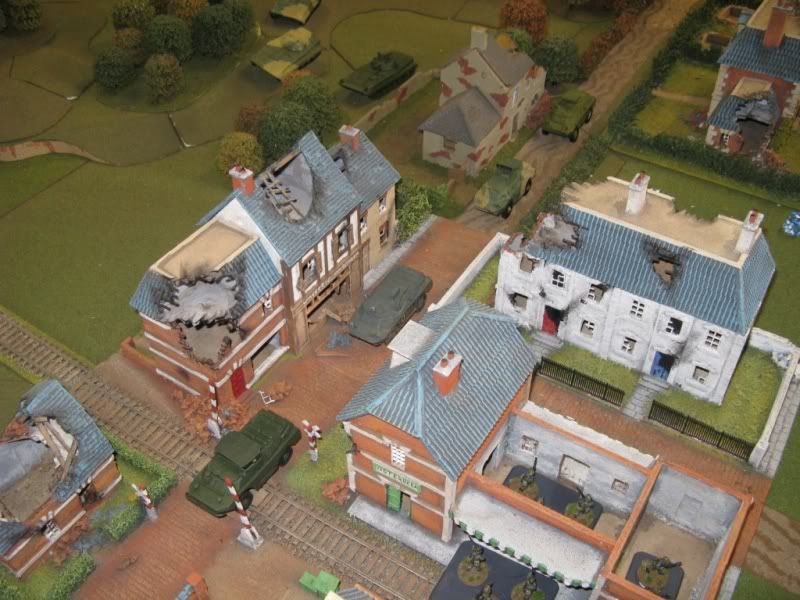
2 views of the NATO end of the table showing a large town with very narrow streets
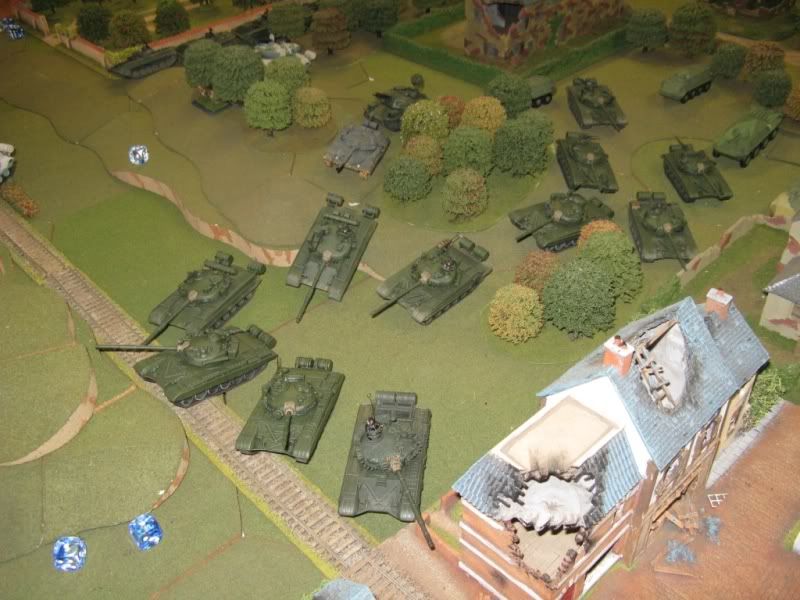
Before the game began I attempted to quickly lay out the units in a sensible order. Here are the Soviet forces - minus most of the infantry:
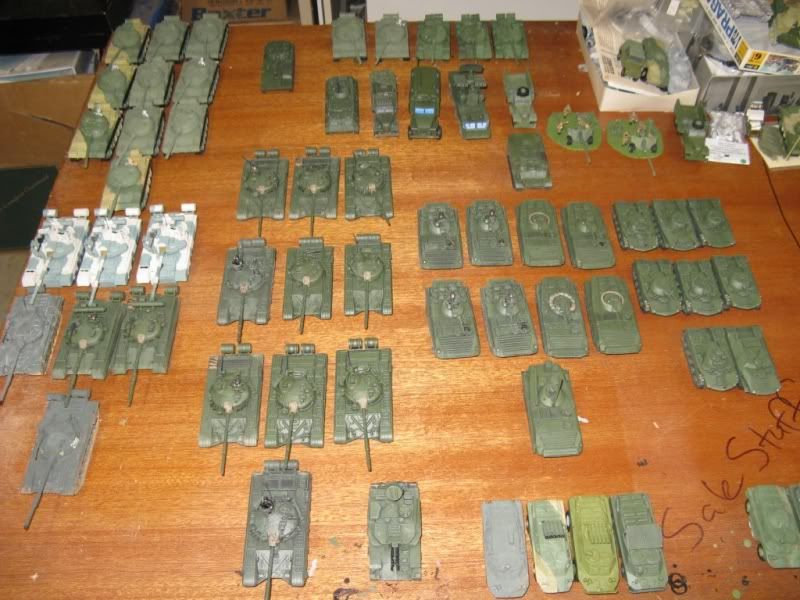
This shows the tanks used in the game. T-62s and T-55s down the back, T-80s on the left and T-72s in the middle. Towards the rear is the HQ group and in front of them is the BMP1 company. In front of the BMPs is a small AT company and next to the BMPs is a VDV BMD company.

The BTR company plus 3 BMPs from the Recon Company.
Here are the vehicles in the NATO force:
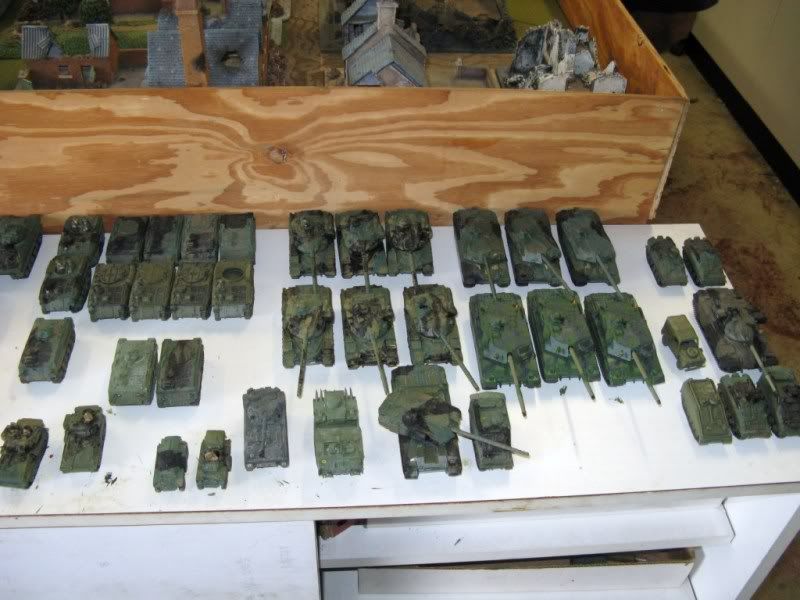
The NATO (British) squadron of tanks, plus and HQ group, and Abbot and my personal favourite (green with envy of Simon) a Tracked Rapier.
NATO (British again) Warrior IFVs and FV432 APCs - and some of Simon's infantry
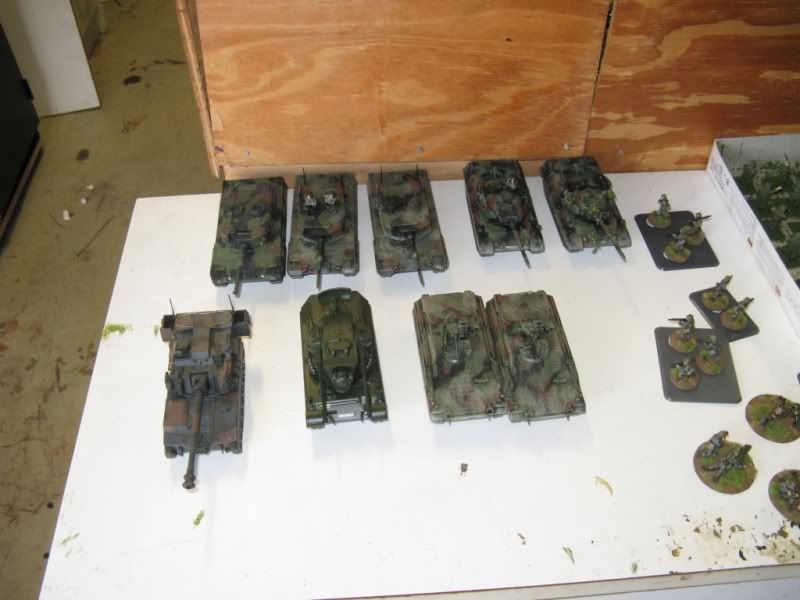
The West German contingent and some of my Liberation, Elhiem & Revell infantry
Part 2 tomorrow night will cover the opening moves of the game itself...
Have fun
Richard
This game me a bit more time to get stuff done and over the last week or so I was trying to knock over a fair amount of Soviet stuff. In the end I didn't do any more British kit, but knocked out 30 odd more Soviet Motor Rifle troops.
Weel, we finally had the Sydney Big Game on Saturday. Whilst we didn't end up with lots of players we did manage to get in a pretty reasonable game - with a fair amount of kit. Players were - WARPAC - Simon & NATO - Dean. I was the umpire and ended up helping Simon a little, while Patrick arrived late in the day and ended up helping Dean a little.
Here is the layout of the table:


2 views of the Soviet end of the table.


2 views of the centre of the table showing the river. In the lower picture you can see the NATO Foward Edge of Battle Area (FEBA) towards the top of the picture and NATO's second defensive line towards the bottom of the picture.


2 views of the NATO end of the table showing a large town with very narrow streets
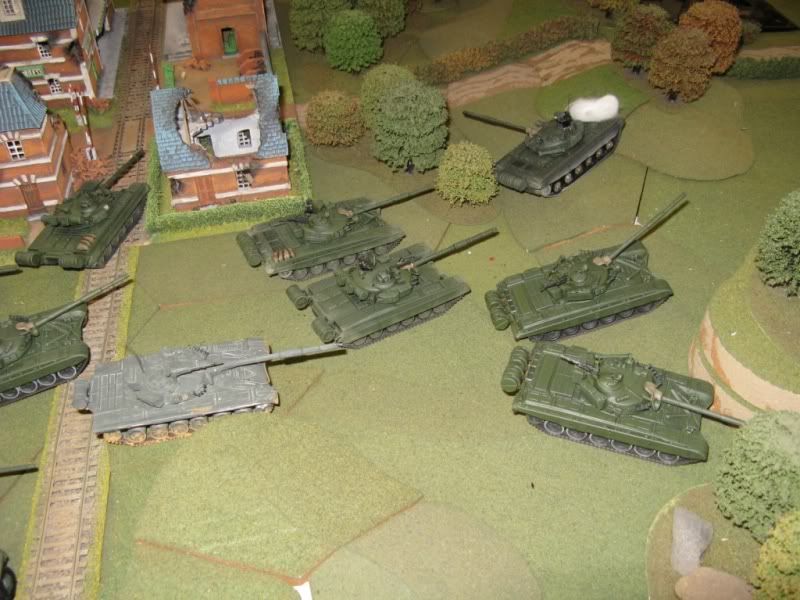
Before the game began I attempted to quickly lay out the units in a sensible order. Here are the Soviet forces - minus most of the infantry:

This shows the tanks used in the game. T-62s and T-55s down the back, T-80s on the left and T-72s in the middle. Towards the rear is the HQ group and in front of them is the BMP1 company. In front of the BMPs is a small AT company and next to the BMPs is a VDV BMD company.

The BTR company plus 3 BMPs from the Recon Company.
Here are the vehicles in the NATO force:

The NATO (British) squadron of tanks, plus and HQ group, and Abbot and my personal favourite (green with envy of Simon) a Tracked Rapier.

NATO (British again) Warrior IFVs and FV432 APCs - and some of Simon's infantry

The West German contingent and some of my Liberation, Elhiem & Revell infantry
Part 2 tomorrow night will cover the opening moves of the game itself...
Have fun
Richard
15 November 2010
Finished the Week Long Project
Well - there you go... I finally managed to finish my week long project. At first I thought I had bitten off more than I could chew - then I thought I'd finish with time to spare - and then it took until tonight to get it all done to a wargaming standard. I hadn't actually planned on doing any figures, but did manage to finish 18 of them - so I'm pretty happy with that.
After this weekend's big game I'll come back to these and weather the vehicles and base the figures properly.
Here's some pics of the whole lot (I need to fiddle with the settings on the camera - its eluding me at the moment...)
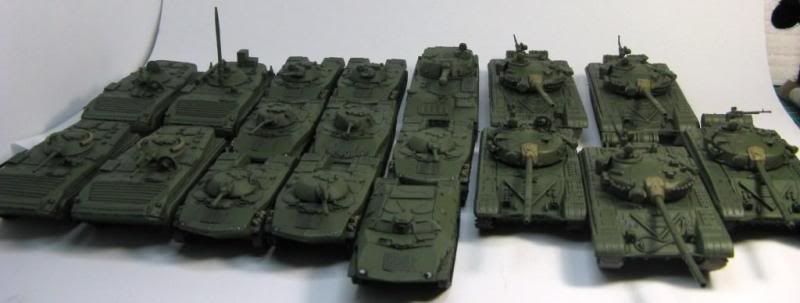
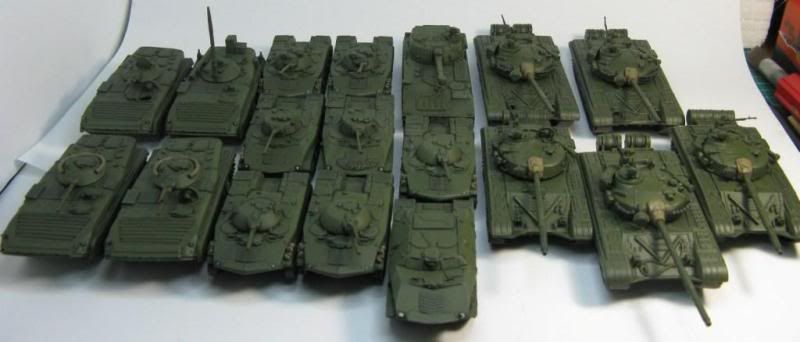
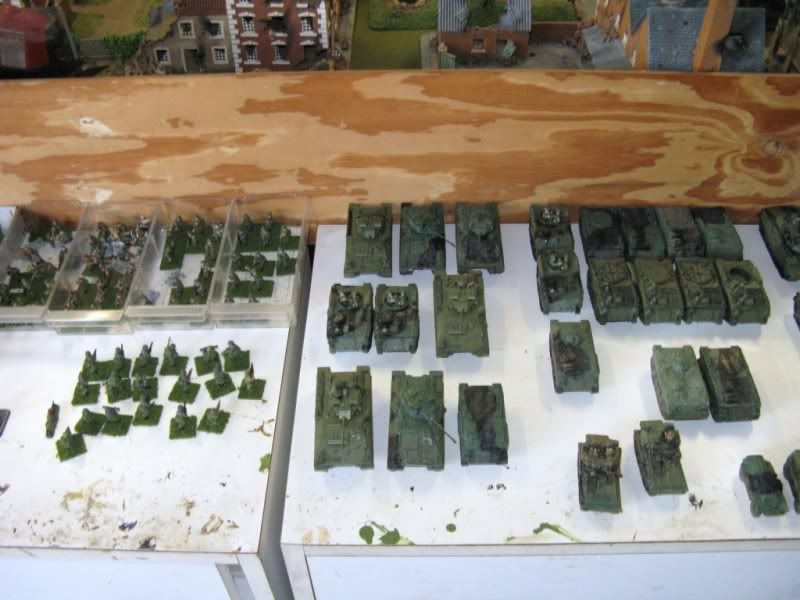
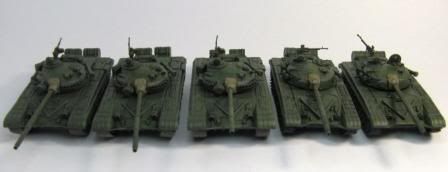
T-72's - The Tank Collection (repainted) on the left, Cromwell models on the right
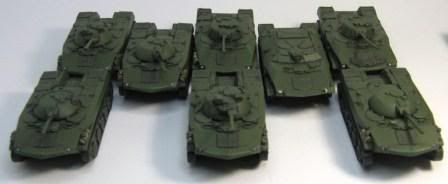
ACE models BMP's

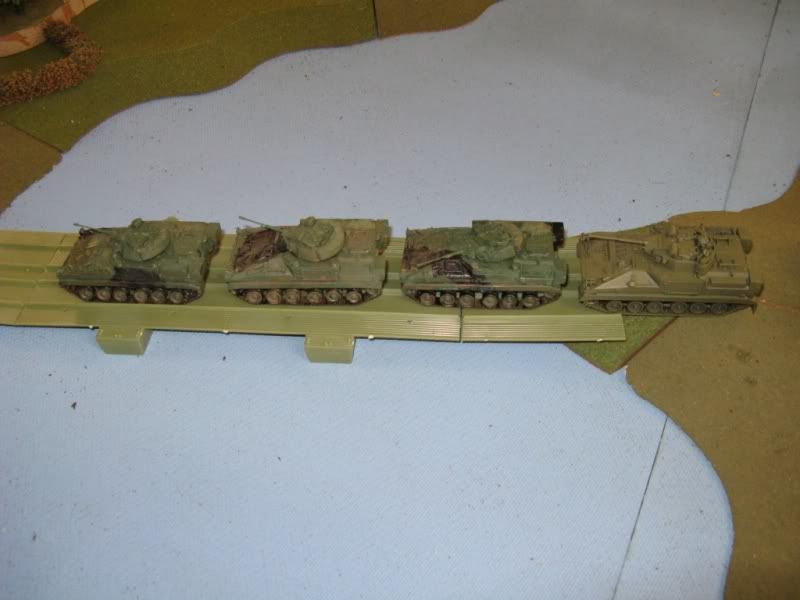
Liberation BMD-1s and BMD-2s (some older? some newer I guess)
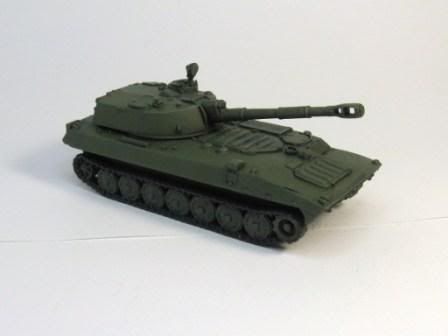
MMS 2S1
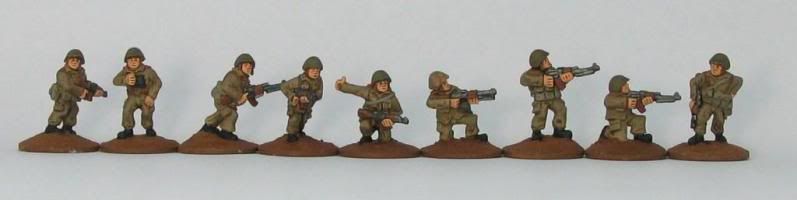
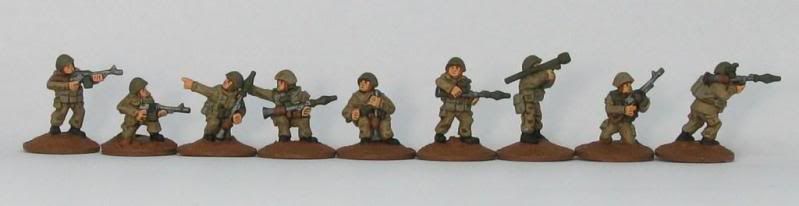
Liberation Soviet figures - dipped
Moving on to some British stuff now - to be ready by Saturday morning!!!
Have fun
Richard
After this weekend's big game I'll come back to these and weather the vehicles and base the figures properly.
Here's some pics of the whole lot (I need to fiddle with the settings on the camera - its eluding me at the moment...)


T-72's - The Tank Collection (repainted) on the left, Cromwell models on the right

ACE models BMP's

Liberation BMD-1s and BMD-2s (some older? some newer I guess)

MMS 2S1

Liberation Soviet figures - dipped


Moving on to some British stuff now - to be ready by Saturday morning!!!
Have fun
Richard
Subscribe to:
Posts (Atom)