The first completed Cold War Hot figure project was my Liberation Soviet Motorised Rifle Troops. I had managed to get 2 x RMRAKH from Duane at Syr Hobbs wargames as well as 1 x MULT20RPG, which Duane helpfully pointed out would fit in nicely with the standard MTR troops. I wish I had realised it, because I would have picked up a few guys with RPKs, PKMGs, and AK-74/BG15s as well. Oh well - next time.
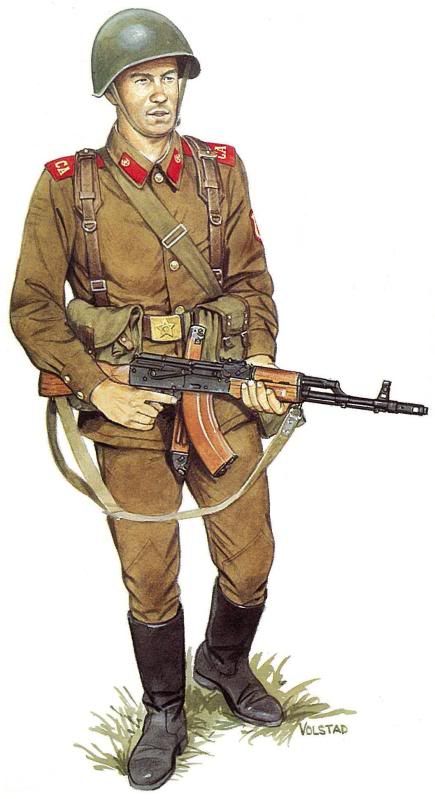
My aim was to have them look like this:

This image is taken from Osprey's "Inside the Soviet Army" which I bought back in my Twilight:2000 days. I love the art in these books and they were very handy when it came time to paint up my MTR troops.
PAINTING
This is from memory - so I may have to come back later and change it... I first tested a quick scheme on some old GW 40K Mordian Iron Guard. It looked OK so I went with.
1. White Undercoat - Citadel spray
2. Uniform - Vallejo Khaki
3. Boots & Guns - Citadel Black
4. Webbing - Vallejo Flat Earth
5. Pouches & Bags - Vallejo Green Grey
6. Faces and Hands - Vallejo Flat Flesh
7. Helmets - Vallejo Russian Uniform
8. Woodwork on Guns & RPG - Vallejo Beige Brown
9. Metalwork on Guns & RPG - Vallejo Gunmetal Grey
10. RPG missiles - Vallejo Russian Green
11. Shoulder Boards etc - Citadel Blood Red
12. Bases - Vallejo Flat Earth
This was all the base colours finished. Then - for the first time ever - I used the Army Painter Strong Tone Dip. having read a bit about it, I decided not to dip, and instead painted on the dip with an old (now dedicated to dip) brush. I tried, relatively successfully, to brush off the excess dip.
I left the figures to dry overnight.
Next day I drybrushed the bases with Vallejo Khaki and glued on some Silfor tufts and sprayed the whole lot with Testors Dullcote.
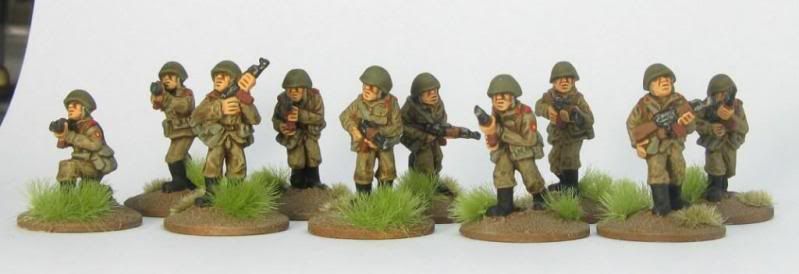
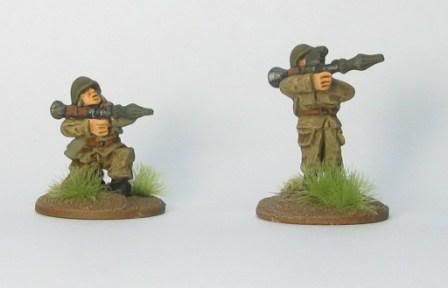
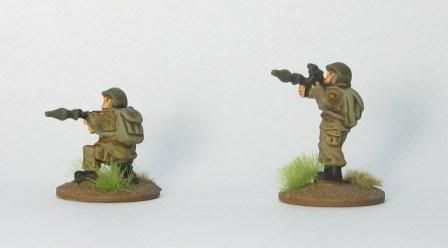
This is the result:


RMRAKH

MULT20RPG


The whole lot!

Sorry for a couple of dodgy photos there!
Here are a couple of useful reference links from good old wikipedia - useful for painting as well.
The AK-74
The RPK-74
The PKM
BG-15 Grenade Launcher
No youtube links here I'm afraid - if I stumble across any I'll come back and add in here.
Have fun
Richard
RPG-7
These look very well indeed Richard
ReplyDeleteThanks for the step-by-step
Nicely done, plan to adopt for my Soviets (Which I am doing for Twilight 2000 themed moderns). Can't wait for you to do Brits in DPM!
ReplyDeleteThanks guys - my step-by-step SAS in DPM guide will probably go up next week.
ReplyDeleteRichard
cracking Job Richard
ReplyDeletecheers
matt