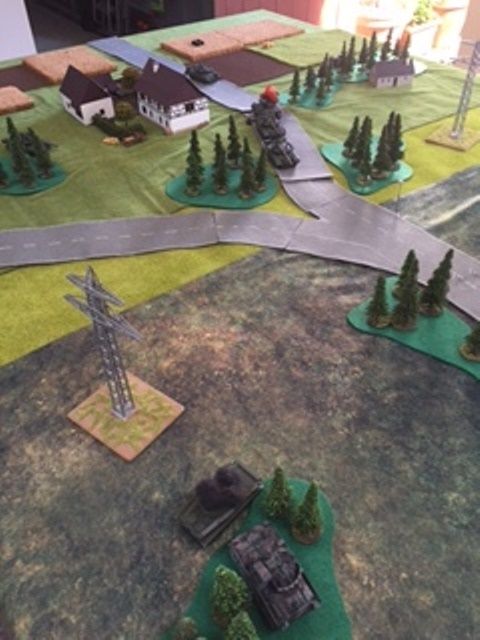
NATO began by deploying a minefield and a barbed wire obstacle. I wasn't too concerned about either to be honest, but they were both placed in good positions and the barbed wire turned out to have a relatively significant impact on me afterall.
NATO the deployed 2 M3 Bradley CFVs in good defensive positions - one covering the obstacles and the other covering my right flank


You can see the West German police unit have also been deployed into the house closest to my deployment.
I deployed my recce units in a similar fashion to the previous game. We rolled 5 turns for the Scout Battle Phase and I proceeded to advance my BMP-2 forward, I moved my motorcycle combination into the house on my left flank - directly across from the West German unit. My BDRM-2 stayed in hidden in some woods in the centre of the table.
The US forces turned out to be significantly more aggressive than the West Germans a couple of days earlier. Both CFVs left their defensive positions and started chasing me down! This was the first result:

While the second saw my BRDM-2 running away!

You can see him cowering in the distance. Meanwhile the police unit started slowly taking the motorcycle combination team to bits with their MG3. I hadn't counted on the table being slightly shorter and had thought they were out of range! Do'h!
Unfortunately for the brave Bradley, that move was the end of the Scout Battle Phase and I had D6 reinforcements arriving, while he was stuck in the middle of the road leading straight to my table edge.

Say hello to my little friends! In what sadly turned out to be the highlight of my shooting for the rest of the game, CFV road warrior didn't last too long.

And my units started their long drive down the table:
NATO reinforcements also started to arrive:

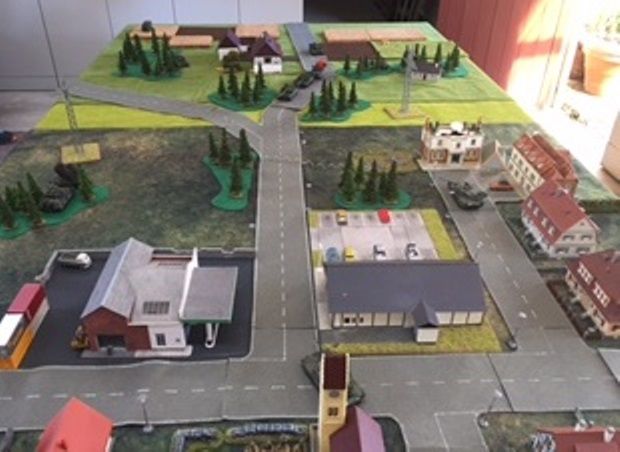
Two M1A1s and a couple of M113s come on, with one squad dismounting into the cemetry.
The T-80 advance continued:

And continued while more NATO forces arrived:

Don't worry dear readers, the red dots on the M1A1s don't mean I actually hit those tanks, they are just overwatch counters...
In what I thought was a calculated and cunning plan, 2 of my T-80s advanced quickly down the road. One swung into the car park for a side on shot on the leading M1A1. Miss. The other T-80 took a longer range, and front-on shot against the M1A1 parked next to the supermarket. Miss.
A third T-80 drove cross country towards the little wooded area where the remaining Bradley was hiding for a near point blank shot. Miss

Now you can see the result of what happened next:

Ouch!!! The Bradley casually fired a TOW missile into the backside of the T-80 in the car park, while the M1A1 near the supermarket slotted the T-80 that had the temerity to shoot at it.
Yeah, yeah - just rub it in...

The NATO force started to pull back its most at risk units, while an M113 drove up to better support them.

I'm starting to get a little desperate... BTR Squad to the rescue

BTR platoon moving up and into the most forward house, recently the defensive position of the police unit:


If you look very carefully in these photos you'll see a knocked out M113 with a pinned squad, and a knocked out M1A1 (the Battlegroup HQ). These were not hit by me shooting them - oh no, nothing like that - but I managed to get them with my two timed strikes - pretty much my best result in the game...
In the middle of all this NATO drew a Gas! Gas! Gas! counter, and although it turned out to be a false alarm we did spend one turn with reduce vision, worse comms checks, reduced infantry movement etc. We also lost orders and had to take another Battle Counter each.
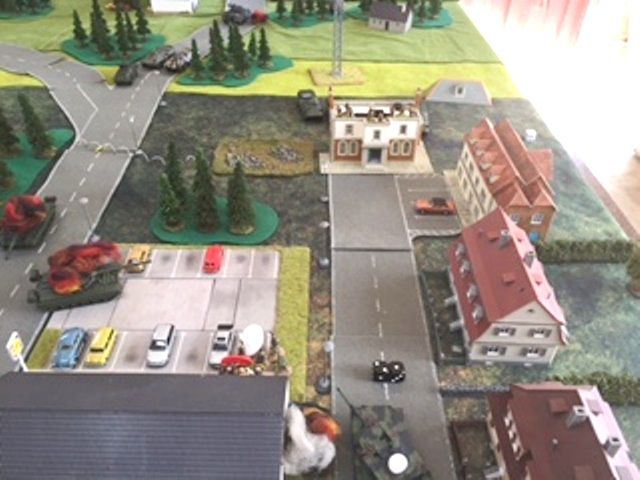
This next photo is taken towards the end of the game (Turn 7, so by now the engineers have successfully rigged the bridge to blow) - this is the point I like to call the High Water Mark of the Soviet attack:

You can see in the upper left corner I have finally managed to kill the Bradley - not before (if you look a little towards the road) said Bradley knocked out another T-80. The final T-80 is now immobilised. Behind some containers near the garage, at the intersection of the main road and the side road behind the supermarket - you can see my advancing BTRs - all I have left to advance with really. Parked close by (even behind 1 BTR) are tow perfectly healthy M1A1s.

Here's what followed:

The Americans successfully took out everything of mine close to the bridge, and had enough movement to mount up and drive over the bridge and win the game.
By this point I was about 3 points off my Battle Rating total, in the last 5 chit pulls getting 3,5,5,5,4 - I went from way below my total right on the edge super quick. That drained my (personal) morale and I was ready to concede at that point anyway. But I still got close, and if a couple of dice rolls had just gone my way, like killing that bloody Bradley in the woods straight up rather than wasting 3 or 4 turns failing to kill it - and taking the M1A1 in the side - I might have made it. NATO was at least sweating at that point.
That barbed wire on the road cost me D6 of movement every time something drove over it. That might not seem much when you are using road movement - but when you are playing a game where you have to drive off the other end of the table to win, every inch makes a difference and it really slowed me down. A great use of defences.
All-in-all it was a great game. Much closer than I felt it was during the game - both sides felt they were in with a chance at some point and both sides felt it was slipping through their fingers at some point - that sounds like a damn good game in my book
Thanks for reading
Richard
Looks like you needed some smoke to cover your advance at speed!
ReplyDeleteEnjoyed both AAR's btw, thanks
Cheers
Richard
Thanks Richard. Based on my dice rolling I think I must have covered half the table in smoke. That might explain why I missed everything! Only problem was the US AFVs could see right through it! AT least its a historically accurate explanation for my failures.... :-)
ReplyDeleteRichard
they were in with a chance at some point and both sides felt it was slipping through their fingers at some point - that sounds like a damn good game in my book
ReplyDelete** goldenslot mobile**
** สล็อต ออนไลน์ ได้ เงิน จริง**