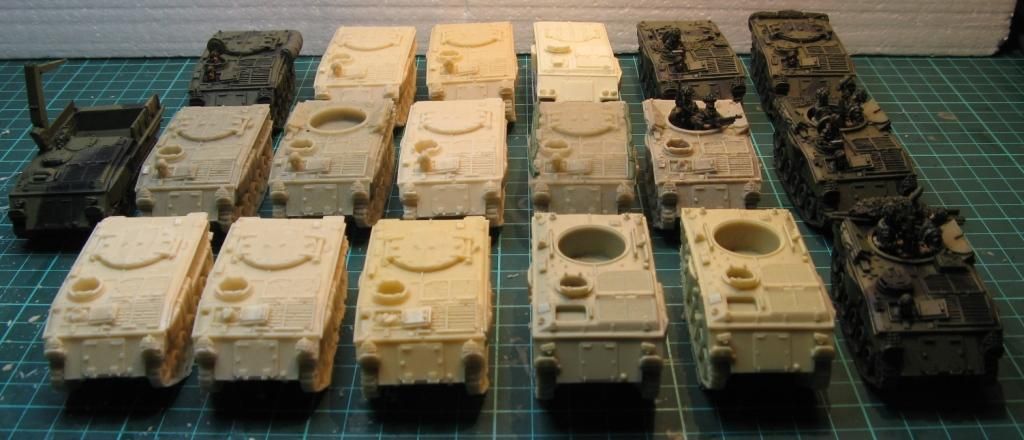
I thought it was about time I reviewed something again - and this time something a little different. For about a year now Zvezda have been previewing and releasing new Hot War figures, vehicles and aircraft. In typical Zvezda fashion (which to me at least, is somewhat confusing - but I'm sure it works for them), the figures are in 1/72, the vehicles are in 1/100 and the aircraft - read helicopters only I think at the moment - are in 1/44.
Not a great deal of help in you work in 20mm, but at least the figures are the right scale. All those 15mm gamers out there are pretty chuffed with at least some of the vehicles as well.
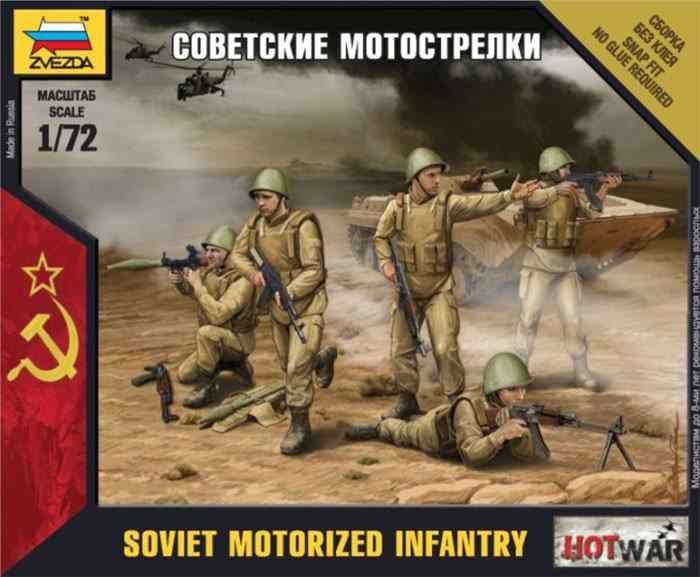
So far, figures-wise, Zvezda have only released Soviet Motorised Infantry and US Mechanised Infantry. I had a good look at both on line and decided that the US troops so far did not suit my needs. I actually thought they were a bit all over the place in terms of the weapons provided - too much was missing, like no SAW to be of much use for me at this point in time.
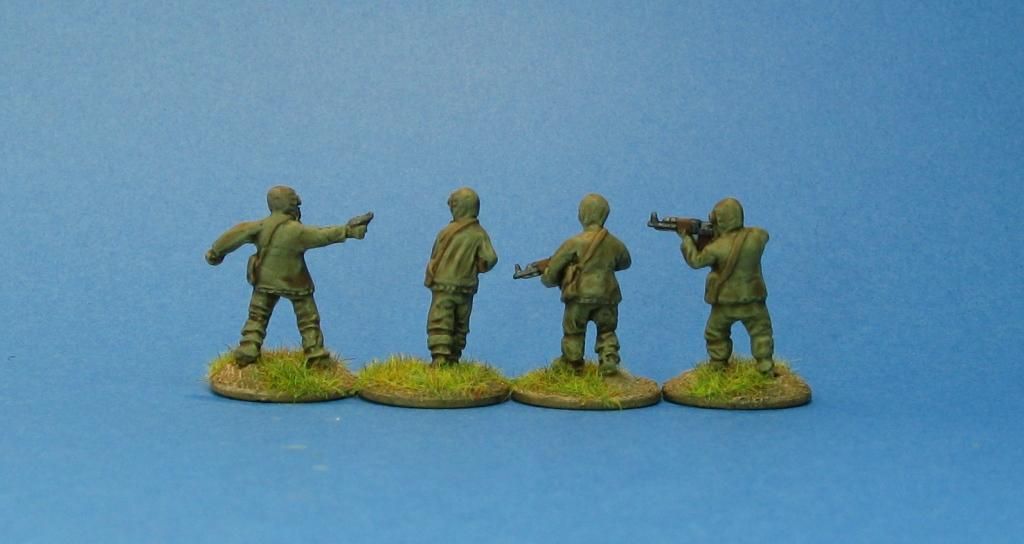
The soviets were better in my opinion. The weapons were much more representative and better "balanced" for a squad. Their only difference to what I already have was they all have body armour. Not a problem - this helps differentiate them and in my mind, makes them perfect for my engineer squad.
So anyway - here is the box art:
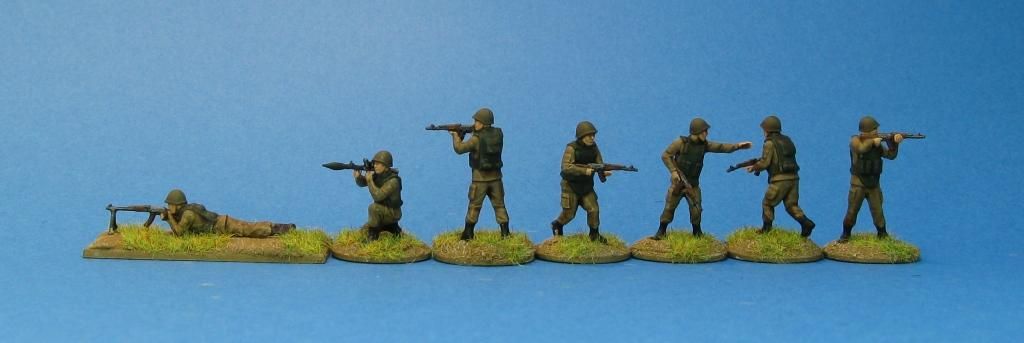
And here are my painted chaps:
As you can see I only painted 1 NCO, 1 RPK and 1 RPG as you only need 1 in each squad.
Next up I have some comparison photos. First are standing figures:
From left to right: Elhiem Soviet NBC, Liberation Soviet Motor Rifle, Zvezda, Elhiem West German
Now walking/running figures:
From left to right: Elhiem Soviet NBC, Zvezda, Liberation Soviet Motor Rifle, Elhiem West German
Officers/NCOs:
From left to right: Elhiem Soviet NBC, Zvezda, Liberation Soviet Motor Rifle, Elhiem West German
RPGs/Pzf 44
From left to right: Liberation Soviet Motor Rifle, Zvezda, Elhiem West German
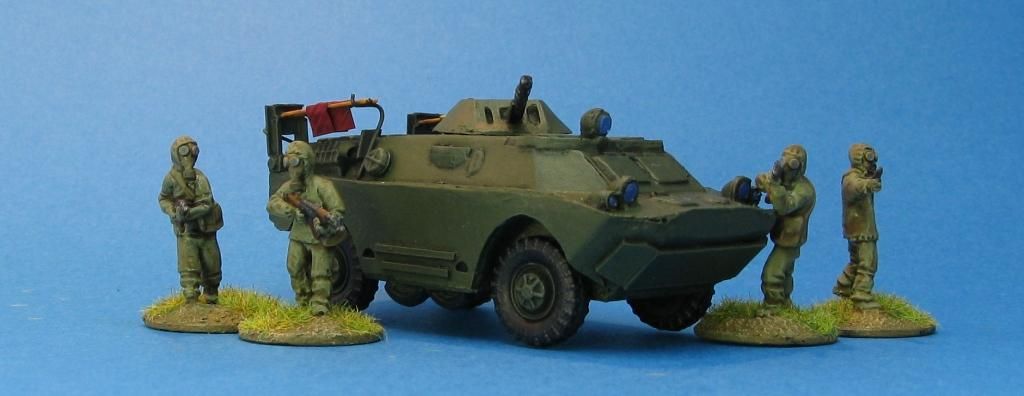
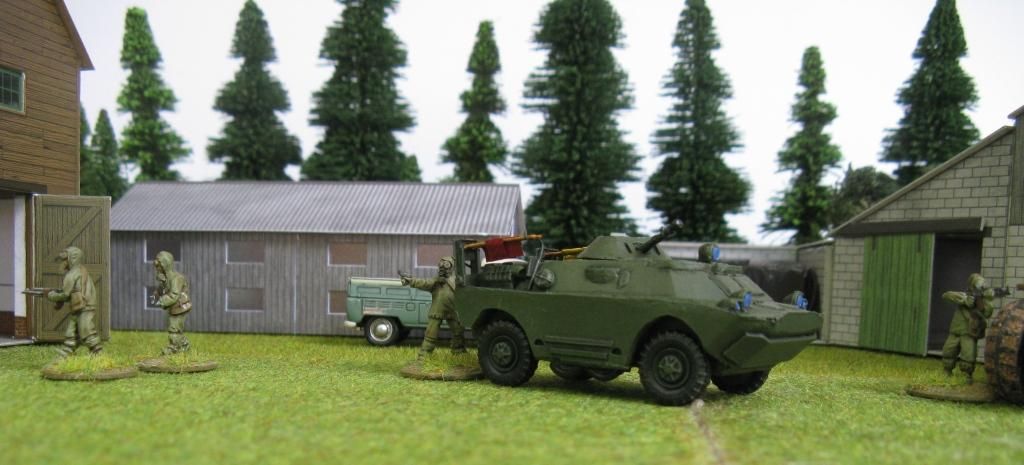
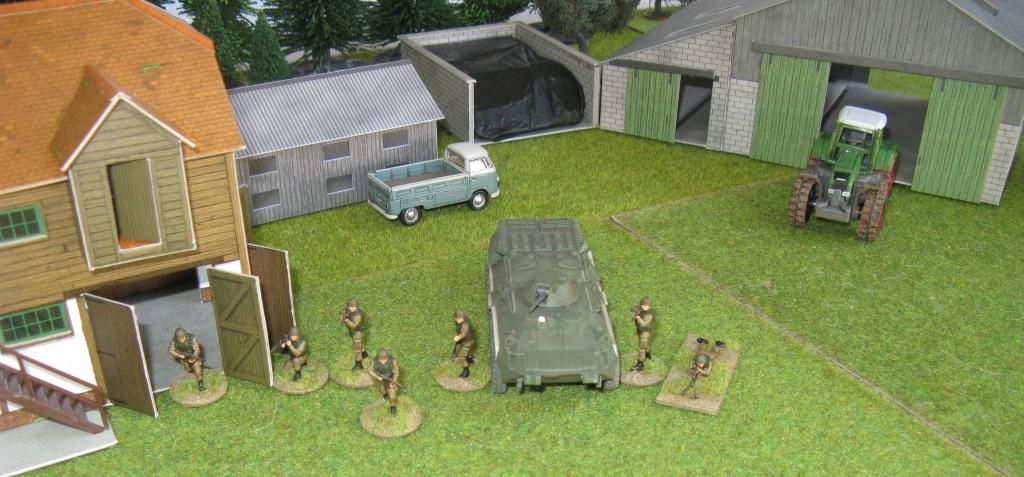
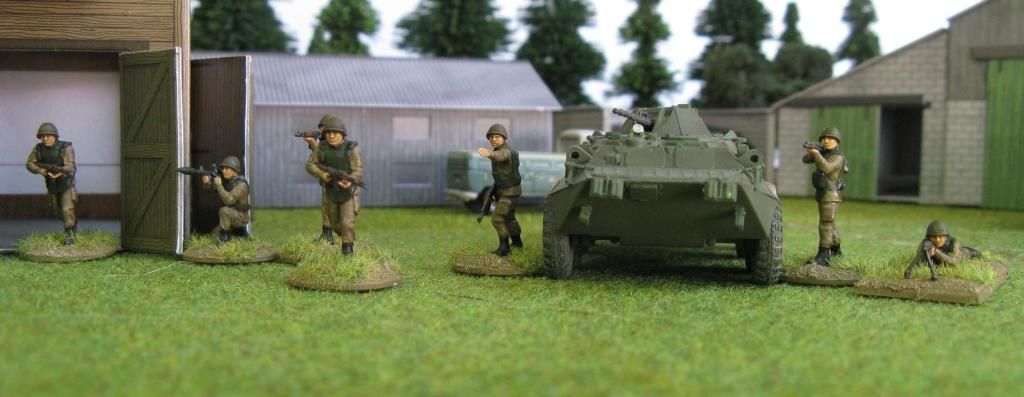
Finally some "Action" shots:
So - my overall impression is that these are very nice figures. Compared with some Zvezda stuff that I have literally been reduced to tears whilst trying to stick together, these fit fairly simply. They took paint and "dip" easily as well. The figures look natural, anatomically right and come with a good selection of excellent looking weapons. Price - very cheap - I think I got these for about 3 quid each plus postage. Sadly I have not seen these in Australia.
My only negative would be that although you get 5 figures in a pack, if you are trying to put together a squad, you will need at least 2 packs, and some of those figures (NCO, RPG & RPK) won't be able to be used twice. Not really much of a negative really.
Best of all, there are some really nice sets coming out like a US Dragon missile box, which I'm very much looking forward to. Come on Zvezda - bring 'em on!
Richard