So with the table set it was time to get on with the game. First up the Danish player was able to palce both his Centurions, the M41, a Forward Observer, 1 Mech Squad in their M113A1, the M150, a single medium Mortar, the HJV Platoon Command all in his deployment zone.
The Centurion Platoon Leader's Tank, an M113A1 and the Forward Observer deployed in and around the barn across the road from Lystrup &Jomfruens Egede Godser main house.
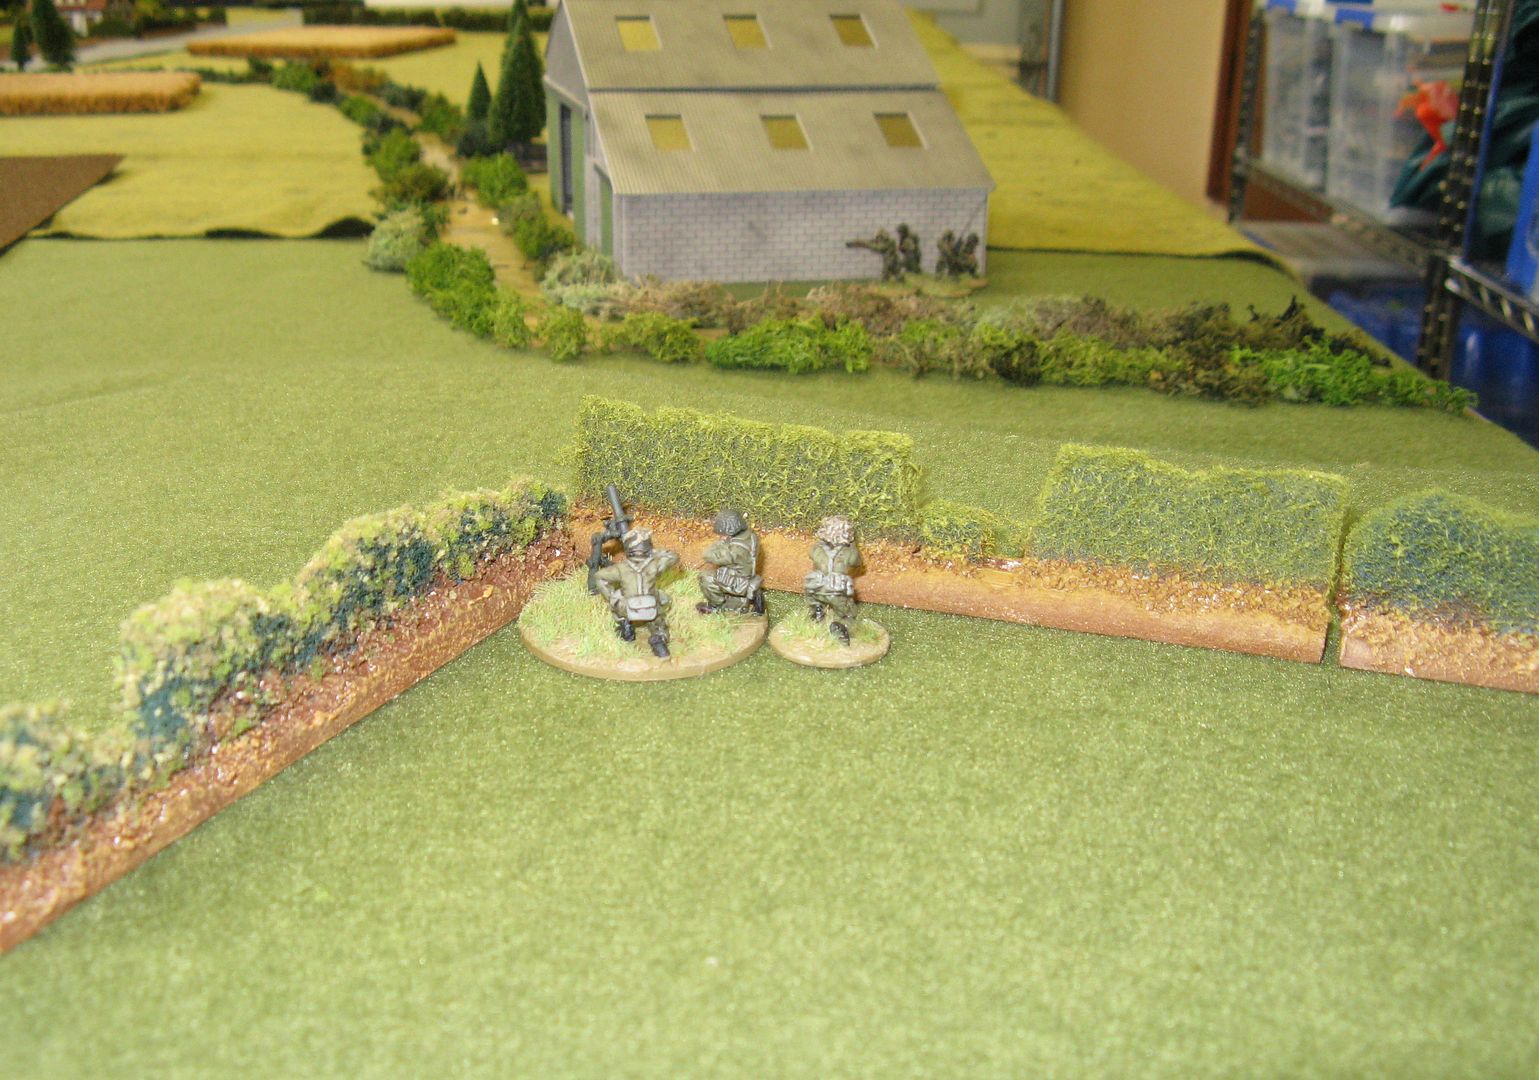
On the opposite side of the table the medium mortar is deployed and in the distance you can see the HJV Platoon Command Squad.
The M150 (on Overwatch) and another Centurion cover the centre of the table.
Here's another view of the centre and left flank. The M41 is hidden in the Lystrup &Jomfruens Egede Godser courtyard.
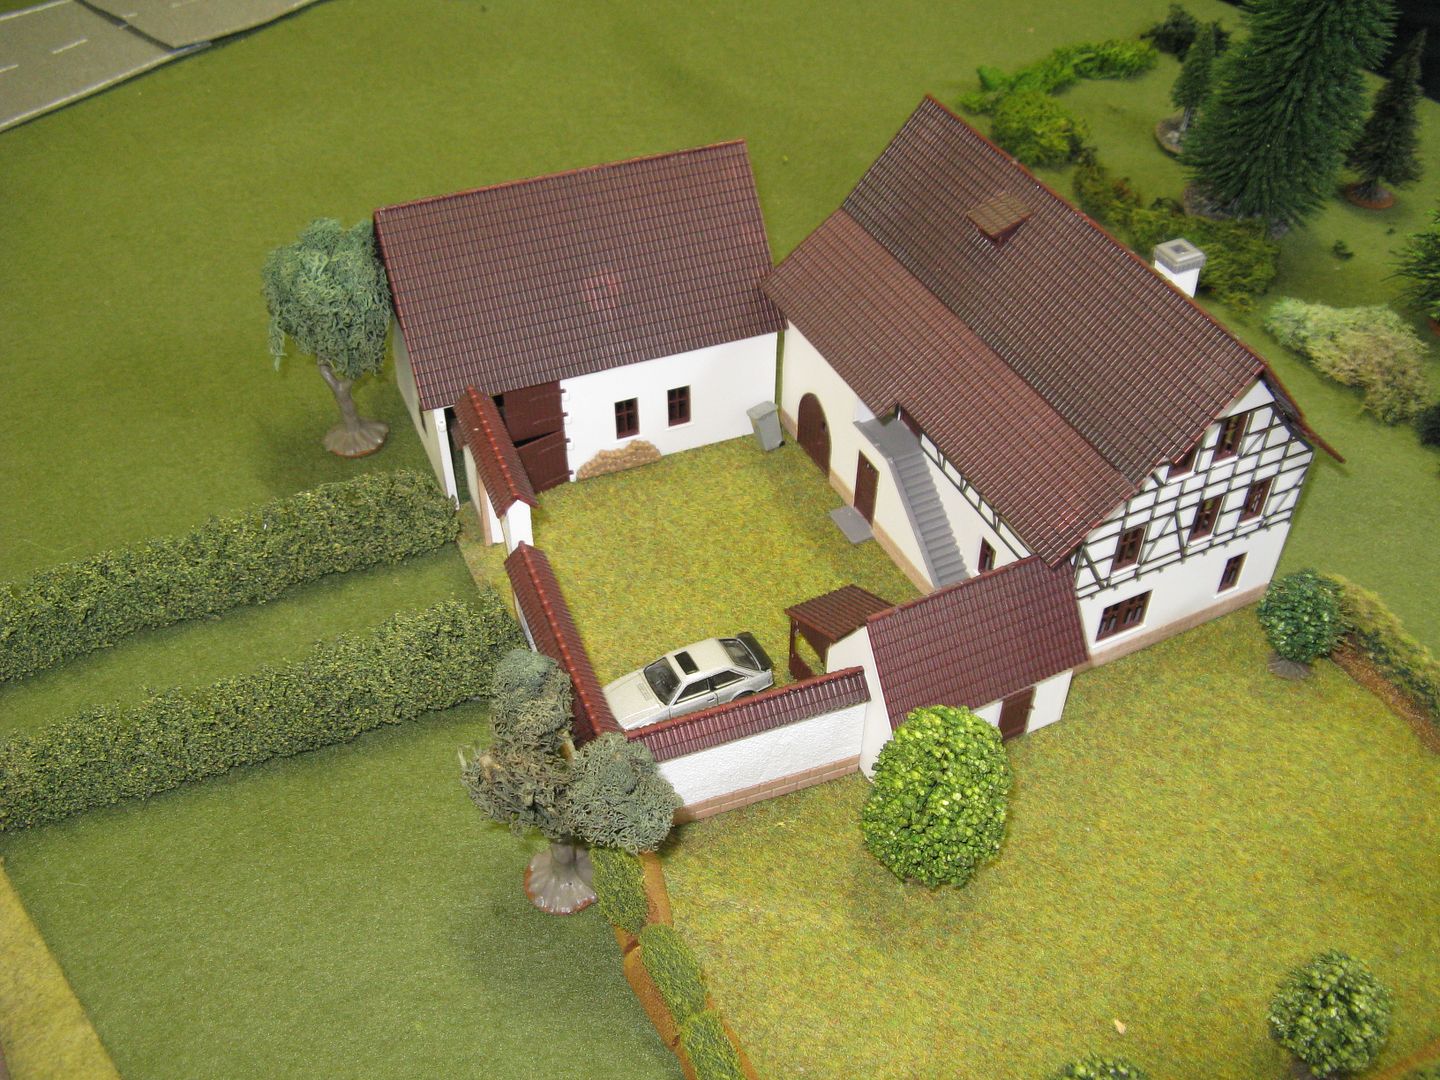
And here's another shot of the HJV Platoon Command (also shown in yesterday's post). The final 2 units on the table - an HJV Squad and the HJV MAW Team were not actually placed on the table, but were "hidden" in and around the house in the picture below - the Soviet Player had no idea of this.
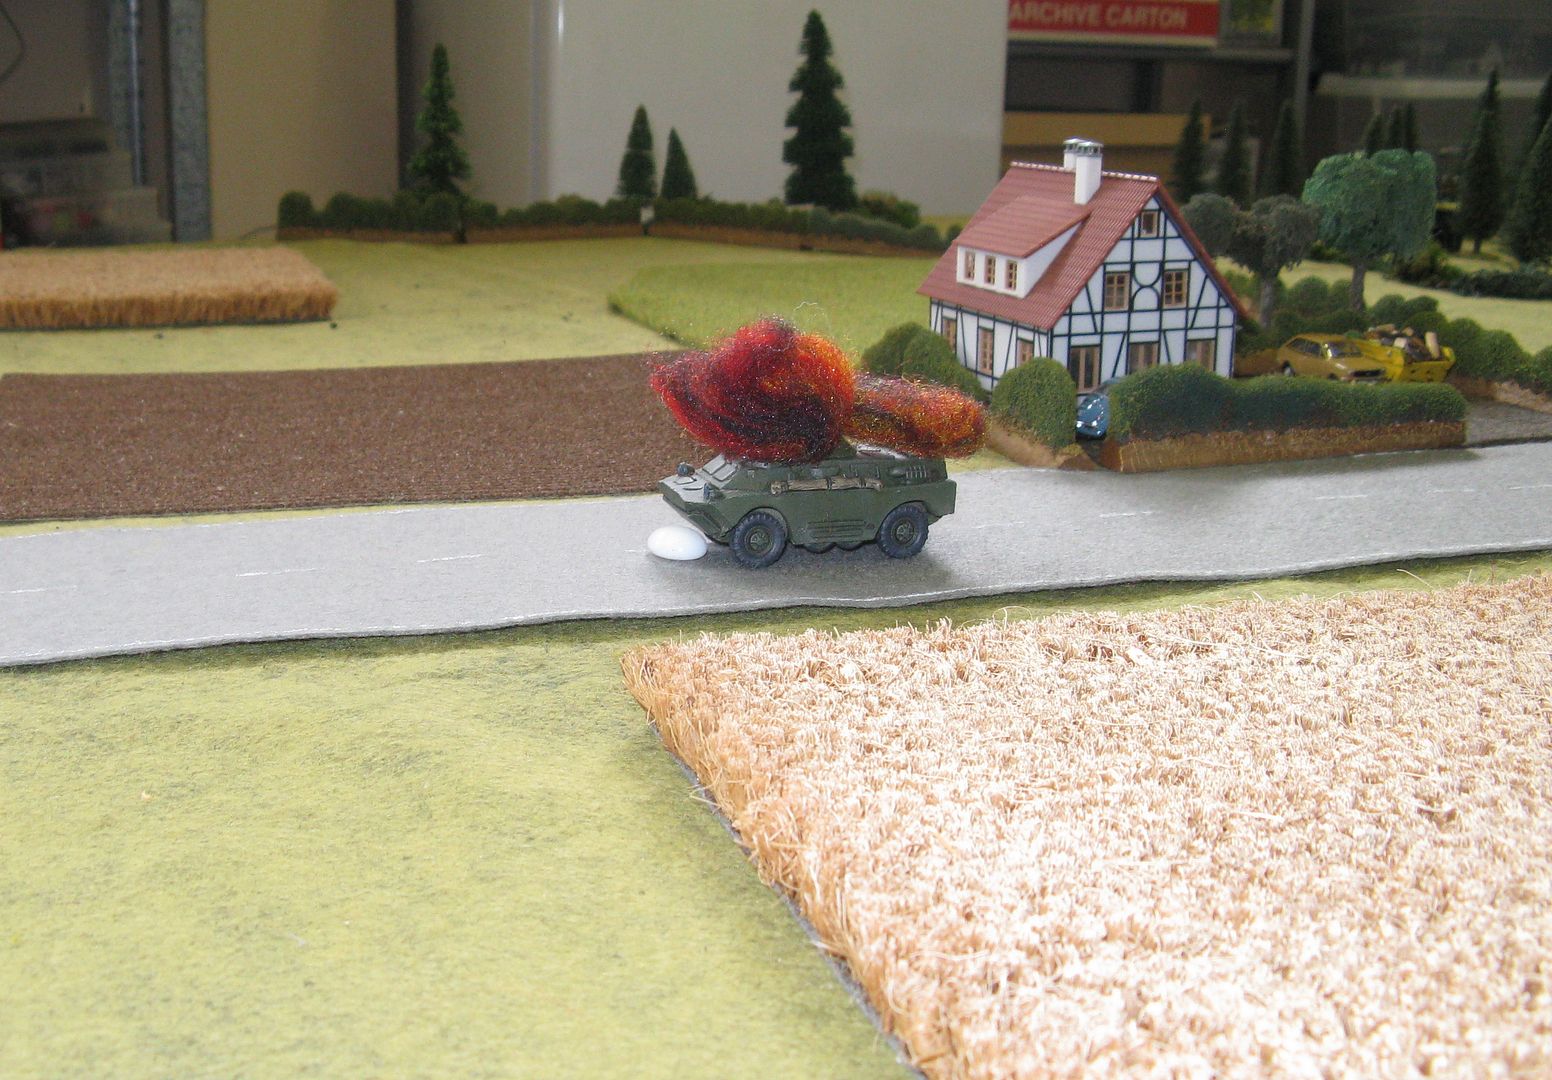
The Soviets led with their recon BRDM-2, the sacrificial lamb that was sent up the main road, mainly to see how many overwatch shots and missiles it could attract. Only 1 105mm main gun round it turned out, was necessary to ruin the BRDM's day.
3 T-55AMV's also raced up the road as far as they could, laden with 2 Soviet Naval Infantry Squad and an Anti-Armour Squad, all of whom had lost their BTR-60PBs in the previous game. In the distance you can see a blown up UAZ-469, which must have taken a round through the bonnet (hood for Americans) totally destroying it, but leaving the Mortar Fire Controller completely unharmed (but pinned for good measure. The other UAZ also emerged unscathed.
Here are the T-55AMV's and their passengers again.
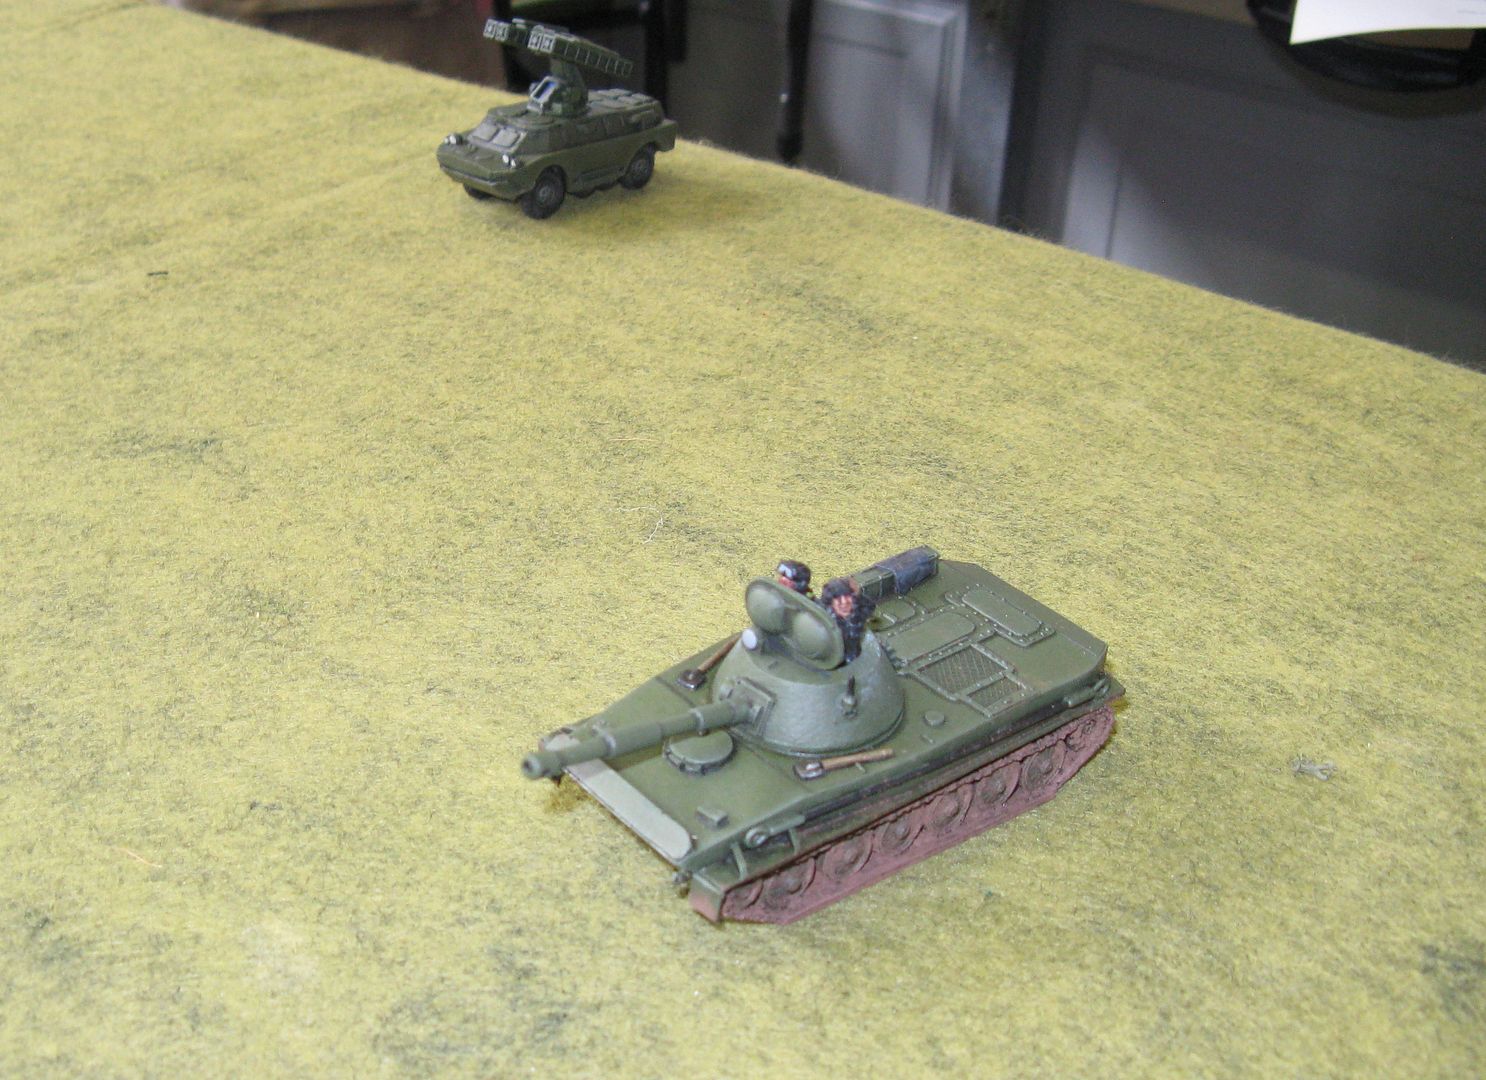
Other units also started to slowly move up the table, struggling in the wet ground. The SA-9 in the background remained there for almost the entire game as the Soviet's really had a difficult time activating all the little units that were not part of a platoon. Based on what happened in this game I have had some ideas to tinker with my Soviet Orders rules.
The BTR-60PB carrying the 120mm SNI mortar team took a couple of turns to get into the right position on the edge of the woods before deploying the heavy mortar.
The Ambush is sprung. A MAW round hits the T-55AMV closest to the house but fails to penetrate due to the reactive armour. The explosive does drive the Squad riding the tank off and they are pinned behind a hedge. The HJV Squad fires their one M72 LAW at the tank adjacent to the first hit tank, which misses and the rest of the squad open fire at the tank riders, massively depleting that squad (down to two men) who are also pinned against another hedge.
A different shot of the action. The two front T-55AMV's were also shot at by a Centurion and the M150, both of which missed.
Scattering artillery did however manage to pin one of the PT-76's crawling through the mud.
Whilst the T-55AMV's tried to deal with a multitude of targets, and unpin all their units, the M150 targeted one of them from cover....
... and managed to take out the first T-55AMV. The reactive armour roll was poor, perhaps the missile hit the same spot as the Carl Gustav team, because it easily penetrated and destroyed the target.
Meanwhile the remainder of the SNI on table force continued to prepare. The ZSU-23-4 was put on Ambush Fire when after finally inflicting 3 BR chits (the loss of the MAW Team, the HJV Squad and an objective) the Danish player drew 2 planes and an Out of Ammo chit, which was played on the mortar, which did not fire another shot for the rest of the game.
Danish reserves started to show up. With the Mech Platoon Commander happy to sit in his M113A1 up the back of the table and call in fire from the off-table mortar battery, the other Squad set off across country to reinforce the Dane's right flank. Unfortunately two "1's" were rolled and the M113A1 was bogged in the mud for the rest of the game.
The first real bit of luck for the Soviets when they managed to get in contact with a battery of 122mm guns whose barrage landed exactly where it was needed, killing the Centurion Platoon Commander (and his tank) and pinning the M41
The Mortar's BTR-60PB continues to advance.
Now the flanking force started to arrive. This was a total surprise for the Danish player, whose been so busy lately he didn't get a chance to properly read the scenario. The Soviet player did read the scenario!
On they came across the stream. I actually wanted them to arrive on the road, but I couldn't get it to go exactly where I wanted it so they came on where they came on.
It didn't really make much difference for the Soviets though as they took out both the M41 and the M113A1 they could immediately see.
As this was happening in the centre of the table there was an exchange of losses. The remaining Centurion took out the second T-55AMV.
Then the remaining T-55AMV, stationary behind the two burning wrecks of his platoon mates calmly slotted the M150, the Danes most damaging weapon.
The final shot of the game was of the burning Danish wrecks. This was the end of Turn 7. The Soviets had been taking chits every turn since Turn 5 as they hadn't won the game fast enough. The Danes were down to 3 Mech Infantry Squads, 1 functional M113A1 and a Centurion, plus the FO team, the HJV Command Squad and the medium mortar.
The Soviets had only lost 2 T-55AMVs and a BRDM-2, plus some Naval Infantry.
Interestingly the Soviets had suffered much more BR damage, while the Danes were sitting pretty as they had draw 2 planes, and out of ammo chit, and one other Name chit which I can't remember.
Had we had the time for one more turn a whole BTR-60PB mounted platoon could have come onto the table and immediately assaulted the barn where the FO and 1 Mech Squad were based. They could have been supported by the 3 T-55Ms that were also on that flank and by the T-55AMV which would have started moving up the table. Turn 8 would not have been a happy turn for the Danes.
So the bottom line was that the Soviets were able to push the Danes out of this position much more effectively than Game 1 where the Danes left the table when they felt like it. The surprise flanking move really smashed the Danes, and the Danish player not being prepared for it made it much more devastating.
So once again, fun was had by all and sometime in the next 12 months we might get a couple more games in the Campaign completed!
Thanks for reading
Richard
Showing posts with label Zealand Campaign. Show all posts
Showing posts with label Zealand Campaign. Show all posts
20 March 2019
19 March 2019
The Zealand Campaign - Game 2 - Follow-On Attack - Lists and Table Set-Up
OK - so onto the lists and table. First up - the Army Lists bearing in mind these were the remnants of both forces from Game 1.
Soviets
1 x Soviet Naval Infantry Platoon (SNI), with 3 BTR-60PBs, a Metis Team and a SVD Marksman
1 x Depleted SNI Platoon with no BTRs, only 2 squads and an attached SA-7 team
1 x Anti-tank Section with no BTR, 1 x SPG-9 and 1 x Metis Team
1 x Mortar Team with a 120mm Mortar and a BTR-60PB
T-55AMV Platoon with 3 Tanks
T-55M Platoon with 3 Tanks
2 x PT-76 Light Recon Tanks
1 x ZSU-23-4
1 x SA-9
1 x BRDM-2
1 x Mortar Fire Controller with a UAZ-469
1 x Shore Fire Control Party with a UAZ-469
2 x 1st Target Priority Fire Missions
Total Points: 627 Total BR:35 No Officers but 4 Platoon Commanders
Danes
1 x Mechanised Infantry Platoon in 3 M113A1, with 3 M72 LAWs
1 x Self-Propelled Anti-tank Team in a M150
1 x Medium Mortar Team
1 x Depleted Hjemevaernet (HJV) Platoon with 1 M72 LAW & "Behind Enemy Lines"
1 x HJV Medium Anti-tank Team with "Behind Enemy Lines"
2 Centurion Mk 5/2 DK Tanks (one of with is an Officer)
1 x M41 Light Recon Tank
1 x SAM Team with Stinger
1 x Forward Observer
Off-Table 120mm Mortar Battery
2 x 1st Target Priority Fire Missions
Remote Control Demolition of Bridge
Off Table TOW Shot
Total Points: 488 Total BR:25+1D6 Officers: 4
So the Soviets had a pretty decent point and BR advantage in game terms, but had to do all the attacking over difficult terrain.
Now the Table:
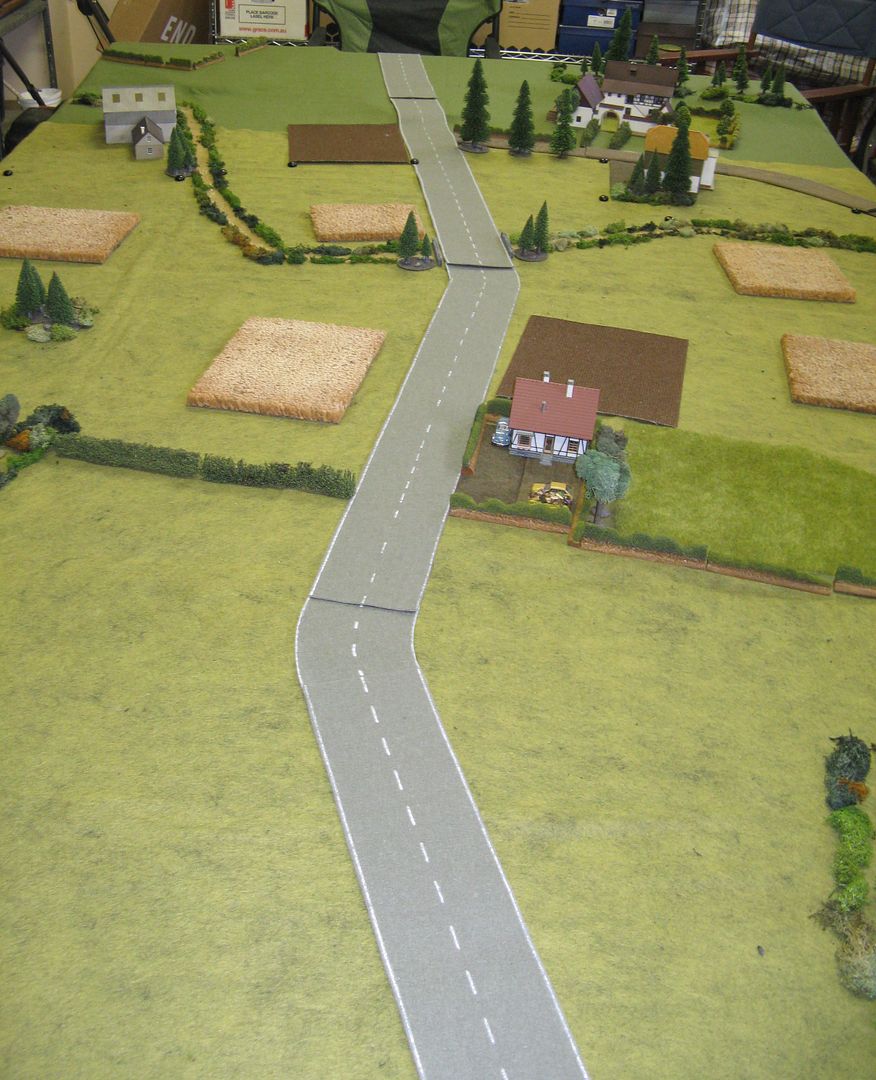
This is the view from the SNI end of the table. There is a slight rise at the Danish end of the table and also a small creek running across the table, which at most points was similar to the Danish Deployment zone. The building in the top left hand corner is part of the aerodrome, while that one the right top corner is Lystrup & Jomfruens Egede Godser.
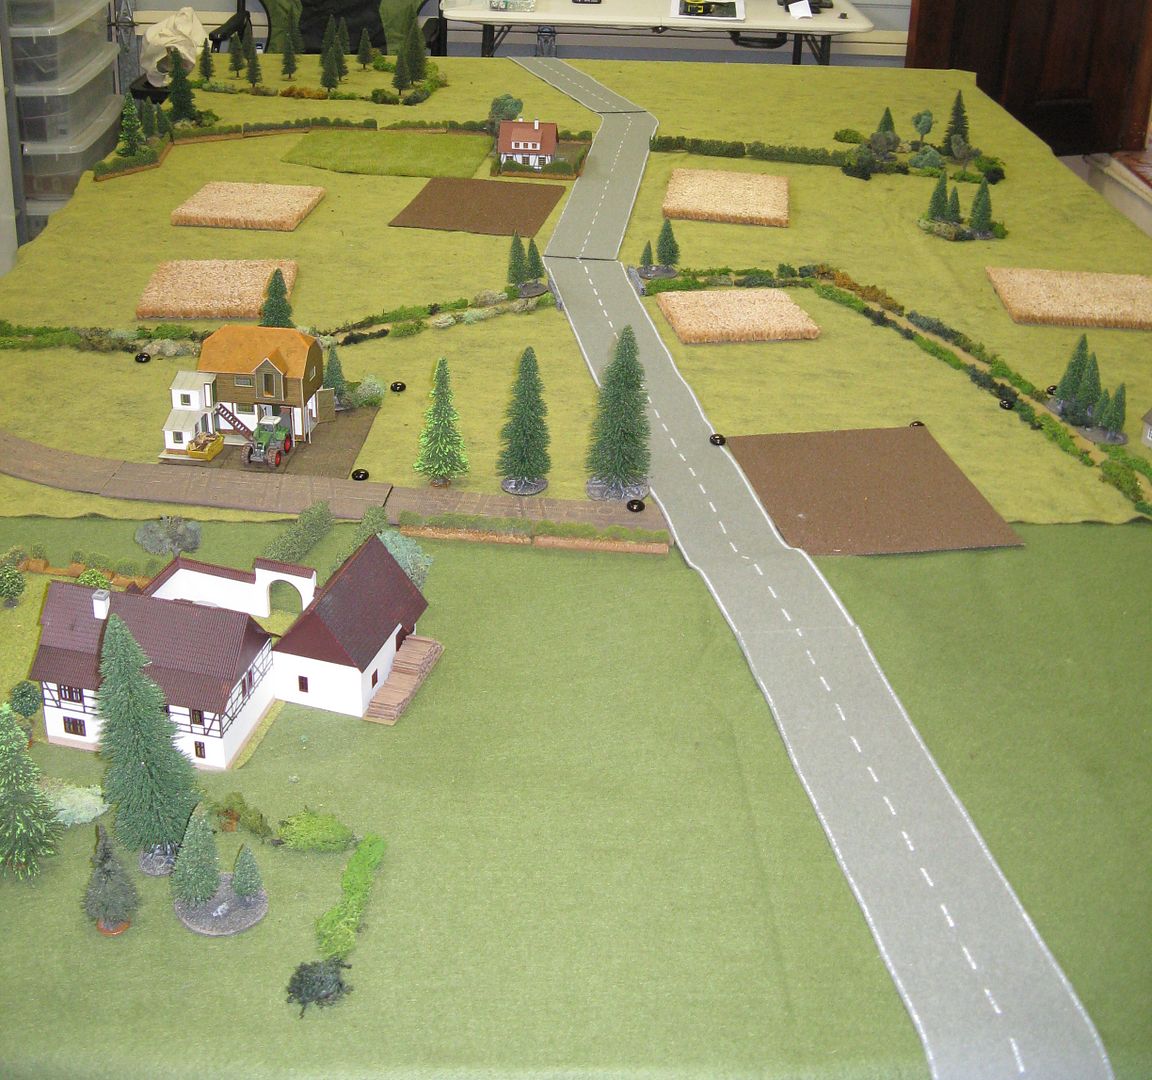
This is the table from the Danish point of view with Lystrup & Jomfruens Egede Godser in the close left hand corner. Again you can see the creek in the middle distance. The black dots you can see are the deployment zone markers I used.
A closer shot of the creek, full of dirty water. To cross it, a vehicle had to move up to the edge of the creek and stop, then move is off-road movement value minus 1D6. Again you can see deployment zone markers.
This is my slightly dodgy version "Lystrup & Jomfruens Egede Godser" which I think basically means Lystrup and Jomfruens Estate. It's much grander in real life, but this will do.
Part of the estate is some structures across the road from the main buildings. I have represented that with this barn structure.
Much closer to the Soviet is this small cottage, surrounded by hedges and some trees. Unbeknownst by the Soviet players one HJV squad and the HJV MAW Team were hidden in this house ready to spring an ambush.
Although this is an in-game photo, I'm using it here to show part of the table set-up so the photo may get used again in the next post. This is meant to represent buildings that are part of Ost-Sjaellands Flyveklub or East Zealand Flying Club. It also shows on the map as Kongsted Svaeveflyveplads which I have no translation for but I understand this area is a flat, grassed glider and light plane aerodrome. Comprehensive readers might also remember this aerodrome was one of the Soviets objectives as the are planning on basing all their helicopters here, at least temporarily.
So that's the Army Lists & the table set-up. I was planning on having the AAR as part of this post as well, but it's already long enough so I'll deal with that tomorrow.
Thanks
Richard
18 March 2019
The Zealand Campaign - Game 2 - Follow-On Attack
Well it's been a while since I've been able to post up anything but new lists, rules etc but my life has finally settled enough that I can start playing a few games.
Back in
December 2017 a couple of mates and I had the first game in my Zealand Campaign. I’m not expecting anyone to remember that (I
barely could) but if you want to read about it, you can find some background
information here, copies of the Operational Orders here, the pre-game and table
set up here, and the After Action Report here.
In a
nutshell, WW3 began on 7 July 1986.
Today’s date is 16 July 1986. Polish
Airborne and Naval Infantry landed on the Danish Island of Zealand yesterday
near Ringsted and Koge respectively. Earlier
this morning elements of the Soviet 336th Naval Infantry Regiment
started landing at the small port of Faxe Ladeplads, to the south of Koge.
In Game
1, the assault elements of 336 NIR set out to establish a beachhead. Driving inland they came across the first
significant Danish resistance to the East of the town Faxe. A small delaying action ensued with the Danes
withdrawing to the West.
Both
sides had incurred casualties, with the Soviets loosing 4 BTR-60PBs plus a
couple of 9P148’s (BRDM-2s with Konkurs ATGMs).
The Danes lost less in terms of numbers, but more in terms of need. They lost a M41 Recon tank and a Centurion Mk
5/2DK.
My first
step was to give the Soviet player a set of choices, in the days before the
game, on how he would proceed. What I
presented to the Soviet player was as follows:
1.
Immediately continue the attack with what you have at hand
This
option gives the Danish player no time to dig in at the next line of resistance,
or replace losses and we will treat the game as a Flanking Attack. However, your force will be similar to Game
1, minus 4 BTR-60s and the 2 Scout Cars with missiles (all losses from Game
1). The battle will take place along the
154 road from Faxe to Ronnede.
2.
Reset Force, allow units to reconstitute back to full strength
This
option will mean that the Soviet forces will not pursue the Danes until about ½
an hour after the first encounter as you sort out casualties, replacements and
new units. It means the Danes will have
had time to set up minimal defences and maybe replace some losses. Your force will be similar to Game 1, fully
reconstituted from Wave 1 reserves. The
battle will take closer to Ronnede, at a place of the Danes choosing and the
game will be a Hasty Defence.
3.
Allow 1st Wave follow-on forces to take over the attack while force from
first contact take over the town of Faxe
This
option will mean that the Soviet forces will not pursue the Danes until about
an hour or more after the first encounter.
It means the Danes will have had time to set up reasonable defences and
replace their losses. Your force will be
tank heavy, with a complete Infantry platoon attached. The battle will be a Deliberate Attack and
the Soviet player will have a choice of approaches to Ronnede.
The Soviet player straight away choose the immediate
follow-on attack option in true Soviet style!
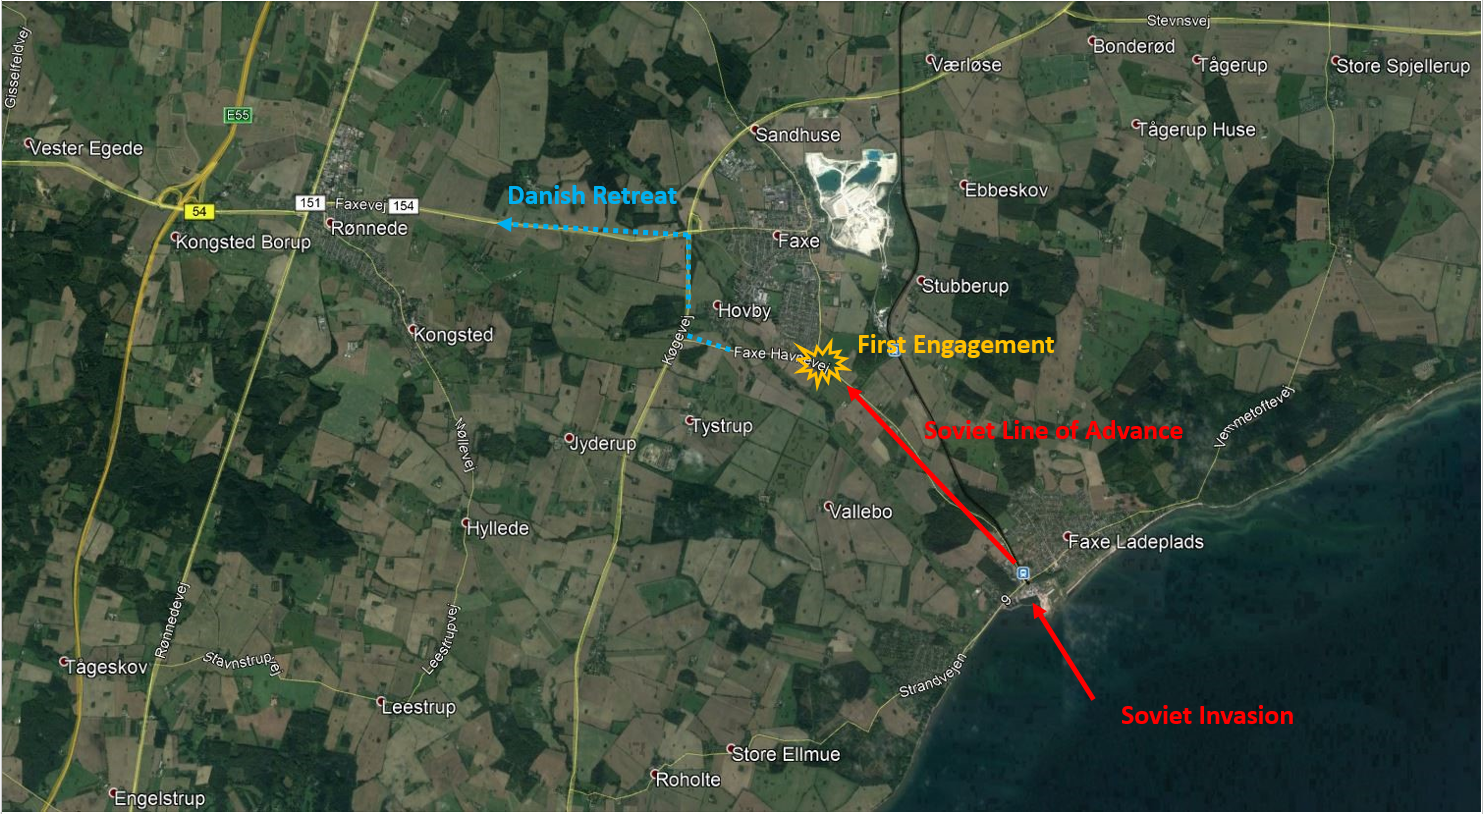
The next choice to make was for the Danish player. I had a good look at the satellite Google map
of the area where the game would now be played and selected two likely spots that
offered some defensible terrain – at least to my very unprofessional eyes. I created two possible game maps from the
image and asked the Danish player to select one to defend.
The Danish player selected Map 1 and then I offered him the
engineering choices I had previously selected from the Danish Defences
options. I choose only those things that
would have taken the engineers limited time to prepare (or perhaps in the case
of the bridge they had been preparing it for a while). Here are the options I presented to him.
Table Option 1
Remote Control Demo of Bridge
Off Table TOW Missile Shot
Or
Improvised Barricades
Improvised Road Block
Cellar Shelter
Off Table TOW Missile Shot
The Danish player selected the option to blow the bridge
(actually I think more of a culvert) and the off table TOW shot.
Then I prepared the mission which I’ve copied in full below:
DANISH CAMPAIGN – SCENARIO 2 –
FOLLOW-ON ATTACK
Situation Report
Following
the earlier engagement, Danish forces have retreated further inland with the
Soviet’s right behind them.
Knowing
the area well the Danish Commander has chosen another spot to defend with the
remnants of his force. The more time he
defends, the more time other Danish reinforcements have to insert themselves
between the Soviet Naval Infantry and the Polish Paratroopers, and secure the
main highway to Copenhagen.
The
Soviet Commander has orders to push inland as fast as possible and secure the
MSR. Time is of the essence, and any
delays will prove costly.
Terrain
The 154
road from Faxe to Ronnede runs along the centre of the table. There is also a secondary road the runs into the
Danish deployment area. The rest of the
table is covered in farmland with a small stream running across the table
crossed by a bridge.
It has
been raining consistently for the last few days and the land is more boggy than
normal. All vehicular off road travel
should subtract 1D6 from the movement rate.
On a “Top Speed” order two rolls of a “1” indicates the vehicle is
bogged.
Victory
The side
that exceeds its Battle Rating must withdraw and losses the battle. The Danish Player cannot claim an All Objectives
Secured victory, but the Soviet player can.
Special Rules
Low
Cloud Cover
If an
aircraft chit is draw, the aircraft becomes available on a roll of a 6+ rather
than a 5+
Pursuit
For each
3 Soviet units that leave the table through the Danish player’s table edge, the
Danish Player must take an additional BR chit
Time
is Pressing
The
Soviet’s do not have much time to remove this obstacle to their advance. If at the start of turn 5 the Danes are still
fighting, the Soviet Player must take a BR chit at the start of each of his
turns.
If the
Danish forces are still fighting at the beginning of turn 10, the Soviet Player
must take two BR chits at the start of each of his turns until the end of the
game.
Deployment
1.
The
table sides each force will deploy in are shown on the map
2.
Place
Objectives
Place
D3+1 objectives on the table. The first
objective is the road junction. The
second is the bridge. After that the
Soviets place and next objective and then the Danes. Repeat as required
3.
Determine
the Defenders Initial Forces and Deploy
At the
beginning of the game, place the Danish player’s defences and D6+6 units on the
table, anywhere in the Danish deployment zone.
Any units not deployed as the Dane’s reinforcements.
4.
Ambush
Fire
D6
Danish units can be placed on Ambush Fire.
5.
Deploy
Attacker’s Initial Forces
The
Soviet player then places all Recon units and 2D6+6 additional units. These may be deployed up to 10” from the
Soviet table edge. Any units not
deployed are the Soviet’s flanking force.
6.
First Turn
The
Soviets are attacking and automatically have the first turn.
7.
Soviet
Flanking Force
Any of
the Soviet player’s units not initially deployed for the attack are his
flanking force, attempting to use side roads to work around the Danish flanks. The Soviet player should write down whether
he wants his flanking force to arrive from the North or the South.
At the
start of Turn 4, start rolling for the arrival of the Soviet flanking
force. On a 4+ they arrive and D6 units
are placed on the northern or southern table edge, within 10” of the centre
line (as written down). They can then be
given orders as normal.
D6 units
will continue to arrive on each subsequent turn until the entire flanking force
is on the table.
8.
Danish
reinforcements
Any Danish
units not initially deployed are reinforcements.
From the
start of Turn 2, roll a D6. On a 4+
Danish reinforcements have arrived. D3
units may be placed on the Danish players’ table edge and can be given orders
from there. D3 units can arrive each
turn until all Danish units are on the table.
So all that was need now was to set up the table according
to the photo and get on with it.
All that plus more in the next post!
Thanks Richard.
07 December 2017
The Zealand Campaign - Game 1 - First Clash
So - onto the actual game. First up we established where the objectives were for the game:
They were the two major intersections along the road and the large hill that dominated the terrain. Then the Danes set about placing their defences, knowing they would have only their recce troops and Homeguard ont he table to begin with:
The Danes access to limited engineering support in the pre-game so I allowed them to choose from a limited list of defensive options. They selected a couple of tank fighting positions for the M41s, a standard mixed AT/AP minefield and a Claymore minefield.
The Homeguard set up in their entirety on the Big Hill (apart from the mortar, back in Faxe.
The Soviets were allowed to play out their recce moves as part of the pre-game. They played in the spirit of the campaign and rather than just drive the BRDM-2 up the table, spot the tanks and rapidly drive off the table, they went with the following option:
Drive up the table. Stop at the first intersection for a look and a quick spray of 14.5mm heavy machine-gun fire at the most likely target (which was a suitably unimpressed M41 which was waiting on a Overwatch order) and then drive off the table. One M41 took a couple of shots at the BRDM but the gunner was obviously a wee bit nervous as this was his first shot in anger, so both shots promptly missed.
The BRDM-2 took another annoyance value only shot and then promptly drove around the corner. By now the Homeguard were determined to get in on the action and their commander called up their 81mm mortar.
And this was the outcome:
With only one M41 still on overwatch the Soviets charges up the main road with an entire BTR-60 mounted company and a couple of BRDM-2s with AT-5 Konkurs (Sprandel) ATGM. The second M41 gunner was obviously made of sterner stuff and inflicted the Danes first kill:
This intersection would become the primary killing ground for the rest of the game. Not only was it a bit of a bottleneck, but it was also right next to where the Danes had placed their timed strikes and on the edge of their AT/AP minefield.
Unfortunately for the Soviets, the chap in the Jeep is the Naval Infantry Mortar Controller, not their Naval Gun Fire Controller who never really got onto the board in the game. This meant the Soviets had access to their 120mm mortars, but the big guns off the coast never got called upon.
The first Danish reinforcements started to arrive. An FO in his acquired Land Rover headed to the top of the church tower. M113s begin to arrive at the Big Hill in the background.
Here's a closer pic of the M113's arriving at the hill.
A couple of BTR-60PBs made it through the intersection of death and their squads spilled out in the treeline which provided good cover for the road.
Meanwhile on the other side of the intersection the Soviets Heavy Squad jumped from their BTR-60PB ready for action
The TOW armed M113 or M150 (who knows!) edged onto the board ready to start throwing missiles down range.
And meanwhile at the back of the board essentially the rest of the Soviet Wave 1 arrived.
But could do very little as the Soviet orders rolls were pretty low and were continuously needed up at the first intersection to keep the pressure on the Danes. Little did I (as the referee) know this was all part of a Soviet cunning campaign plan.
Things at the intersection of death weren't really going the Soviets way...
... whether through M41 main gun (76mm of anger) or artillery or mortar strikes. Both BRDM-2 Konkurs were now destroyed, the BTR which had mounted the heavy squad was knocked out and two other BTR's were pinned.
I guess loosing a few things meant the Soviet reinforcements would start moving up the table:
While things got progressively bad near the intersection
But at least the mortar fire controller had made it to the firing line and could start calling in some useful support.
To be sure it wasn't entirely one-way (just heavily one way). In three rounds of Soviet shooting the M41 on the big hill was hit by a AT-13 Metis (Saxhorn) ATGM - and pinned, a recoilless rifle round - and pinned before being destroyed by another Saxhorn missile.
The majority of the Homeguard squad camped out next to the destroyed M41 had also taken serious damage and were pinned.
The Soviet advance continued
And the second BTR-60PB mounted naval infantry platoon began to arrive around the first intersection.
Importantly the Soviets managed to knock out a single Centurion that had arrived on the table
At this point the Danes decided enough damage had been inflicted on the Soviets and it was time to relocate back to the next defensive position.
In terms of BR, the Danes had inflicted loads more chits on the Soviets than they themselves had taken so in game terms it was a victory for the Danes. They had lost a M41, a Centurion and a few citizen soldiers from the Homeguard, while taking out 4 BTR-60PBs and a couple of BRDM-2 ATGM vehicles.
However, in Campaign terms, the Soviet player was perfectly happy to have only lost a BTR-60PB platoon (and primarily only the vehicles) and 2 ATGM vehicles to push through the first defensive line. It felt to him like a reasonable exchange so the Soviets certainly don't feel like they lost this one. They've also got many more troops coming along in the next wave or two, so can easily replace those losses, while Danish losses, at least for the moment - cannot be so easily replaced.
So - that was kind of a win/win scenario. Both players achieved what the wanted to achieve with terms that were acceptable to them. Neither side got a clear advantage and both have the majority of their assets available for the next game.
Thanks
Richard
Subscribe to:
Posts (Atom)

