Showing posts with label Tutorial. Show all posts

24 November 2015

US Infantry Woodland BDU (Simplistic) Tutorial

I probably should have posted this like a year ago, but last night I had to search my office/painting room, looking for the peice of paper where I had written down the paints I use to paint Woodland cam on US Cold War infantry.

Being a careful chap I had bought a note book where I was supposed to write all this down - but of course I forgot too...  Part of the idea of this blog was also to be able to record how I had done something - in case I needed to replicate it several years down the track.  Except in cases like this one where I had not gotten around to it...

So... I found the peice of paper (which I'm sure would surprise my wife - but she never reads this blog) and wrote it all down in my note book, promising myself I would put it up on the blog asap.  So here we are!

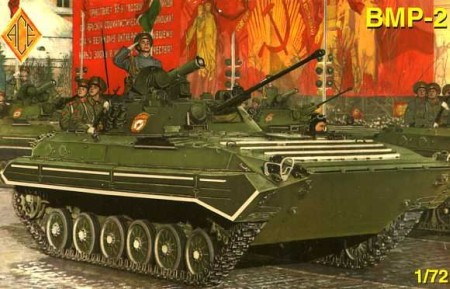
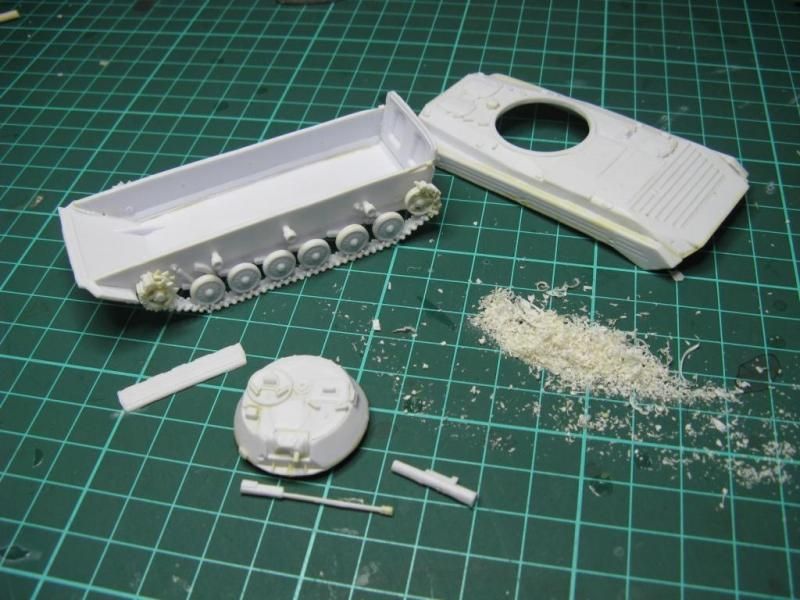
First aim - the aim is to make something that vaguely (on a 20mm figure) resembles this:
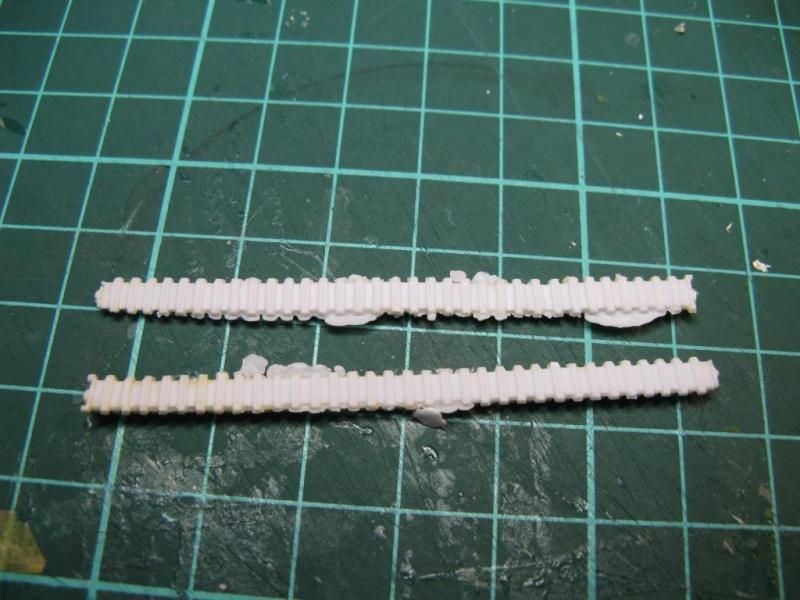


or these:


Step 1
I started off undercoating the figures with a matt black spray can. 

Step 2
Then I used another can of Tamiya spray - in what I considered to be a close enough green to VMC Reflective Green (and sorry I can't remember that so you'll have to work that out for yourselves) and gave the whole figure a green base coat.

Step 3
I then washed the whole figure with a Vallejo Black wash

Step 4
Drybrush the figure in either VMC Reflective Green or VMC Olive Green - which ever grabs you best

Step 5
Paint the boots and guns black

Step 6
Looking at the webbing straps, pouches, water bottle and NBC bag, choose some of them to paint with VMC Russian Uniform.  This is to represent bits of webbing that haven't yet been replaced by webbing with the Woodland Cam.  The more you do the less you'll have to apply cam too!

At this point the figure should look like this:


In the second pic you should be able to see some of the webbing standing out in the Russian Uniform.

Now you are ready to start on the cam patterns.  I find it much easier to do with some reference pics, or previously painted figures nearby so you can get the next stages at least kind of looking right.

Step 7
Add fairly large swirls of VMC German Cam Beige Brown.  Something like this:


On the second pic here you can see some of the large pouch has been painted in the first cam pattern, while the water bottle and the pouch opposite are in the Russian Uniform colour.

Step 8
Add splotches of VMC Cam Medium Brown, in between and connecting to the Cam Beige Brown.  To look like this:


This is perhaps the hardest step, as the cam pattern needs to "lock into" the previous cam colour, so it can't be done slap dash.

Step 9
Almost done.  Now add thin black lines to the cam pattern.  Like this:


Again, this needs to be pretty neat and not 100% random.  I find that for the best look, and to make the cam pop, the thin black lines should largely go between the first two cam colours.

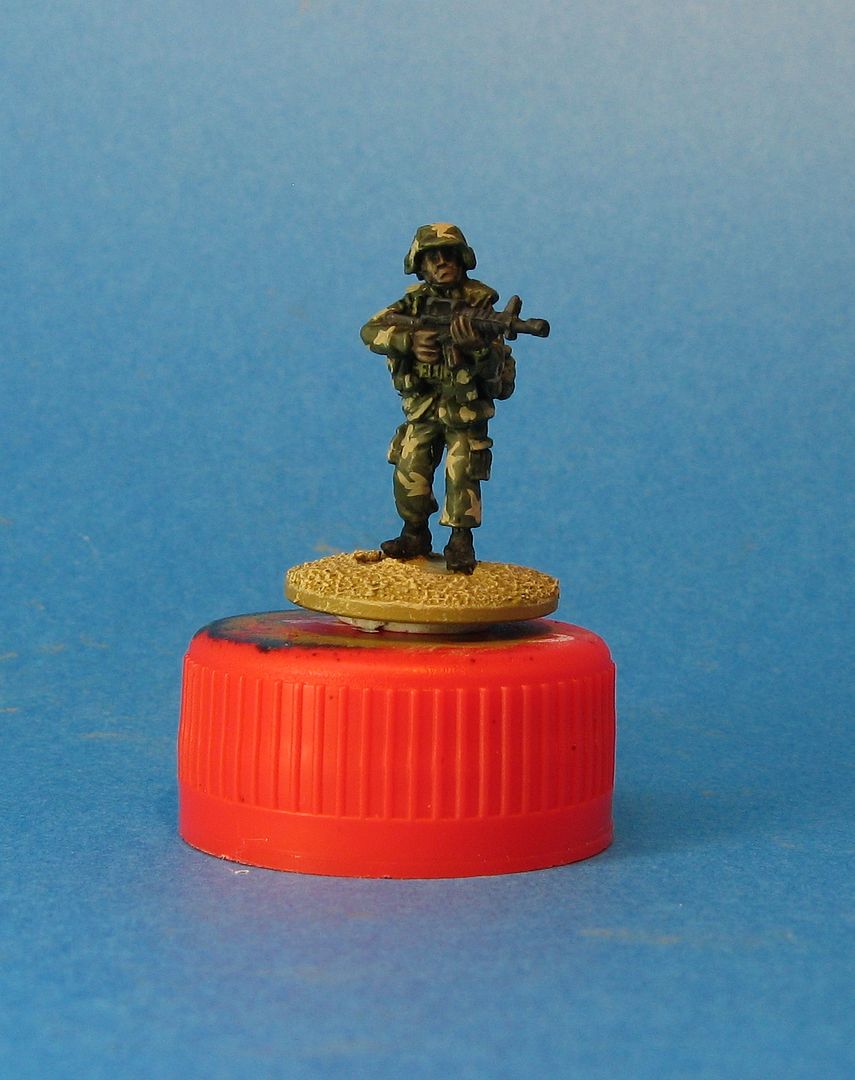
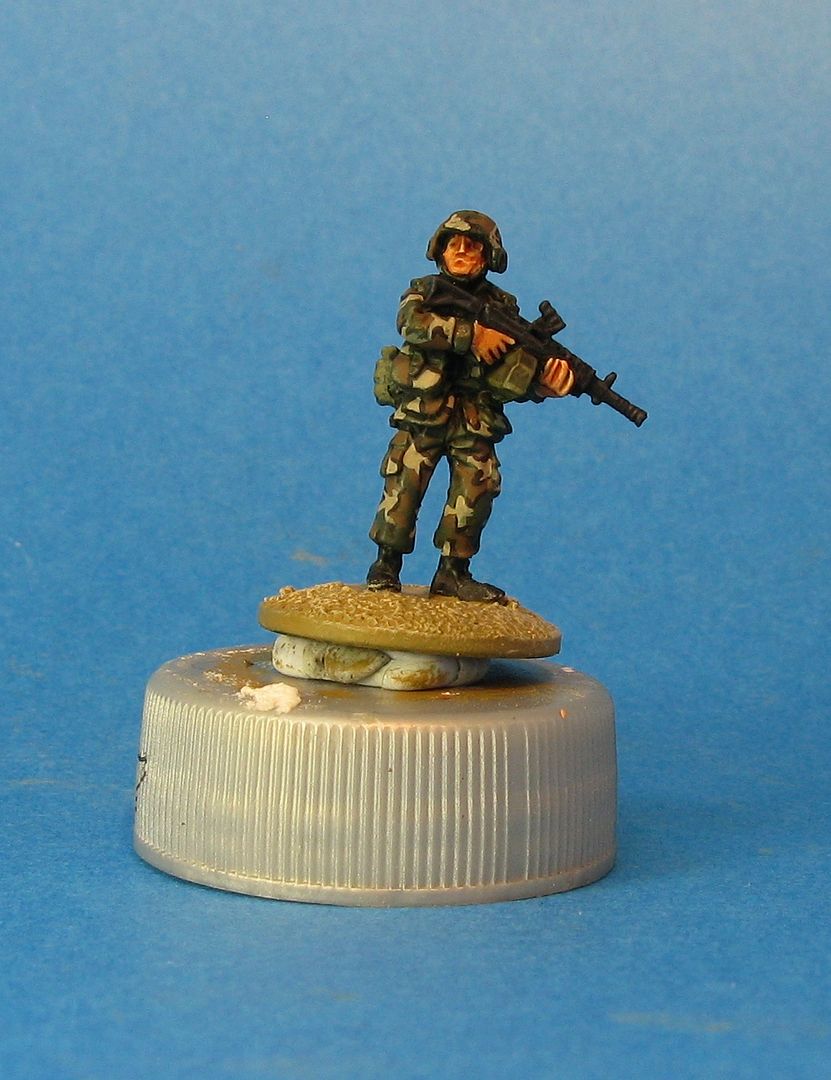
Now you can move onto faces, weapon highlights etc and you're done.  Final result should be this:


I've shown those two pics previously - but they are the finished troops used in the tutorial.

That's it for the day - it's fairly simplistic I know, and I'm sure you can find more accurate tutorials out there, but I'm very happy with the result.

Thanks

Richard


07 May 2013

Creating a World War Two Urban Tabletop - Part 1

As per usual - another lurch in direction.

At the moment we are starting to playtest Battlegroup: Fall of the Reich or BG:FotR - the thrid book in the Battlegroup series (if you don't count the new mini-rulebook).

I have wanted (for ages) to create a decent cityscape table - and years ago was inspired by this thread on the Guild by Faustnik.  He creates a cobblestone table-top using a fake (faux?) leather like material - which until a few weeks I ago, I had never been able to find myself.  Then I stumbled across it at "Spotlight" a shop frequented by my wife and bought some.

It's not cheap - about $40 a metre...

It's brown and looks like this close up:


Next step I popped down to "Bunnings" and picked up a couple of 4' x 2' MDF boards - 12 or 13mm thick - like this:


Then - with much help (meaning she kind of took over much to my relief) from my dear wife, and using an air-powered stapler - we stretched the vinyl like material over the boards and stapled the material down - so they now look like this:


You can see the air-compressor in the second pic.

So - Mission Accomplished as George W. Bush would say - meaning, Part 1 is done - much more work to follow.

Thanks

Richard

03 January 2013

Carve yourself a BMP-2

OK - slightly exaggerated title, but as you will see in this post there is an element of truth in it.

Recently I built an ACE Models BMP-2 that came in a box looking like this:
which is one of the earlier production models of the ACE BMP-2.  During the build I took a few photos - so it's not really a Work-In-Progress or tutorial - just a history of how it went together along with a growing pile of off-cuts.

Before I jump into this I have to make a statement up-front.  I have to say that despite ACE kits kind of doing my head in - I actually really like them.  I guess its a love-hate relationship.  Sure - they can be a bit of a headache to build - but I think they end up looking lovely and in my opinion - possibly the best examples you can get (along with a great range - even in most of them are out of production).  So - moving on...

First up - the sprues.  Here is all three of them:


Followed by some close up's of each individual sprue:

They probably don't look that bad from that distance!

This is a close-up of the wheels, and three chassis peices cut from the sprues.  You start to get an idea of what you need to do.

Once those peices were cleaned up this is the pile of off-cuts (for lack of a better word) I was left with:

The pile starts to grow and you get an idea of the cleaning required on the hull sides (sponsons?)


Hull (top and bottom), sides and turret all cleaned up - pile detris pile:


Starting to assemble the tracks:


Power train wheels - a reall pain as there are no guides to match them up - so I do it by eye - sometimes it works...


The detris pile continues to grow as the kits starts to come together:


I was hoping to get away without having to put on the top tracks - from this photo you will see why:


Once I decided that I couldn't get away with it I thought I might get away with just cleaning the side you'd actually see.  Once I cleaned that and fitted it I realised I'd cleaned the wrong side so had to clean them both anyway!

Here is the final picture of the completed BMP-2 with the final detris/off-cuts pile:


100% honestly that pile came from just this 1 kit.  Pretty impressive in my opinion... but the kit looks pretty good.

Just out of interest - here is a comparison photo between the S&S Models BMP-2 and the completed ACE Models BMP-2.


So that's it for now.

Thanks

Richard

18 November 2012

BAOR Brigade HQ - Work-in-Progress

Well - inspired by the photos I showed in the previous post - most of which came from this thread from The Guild - I decided to have a crack at building something that could at least loosely represent at British HQ in the 1980s.

I needed about four FV436 (Command vehicles) which looked a bit like this:

But since they were all going to be covered by tarpaulins I decided that I was free to cheat a bit.  As a kid I had some books were a chap had made pretty decent tanks out of balsa wood.  Now was my chance!

These are my FV436's - with the roof stowage bin towards the back!
 I added some plastic tube to make installing aerials later a bit easier.  Sadly (or not so sadly) I didn't notice the tent extension framework on the back of the FV436 until I was typing this out!  Well it made the task easier to leave it off anyway.

Each command vehicle needed a tent extension and there needed to be a tent doorway.  These were also made out of balsa wood with a little wire frame for the tent roof.  Like so:

And when you put them all together you get:

Hey presto!

Next up was the really fun part - soaking tissues with quite watery PVA glue left me with this:

The edges were cut off and the vehicles and tents were sprayed green and grey - and then I looked more closely at the pic and realised they weren't grey at all - so I painted them Vallejo Khaki and Khaki Grey.  I then applied the appropriate Citadel wash with the silly new name I can't remember.
They were then dry-brushed and plastic rod aerials were added to the vehicles. 

Pics of the final work in the next post.

Thanks

Richard

01 June 2010

Bundeswehr Troops

I've now completed all my West German Troops - I don't have a ton, just enough for some decent sized skirmish games. They are a mix of Elhiem troops and Revell plastics. Size wise I think they mix together well.

I had to be careful in selecting from the Revell range as they are very modern and generally don’t fit into the 1980’s at all. So basically I just took Milan teams and snipers as neither of these have the new G36 Assault Rifle – so I thought I could get away with it – at least when you look at them from a wargaming distance!

My only beef with the Elhiem figures is that they have a bit of a weak point at the ankles. I don’t think in years of painting and gaming that I’ve ever broken an individual figure (I have dropped models and smashed them to pieces – but hey, that’s different). I managed to break 2 of these guys – and due to the skinny ankles, was not successful in pinning them back together. Once I get around to doing a Marder or M113 with an open hatch I should be able to use both these figures there so nothing to complain about really.

Oh yeah – a couple (mainly shooting ones) had faces that were not so good as well. This confused me a little because the vast majority have excellent faces.

Hopefully, though, at some point I will be able to supplement these with some Liberation West Germans (one they have been remastered) and more from Elhiem. I know some more chaps with G3’s and MP5s are currently being done.

Here's a couple of my standard wikipedia links to things of interest on this topic

The Bundeswehr

G3 Assault Rifle

MG3 Machine Gun

Uzi Sub-machine Gun

Light Pzf 44 2A1

My aim was to have them look like this:

Photobucket

Image from Osprey Elite 16 "NATO Armies 1949-87.

I’ve also found a couple of other reference photos:

Photobucket

Photobucket

PAINTING

These chaps (the Elhiem figures) were very easy to paint, once I had worked out the correct (in my twisted view) colour for the West German uniform. Once that was done, the rest was a piece of cake. These were painted in my traditional manner.

1. Black undercoat – Citadel Spray

Base Colours
2. Base Uniform Colour (slapped on) – about 60% Vallejo German Field Gray 40% Vallejo Green Grey
3. Helmet, Breadbag and some other bag at the rear of the figures – Vallejo Khaki
4. Pouches and Webbing – Vallejo Medium Cam. Brown
5. Water Bottle, Stock and other parts on Gun – Vallejo Reflective Green
6. Metallic parts on Guns – Vallejo German Grey
7. Wooden Uzi butts – Vallejo Beige Brown
8. Flesh – Vallejo Flat Flesh

Black magic Wash over the whole figure apart from the flesh.
Citadel Orgyn Flesh Wash over the flesh

Highlight the whole model using all original colours (I drybrushed the helmet and the pants)

9. Helmet Cam colours – Vallejo English Uniform & Reflective Green

Here are some pictures of the completed Elhiem figures:

Photobucket
West German NCO's with Uzi SMGs

Photobucket

Photobucket
Bundeswehr troops with MG3

Photobucket
Bundeswehr troops with Pzf 44

Photobucket

Photobucket

Photobucket
Bundeswehr troops with G3's.

Here are some pictures of the completed Revell plastic figures:

Photobucket
Sniper Teams

Photobucket

Photobucket

Photobucket
Milan Teams

Again - as per usual - here are some Bundeswehr Youtube clips:


Well like I said – that’s all my current stock of West German figures painted. Next step is to complete the painting of a couple of Marders, Leopard 1A5s and Leopard 2A4s.

Then I want to try out a little battle between my West Germans and my Russians.

So have fun

Richard